MyJobMatch Training Documentation
Welcome to MyJobMatch!
MyJobMatch has been custom-built to help Employment Supports Organizations and Providers collaborate with their team members to track, match and secure jobs for individuals with intellectual and developmental disabilities.
This platform is part of a larger project that is applying innovation to a process using technology to help improve the Job Developer's work, so they can spend more time on high-value and high-touch tasks like job skills training, relationship-building with employers, and supporting individuals.
It’s important to note while the platform has been built to support the role and purpose of Employment Supports Organizations and Providers, our goal is not to augment the current process with a complimentary tool. Our goal is to build a system that will enhance and compliment a future process that is more collaborative and impactful.
Questions, Support and Issues
For any questions related to the platform or if you'd like support using the platform, please email (support@myjobmatch.ca).
If you notice bugs or errors please use the Help Button in the bottom left hand corner to submit the issue.
Remember, your edits, questions and suggestions will make this platform better for you and all of your colleagues! We always appreciate your input.
Installing MyJobMatch on Mobile and Tablet
MyJobMatch is a progressive web application (PWA). PWAs offer a unique installation process that differs from traditional app installations. Instead of downloading and installing the app from an app store, PWAs can be installed directly from a web browser. Follow the instructions below to install a PWA on your device.
iOS
Please note that PWAs can only be installed on iOS using the Safari web browser.
- Navigate to app.myjobmatch.ca in Safari.
- Press the
 icon on the bottom centre of the screen.
 - Scroll down and select "Add to Home Screen" from the popup.
- Tap "Add" in the top right corner to finish installing the PWA.
Android
Please note that although Progressive Web Applications (PWAs) can be installed using different browsers, we highly recommend using Google Chrome for the optimal user experience.
- Navigate to app.myjobmatch.ca in Chrome.
- Press the
 icon in the upper right to open the menu.
 - Select "Install App".
- Press the "Install" button in the popup.
Log in + Set Up
Homepage
Set this URL as a favourite in your web browser or save to your desktop for quick access to log in.
How to set-up your username and password
The first step to getting set up on the platform is to receive an invitation email from your MyJobMatch administrator.
Click the Accept Invitation button in the invitation email to continue to the MyJobMatch platform. Please note the invitation expires after 7 days.

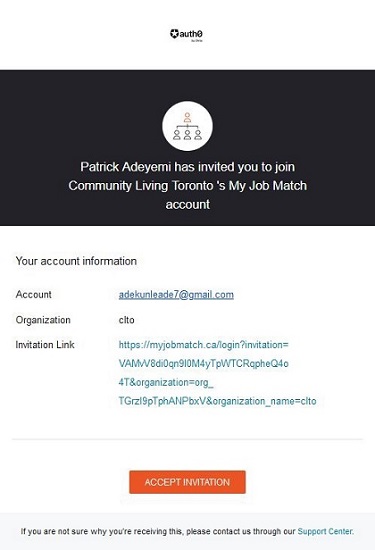
Take note of the organization name you will need later to log in
Clicking the 'Accept Invitation' button from the previous step will take you to the sign up window (image below).
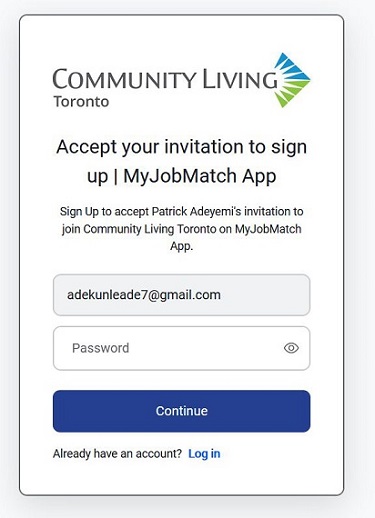

Create your password then click the 'Continue' button to start using the MyJobMatch platform.
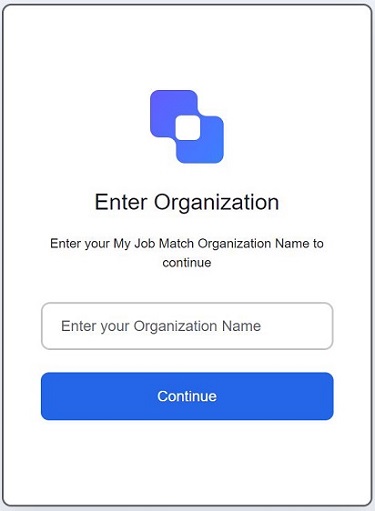
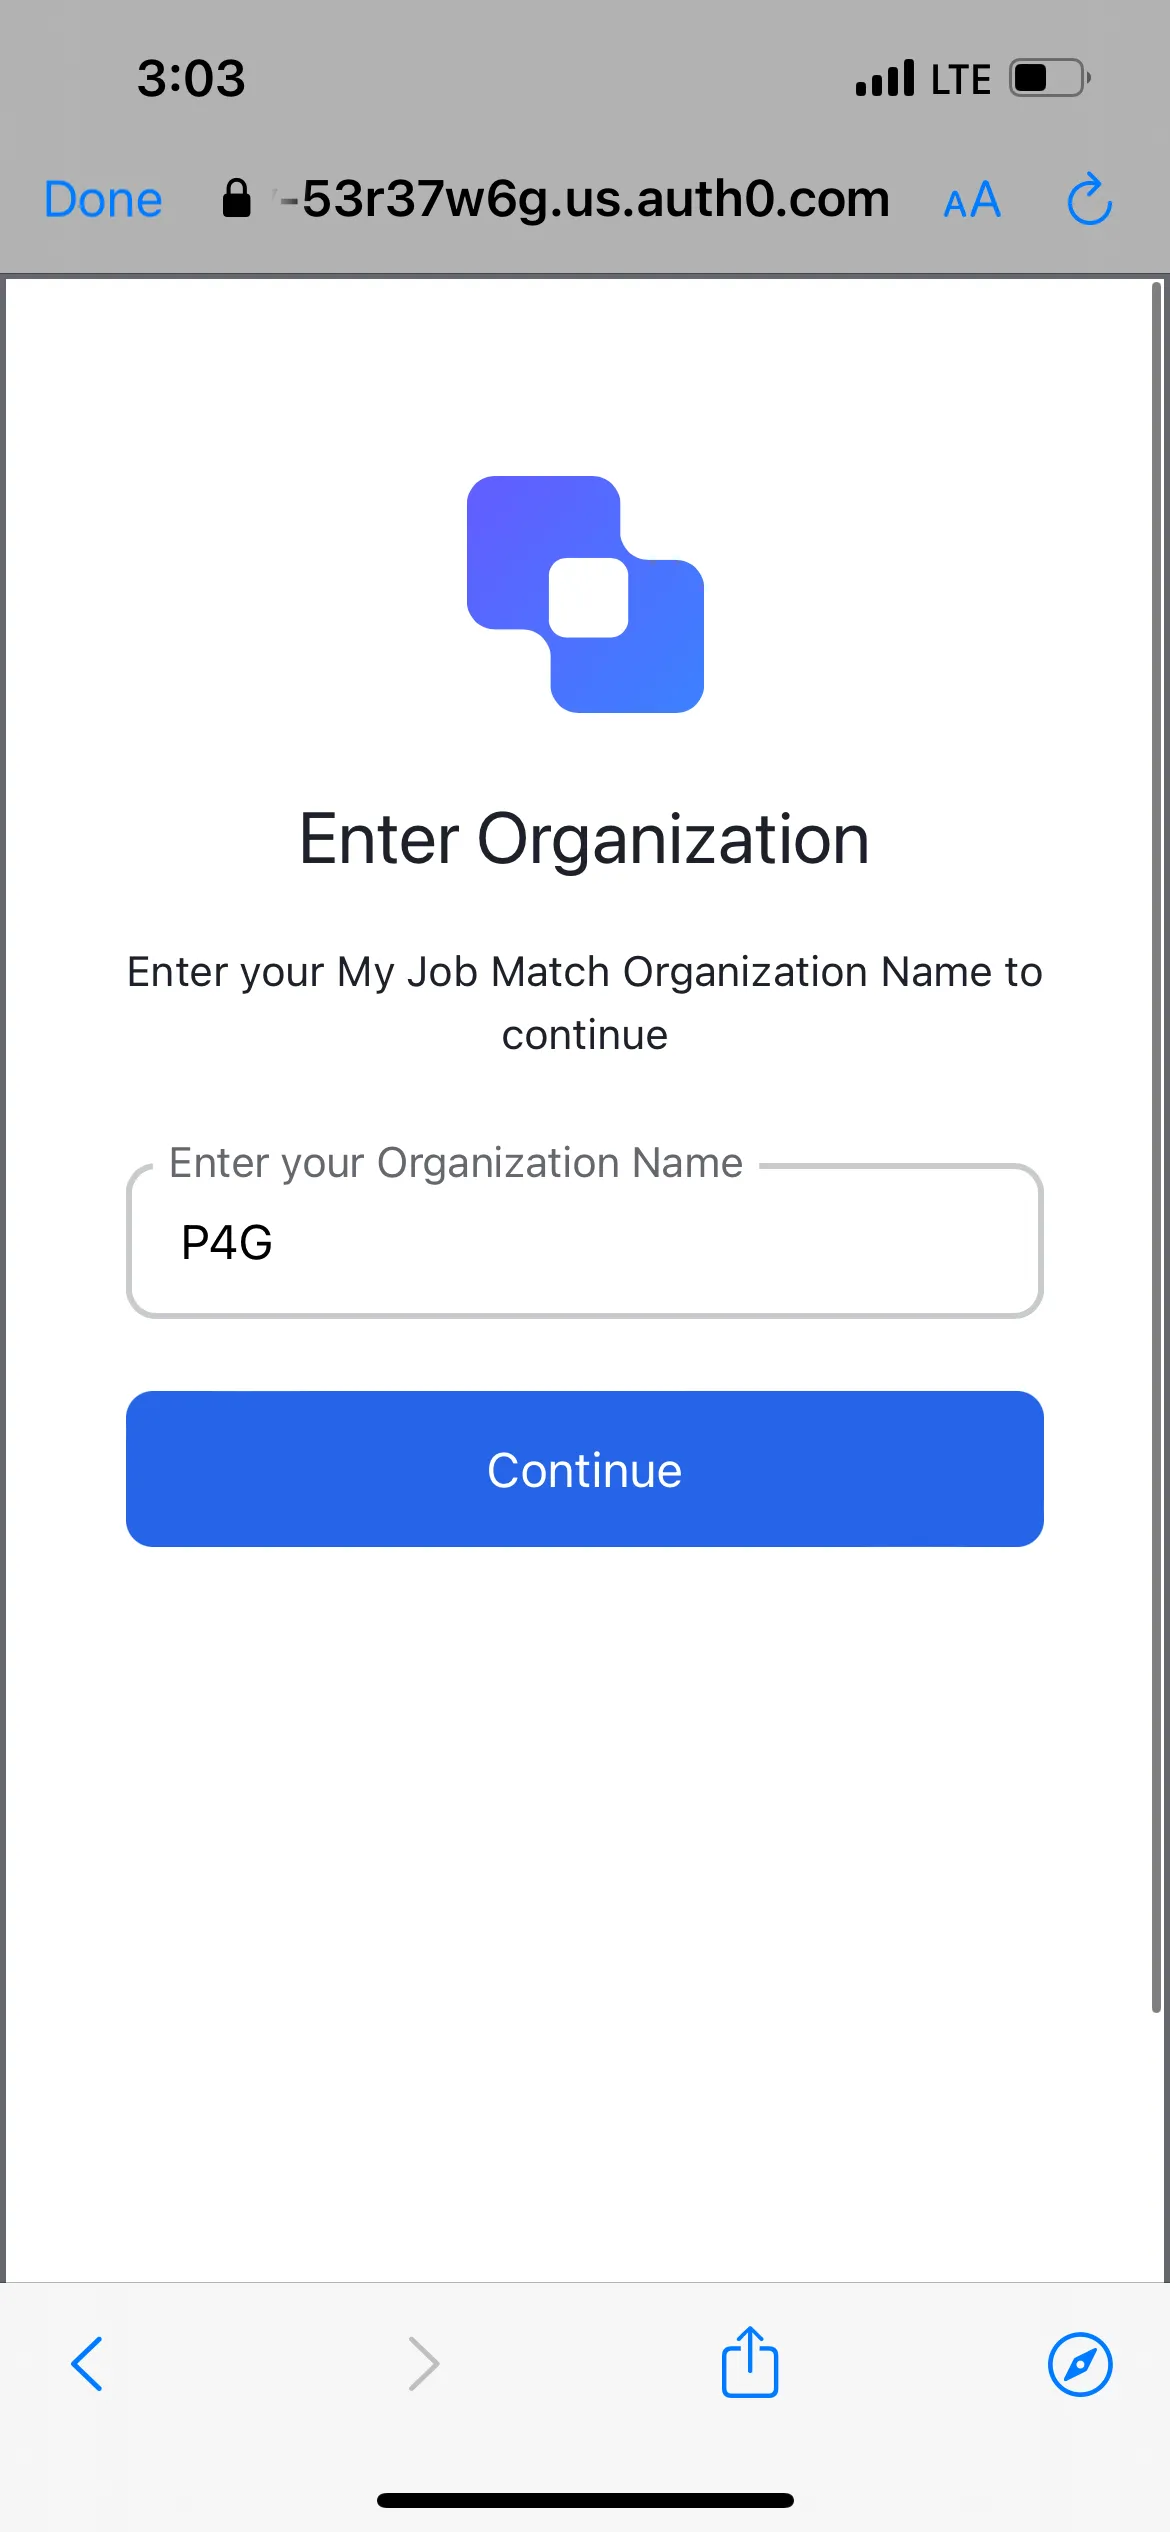
Step 1: Enter your Organization Name
Once you click "Log In" from the home page, type in the name of your organization and select continue.
The proper name for your organization should have been given to you by your organization.
If you do not have your organization name, please check your original invitation email. If you still can't locate it, contact your MyJobMatch administrator.
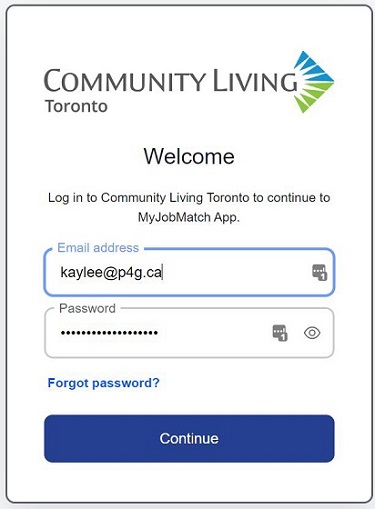
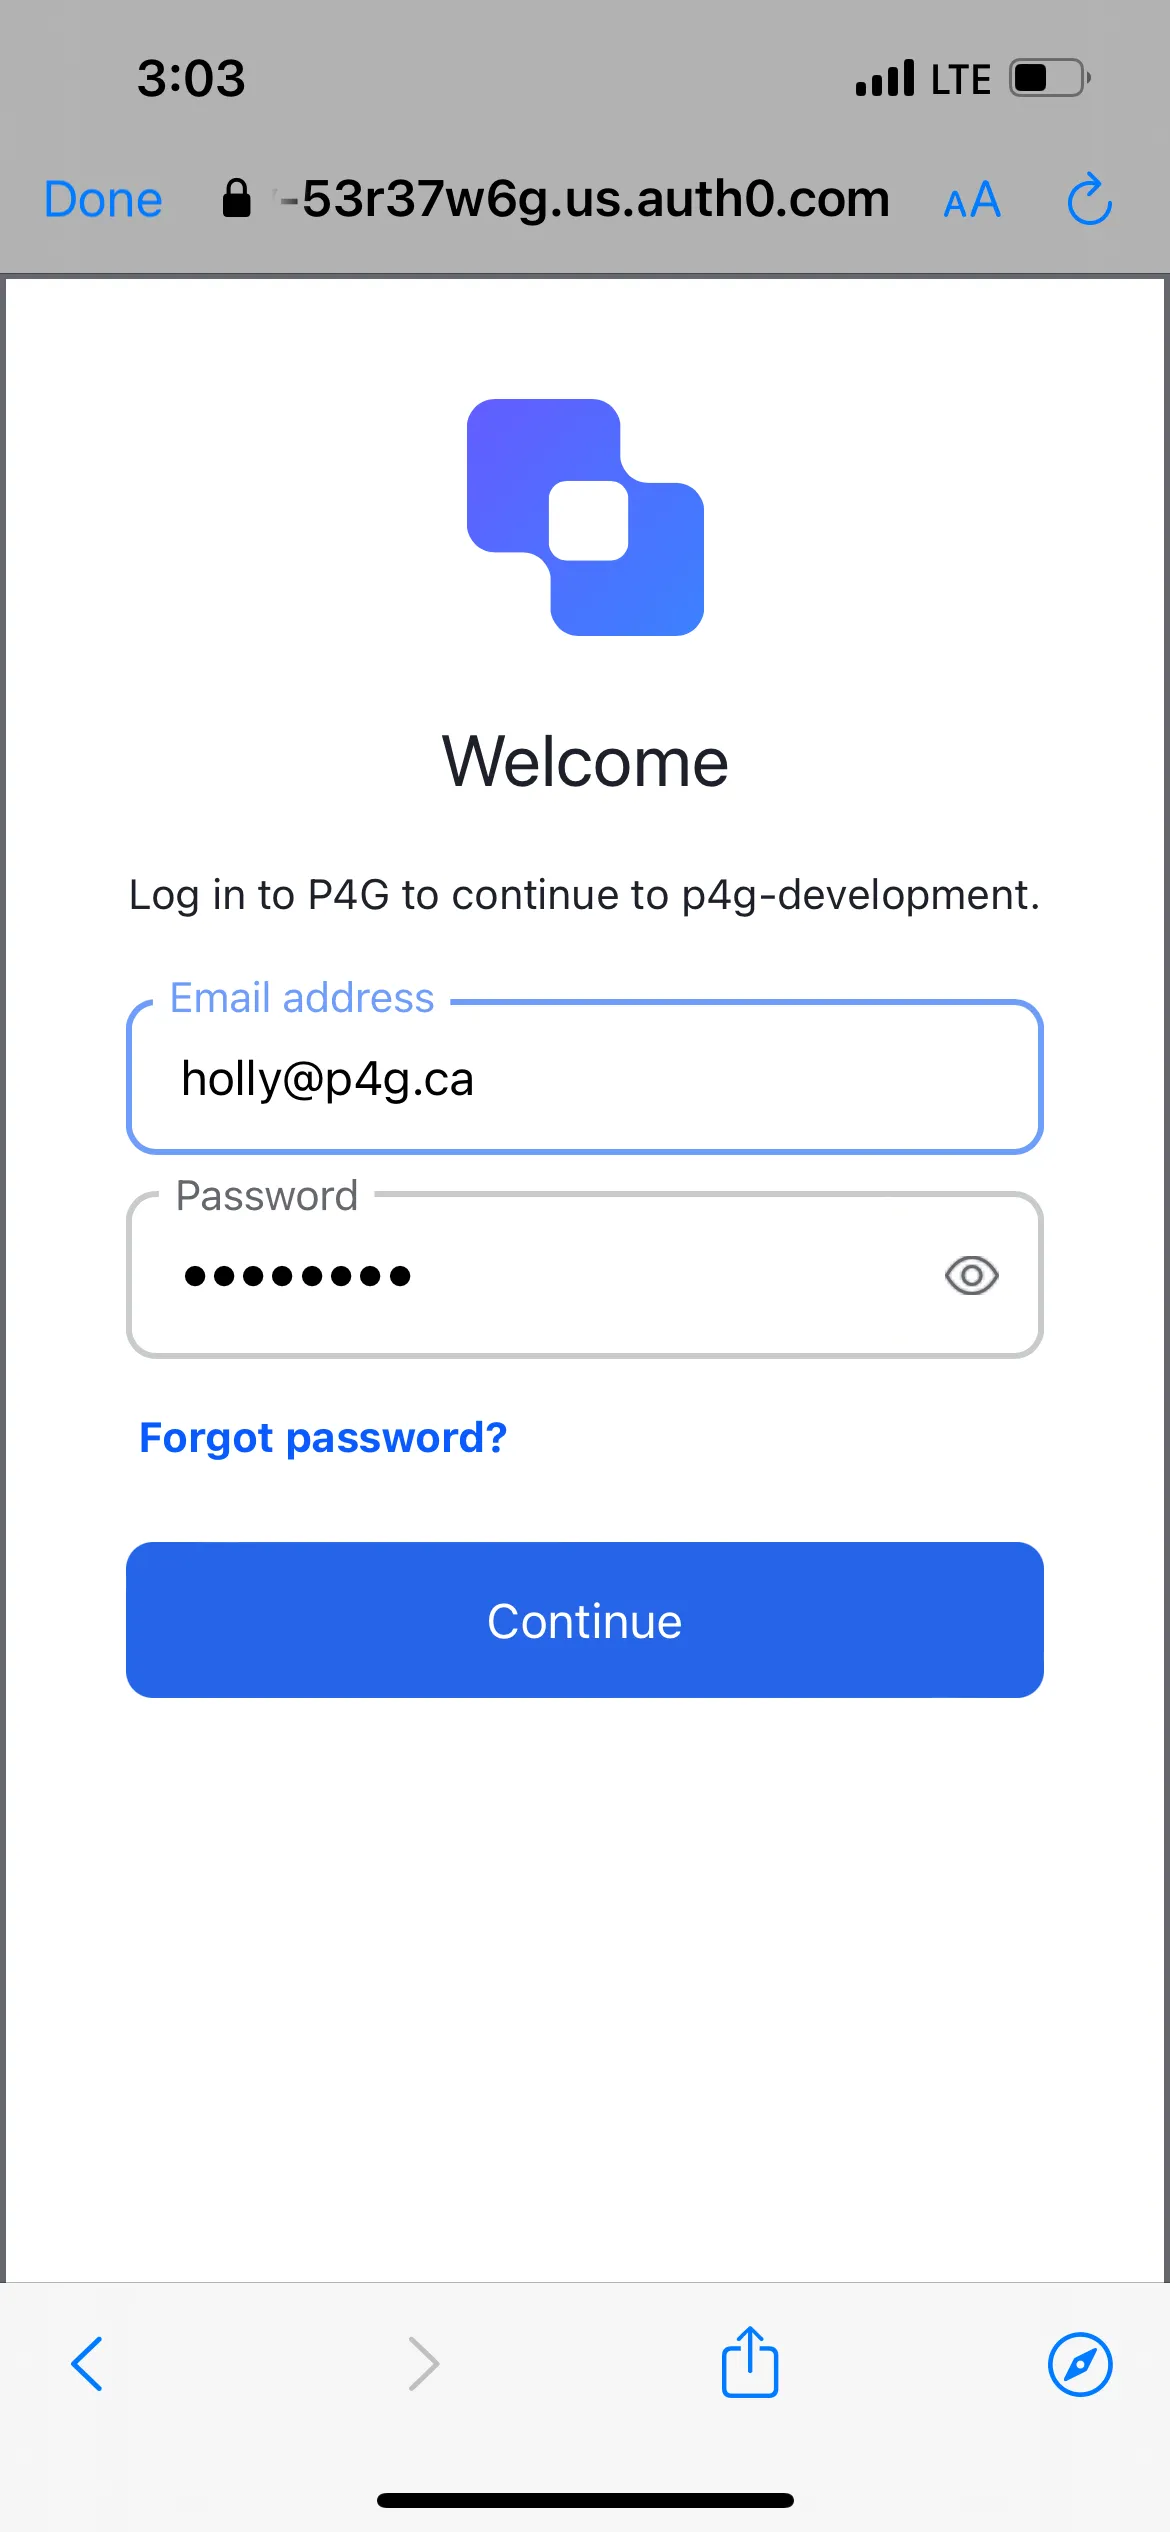
Step 2: Enter your Password and Email
Enter the email address and password from your onboarding email and select continue.
Your email should always be the email address your organization has provided to you.
If you forgot your password, click "forgot password?" and follow the instructions to reset your password.
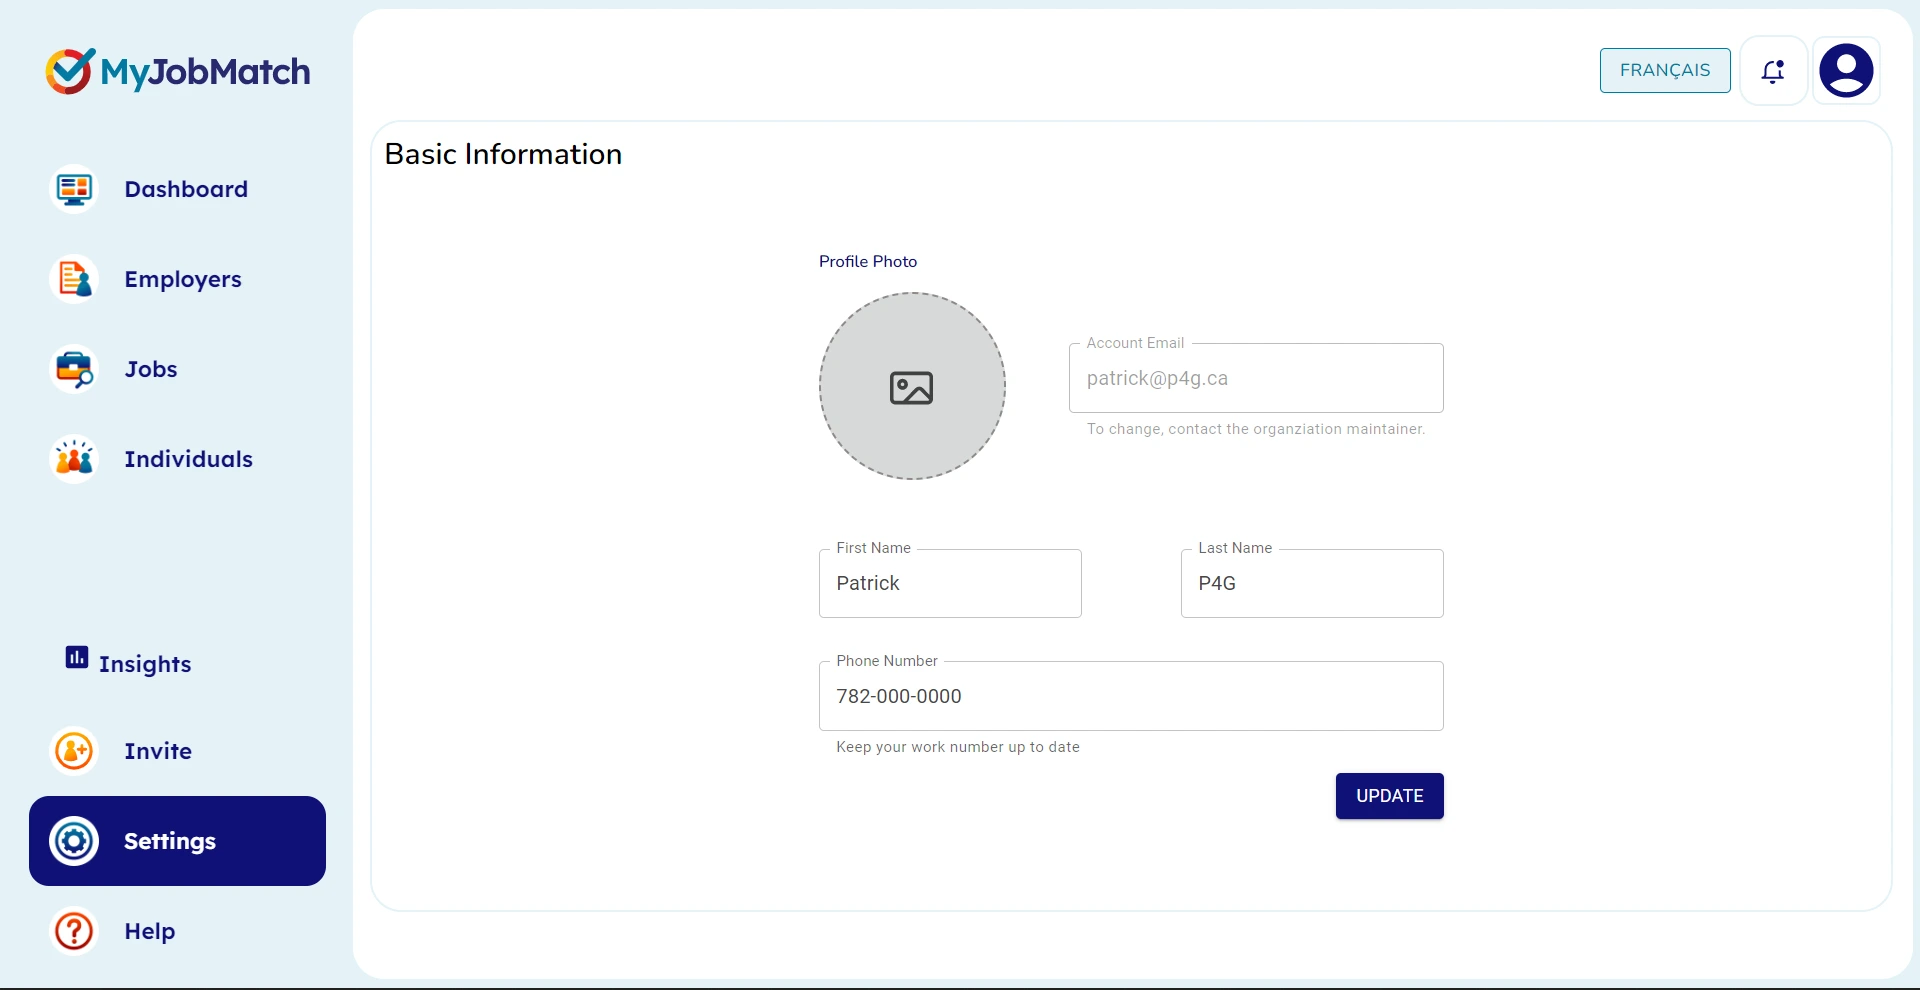
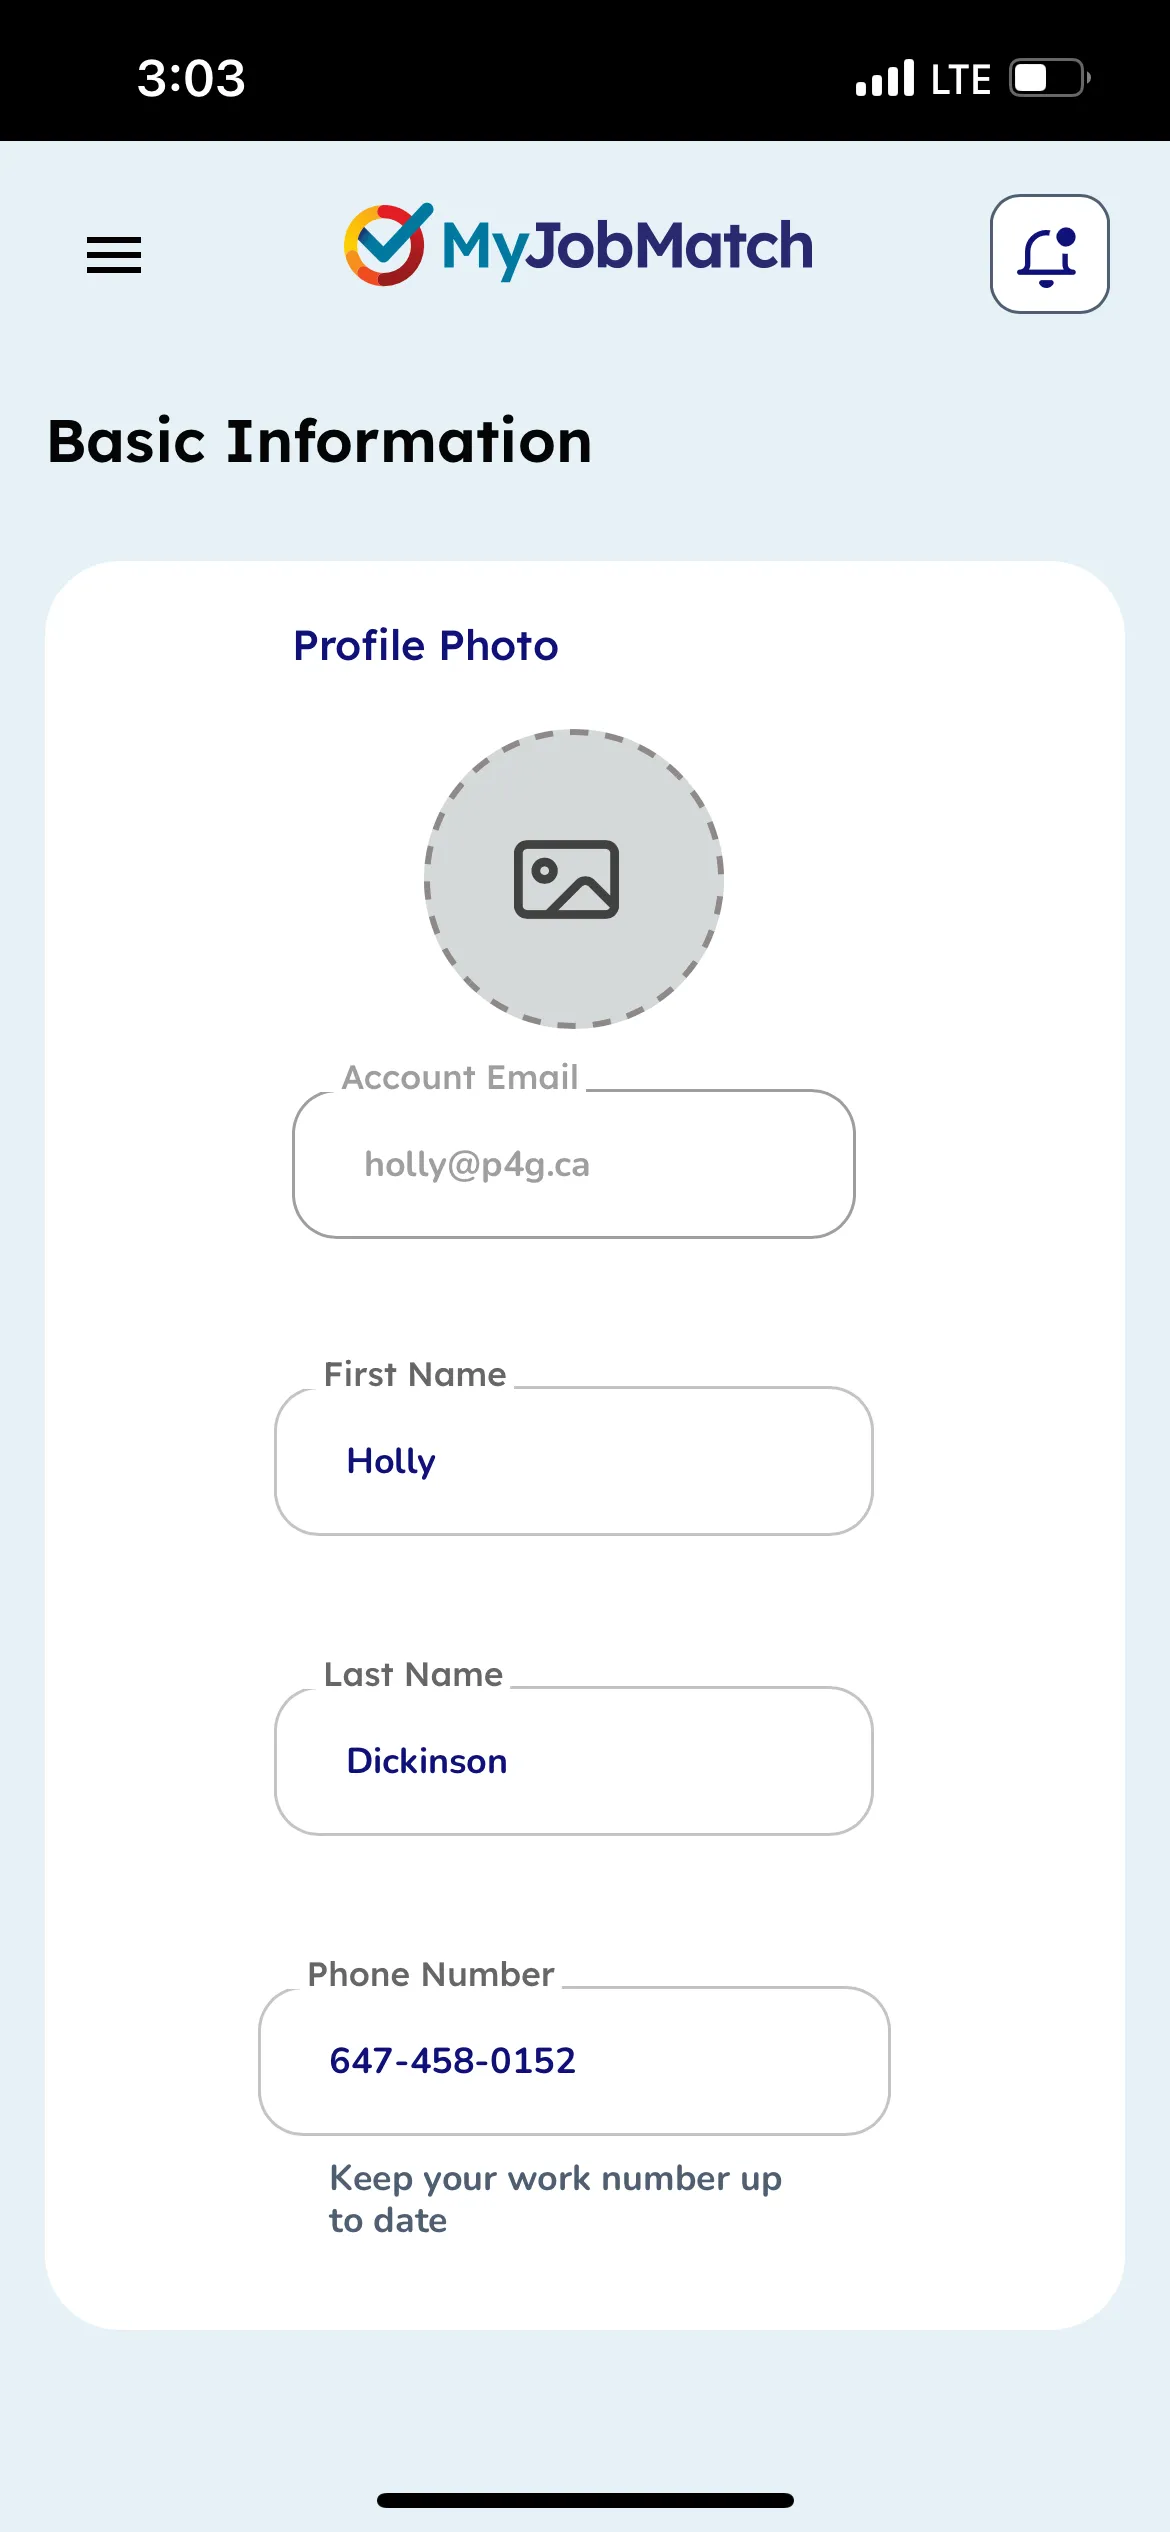
Step 3: Confirm your information + add profile image
Select Settings from the Navigation.
Add a picture by clicking the profile photo image.
Select image from your computer to upload.
Review and make any corrections.
Select Update.

Navigating Your Dashboard
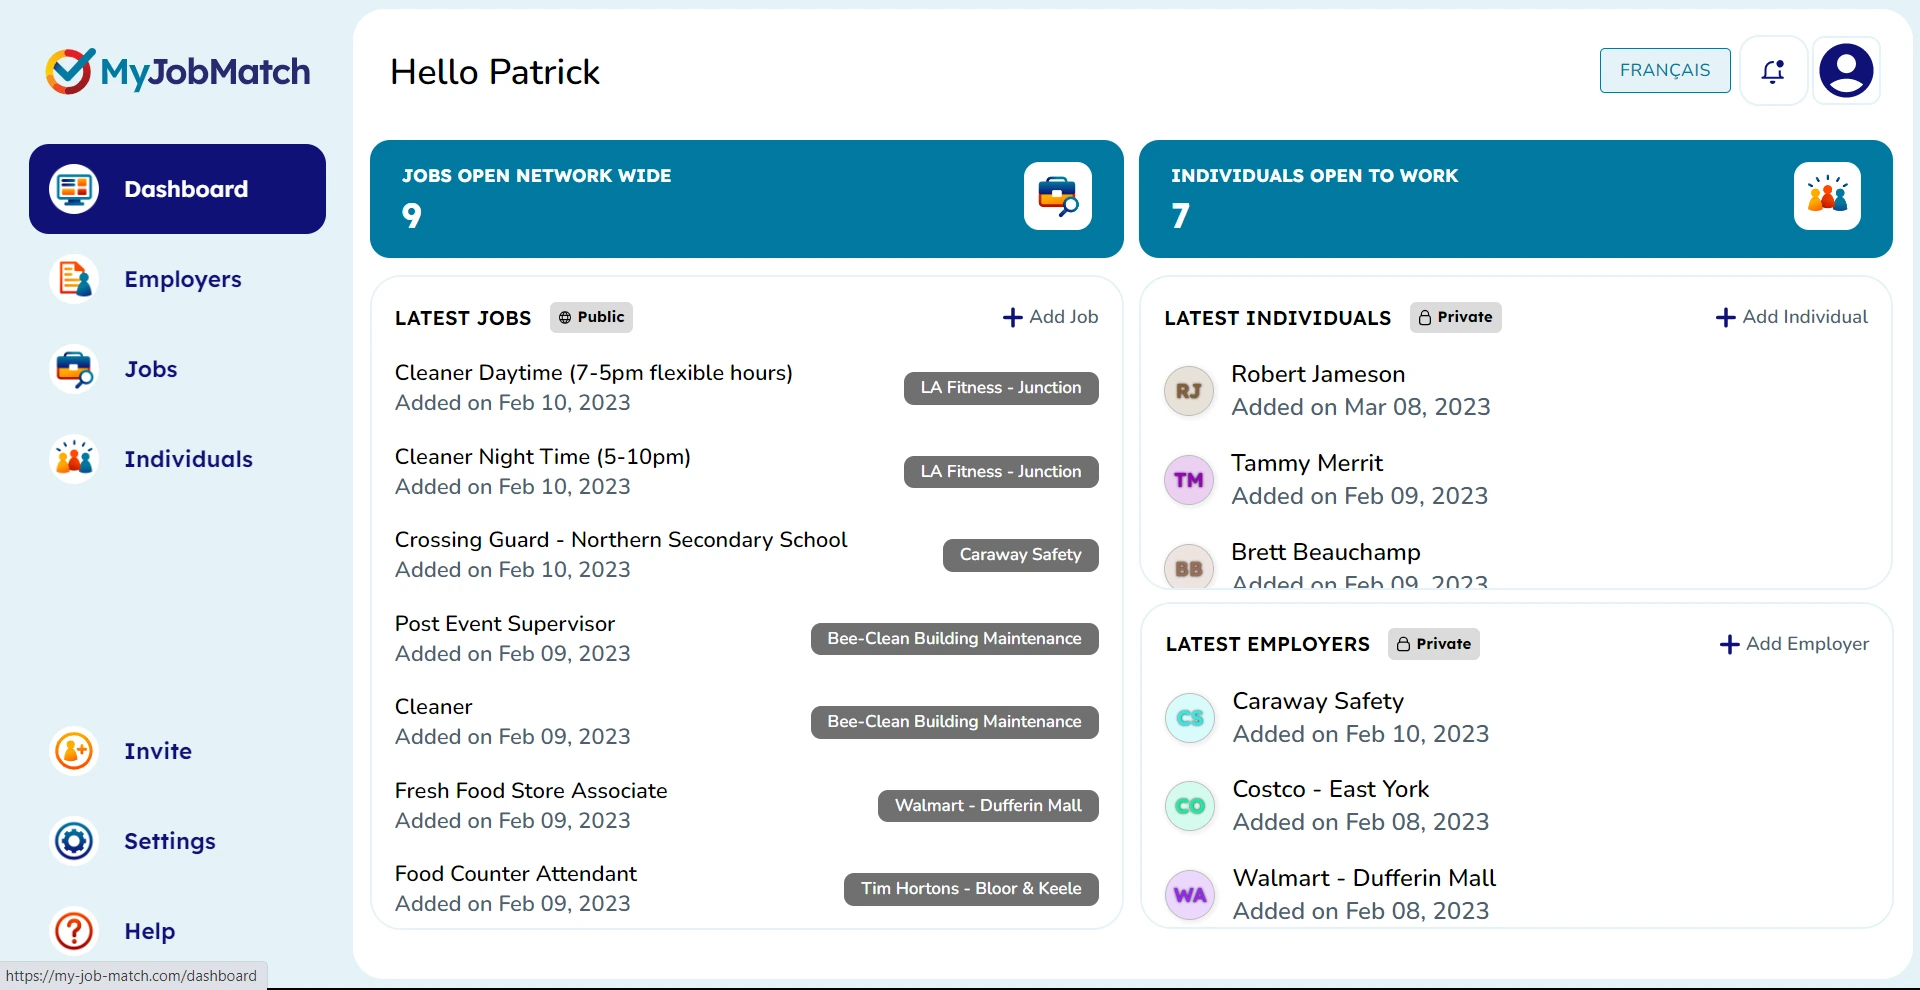
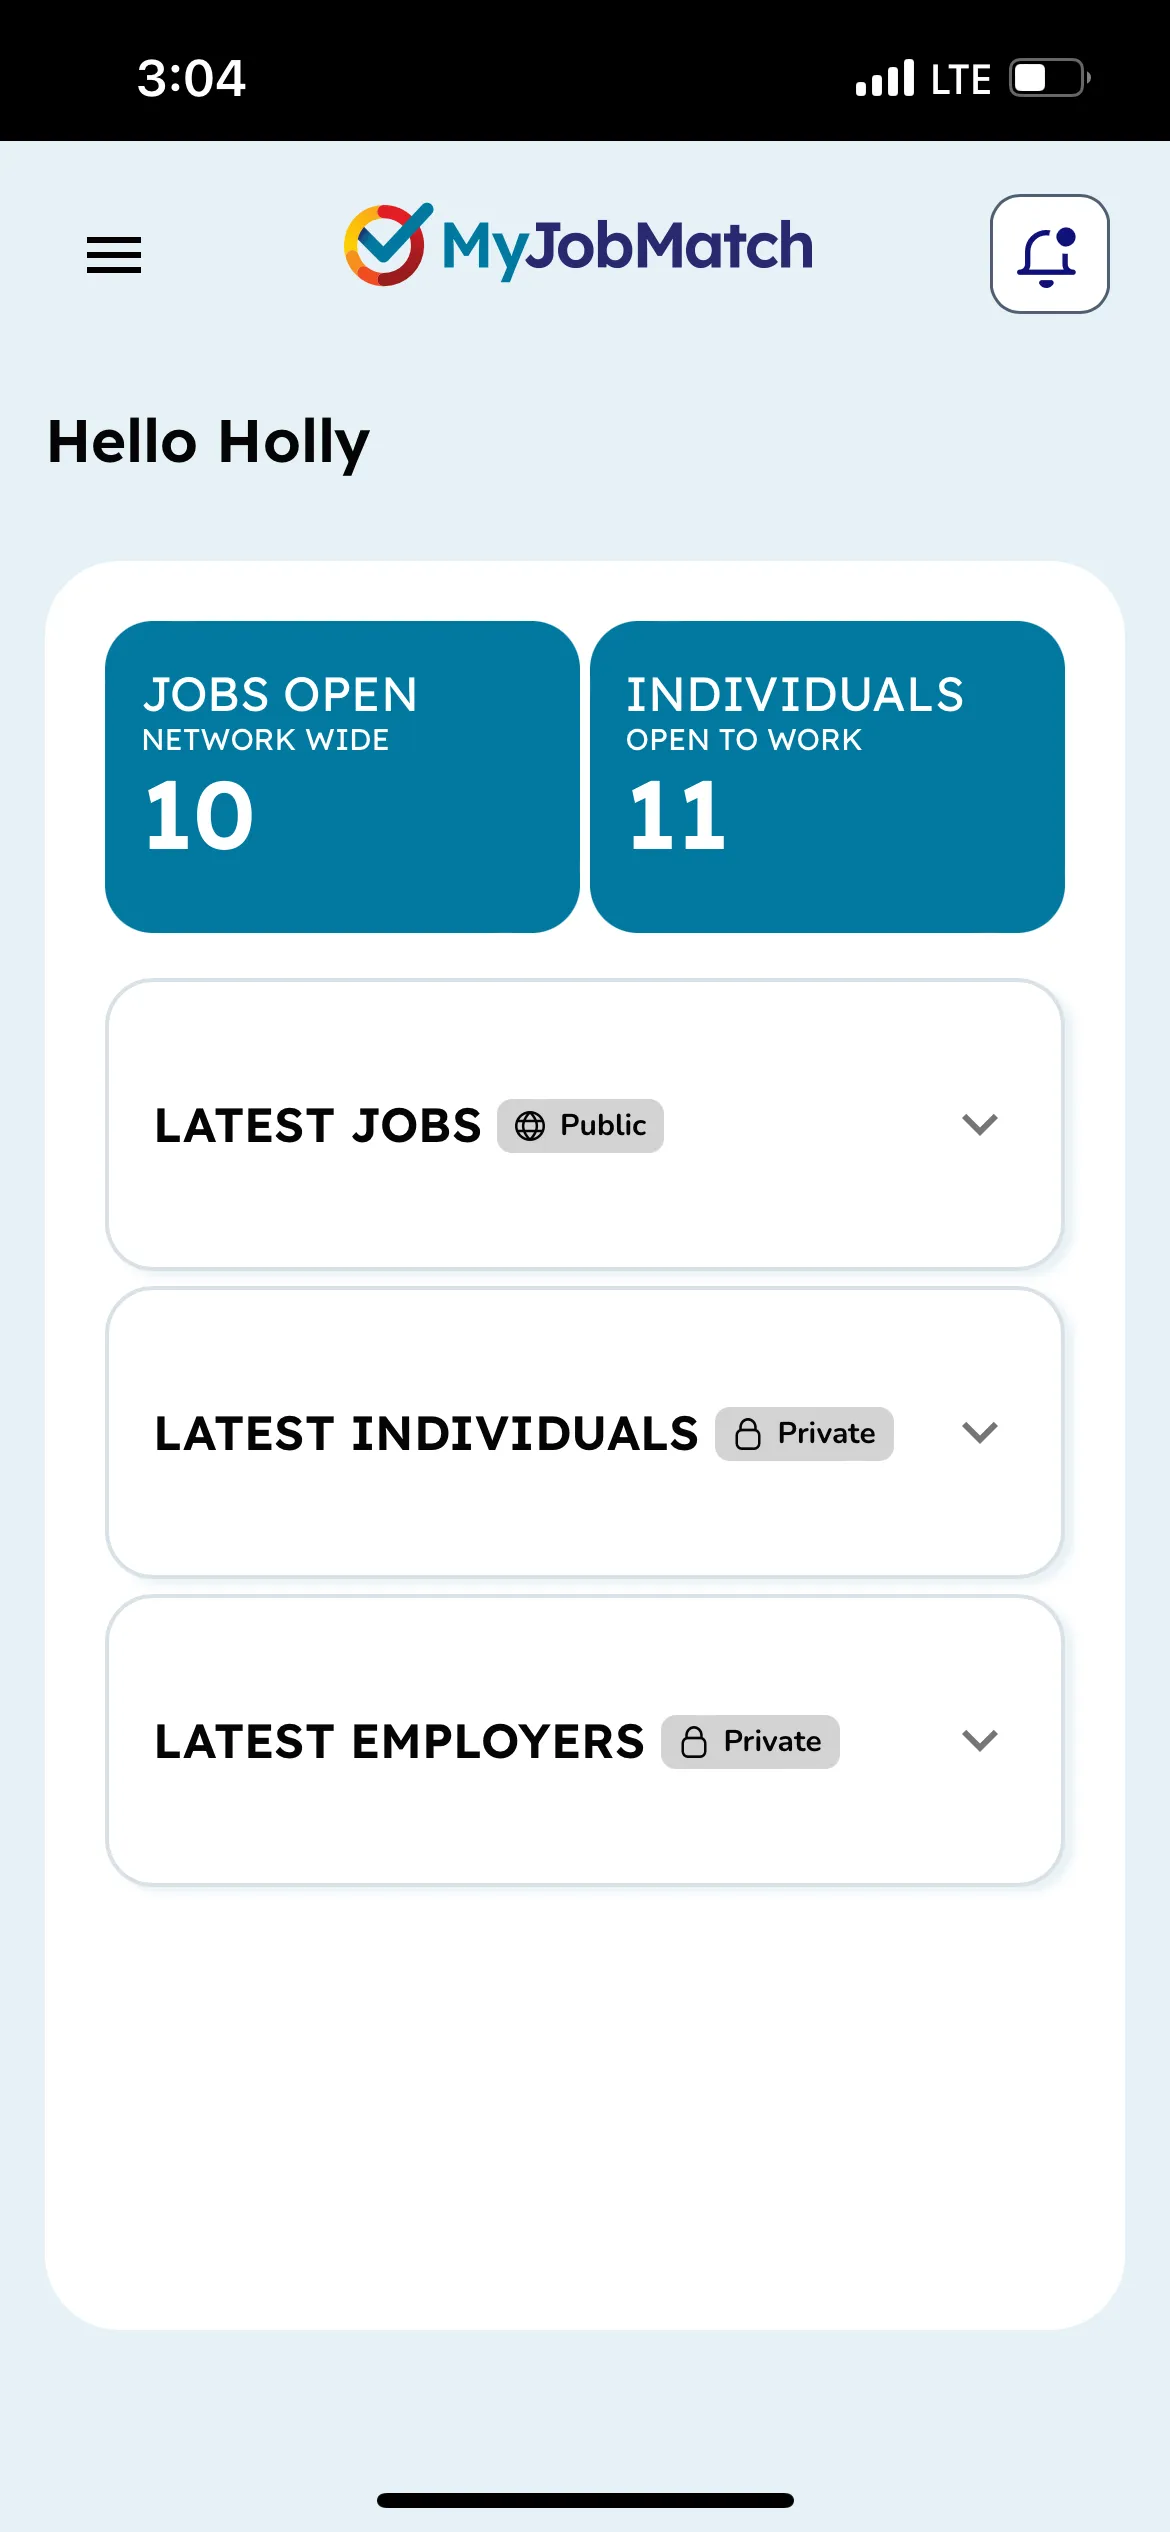
Dashboard Orientation
Jobs Open Network wide: All Jobs are public in the MyJobMatch platform for all agencies to review. This gives you the total number of jobs available on the network at any given time.
Individuals Open to Work: This gives you the total number of individuals who are open to work at YOUR agency. Individuals are kept private to your agency.
Latest Jobs, Individuals and Employers provide quick access to the latest profiles and information added to the platform. You can click on an existing or select one of the "+" buttons to add a new Job, Individual or Employer.
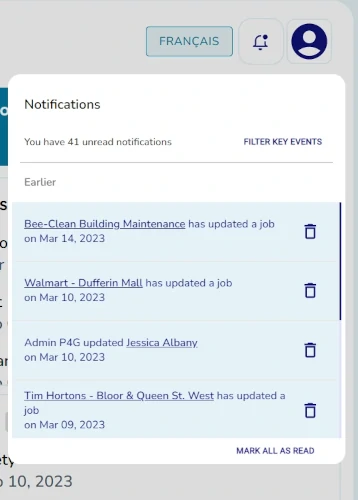
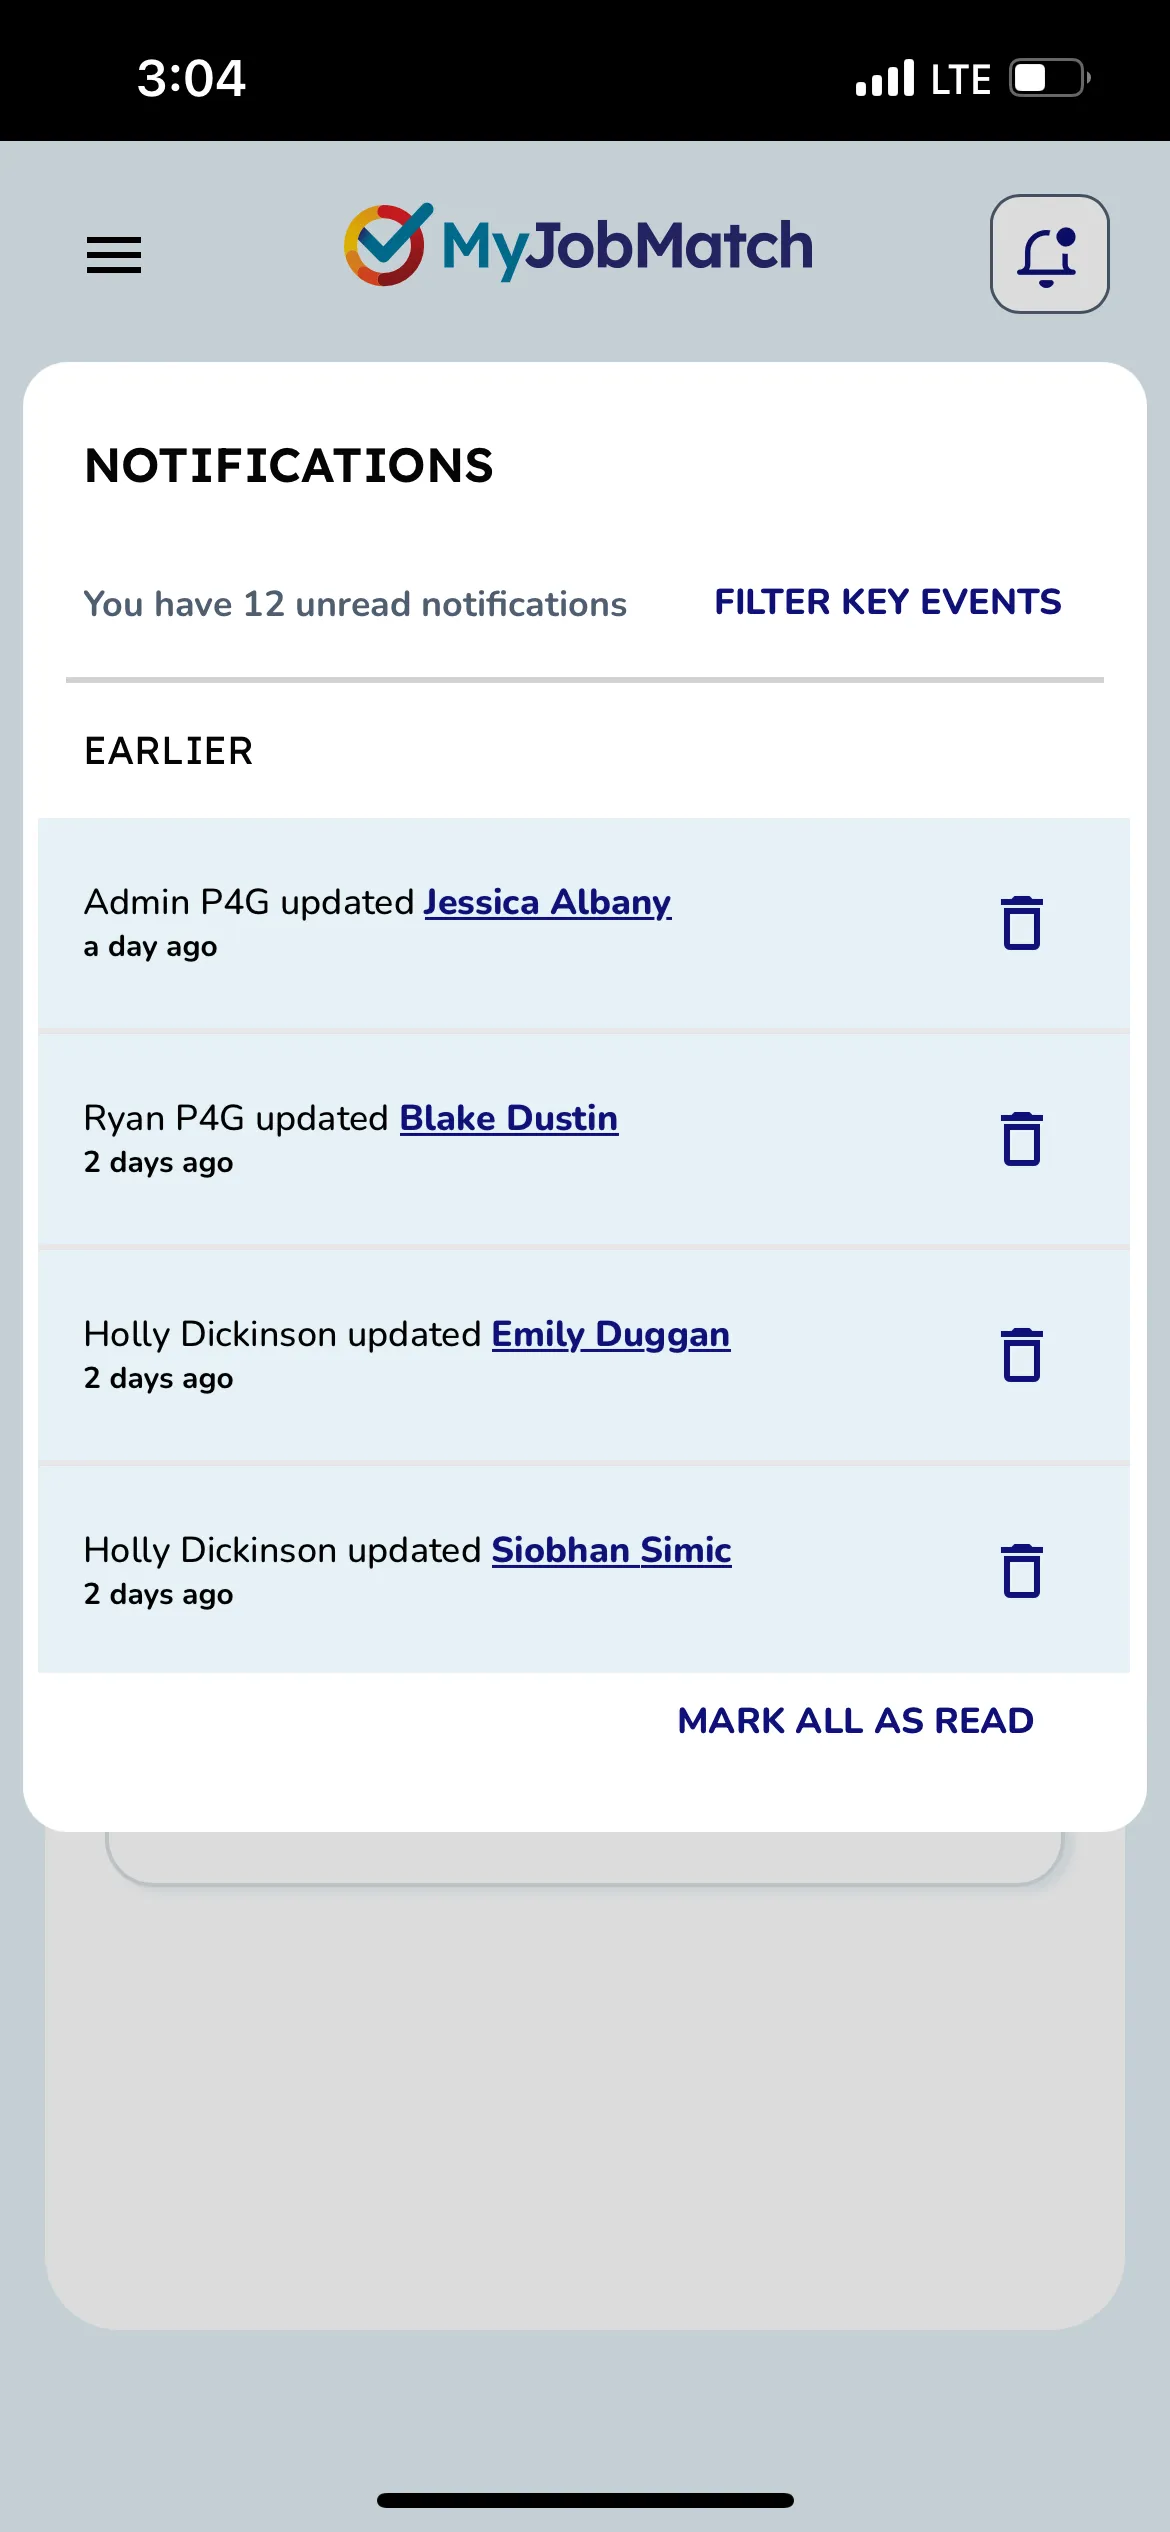
Notifications
In the top right corner of your screen, you will see a bell icon. When there is a blue dot on the bell icon this means there has been new activity added to the platform that may be of interest for you. Click the bell icon to see this activity.
Options for your notifications:
Mark all as read: This will mark all notifications as read.
Filter Key Events: This will remove all notifications except for the ones with important dates and deadlines (i.e. an upcoming job closing or individuals who has been inactive for more than 10 days on the platform but is open to work).
Settings - Quick Access
In the top right corner of your screen, you will see a person icon.
When you select this icon it will take you to the Settings page where you can update basic information that is included in your profile.
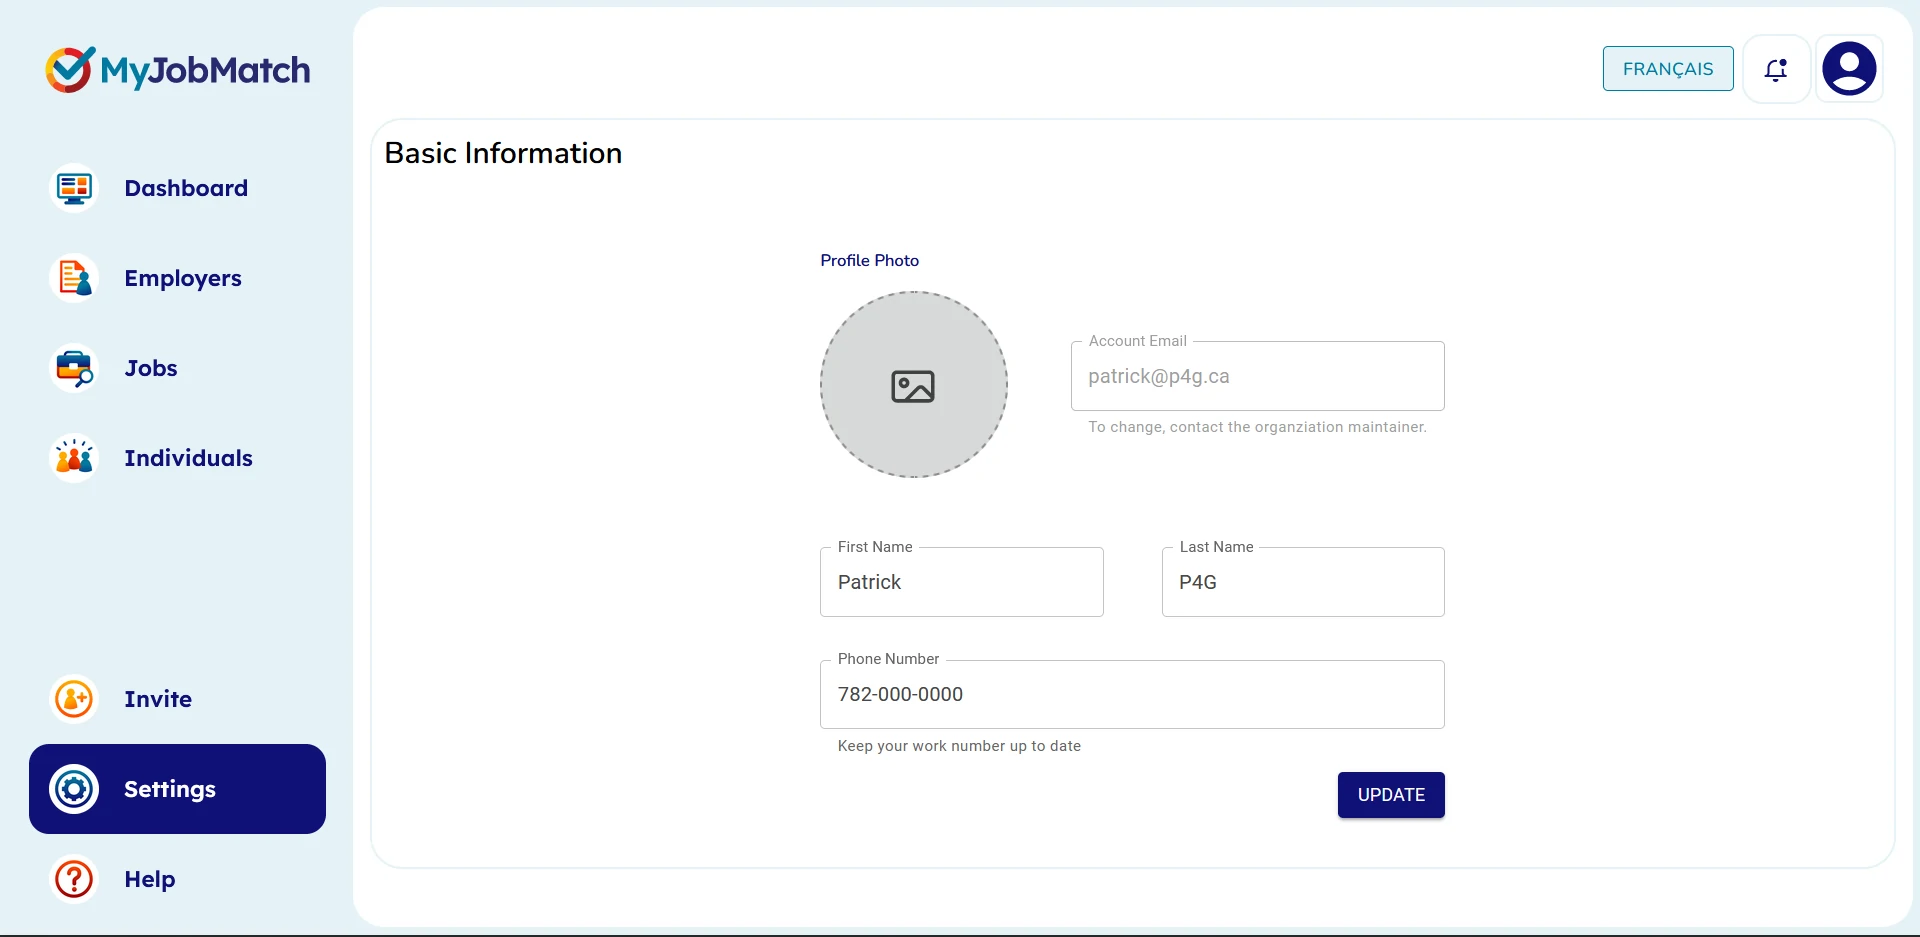
*Once you update your profile information, select Update.
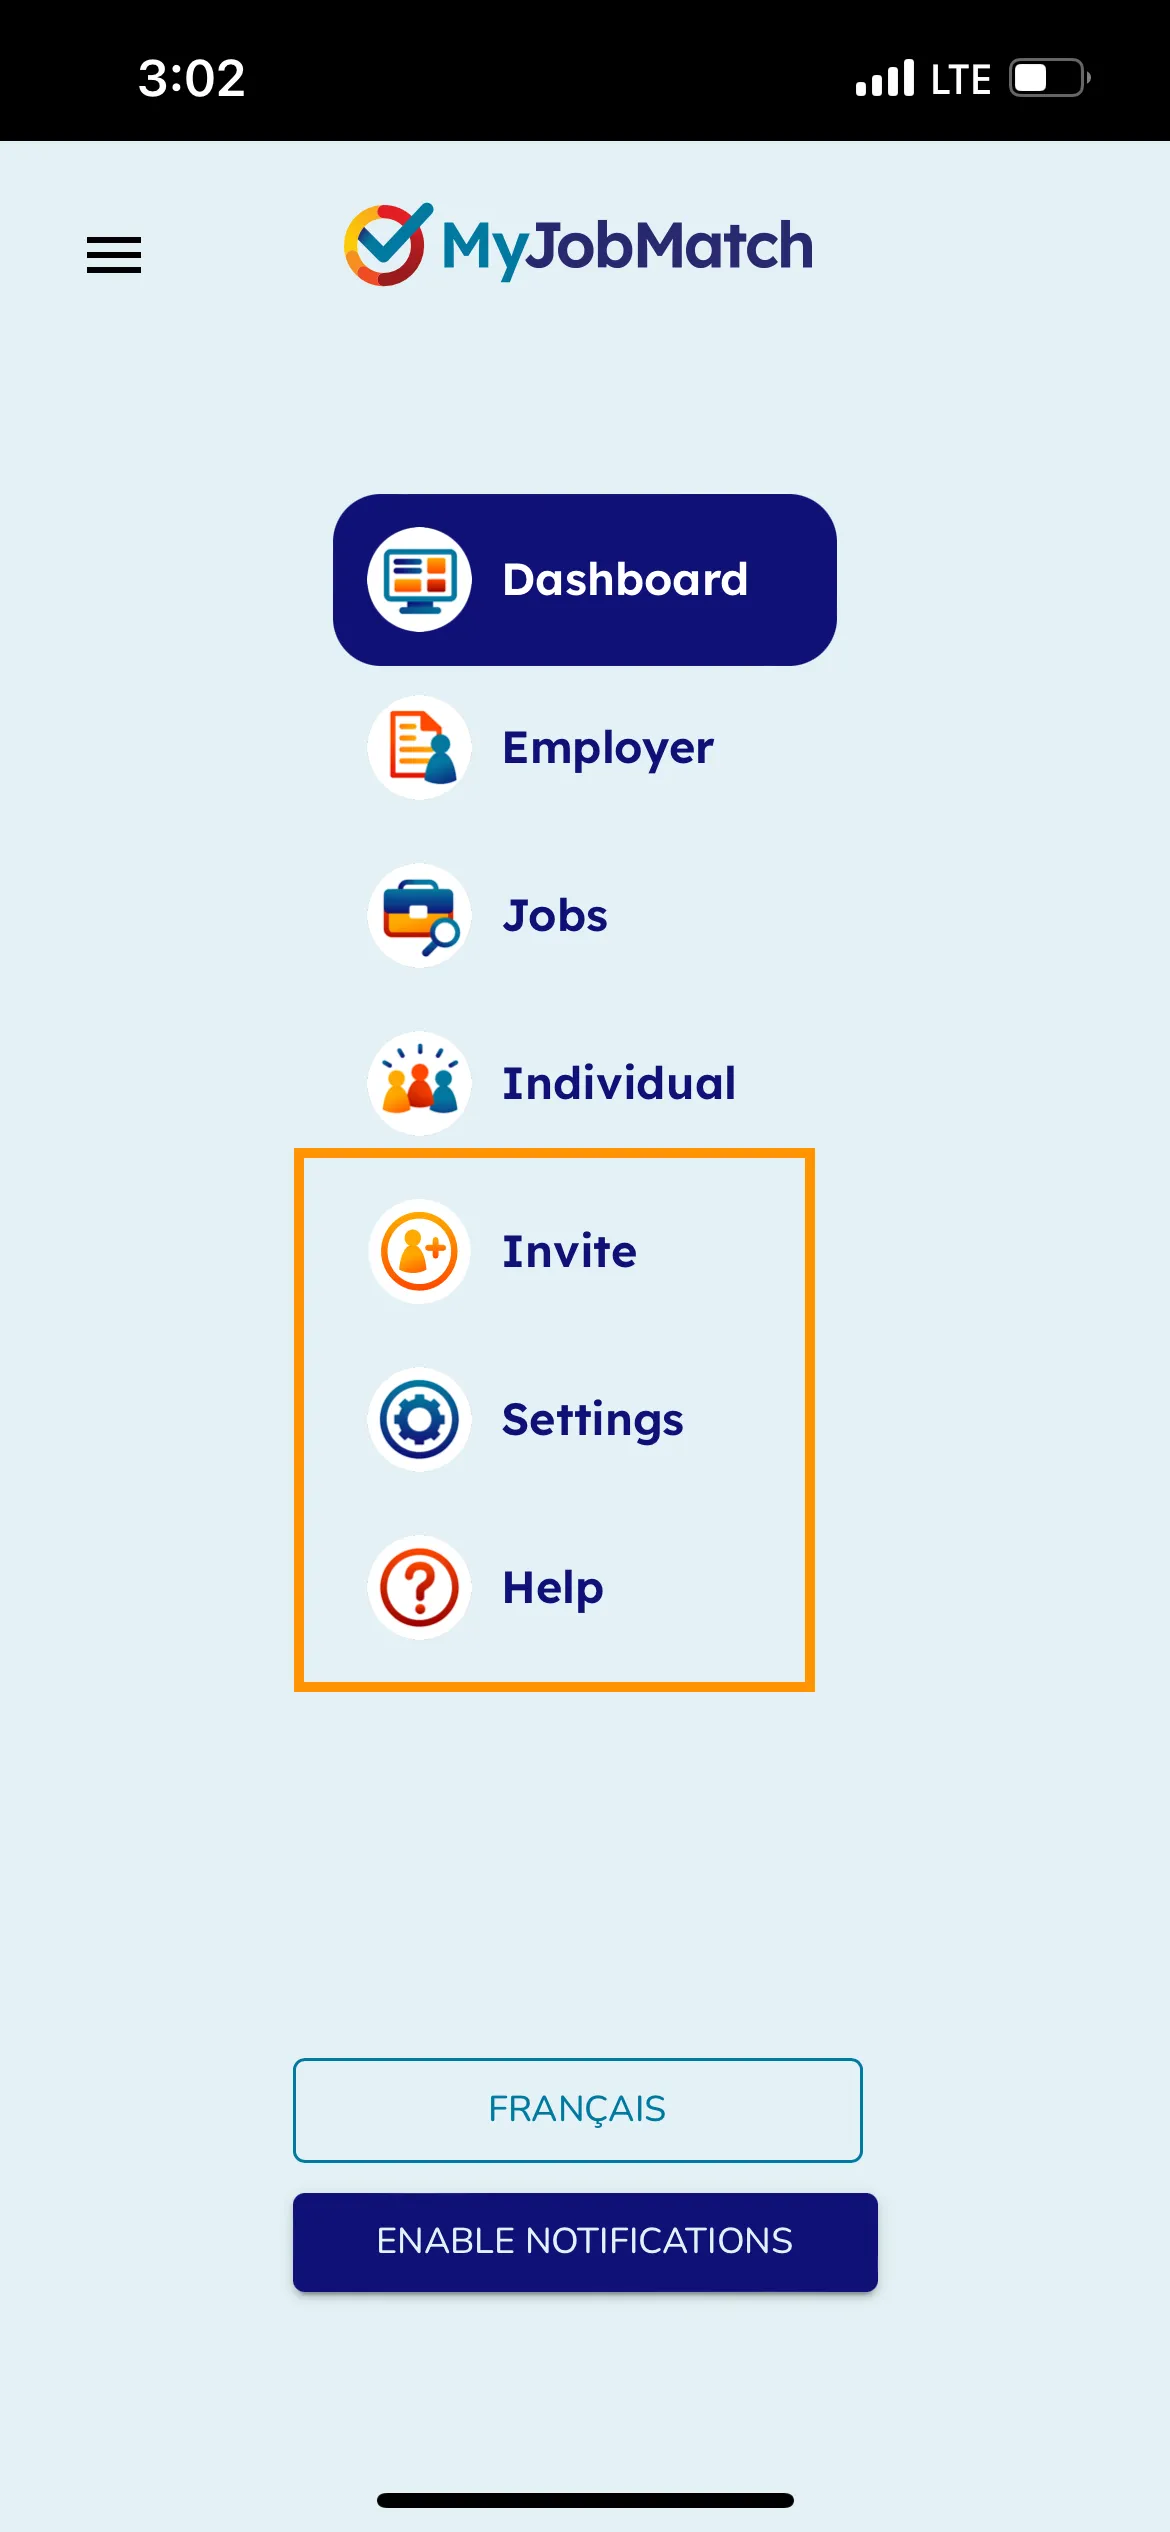
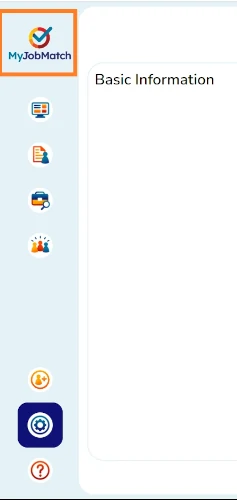
Navigation Options
Use the left side of the dashboard to navigate to Employers, Jobs or Individuals
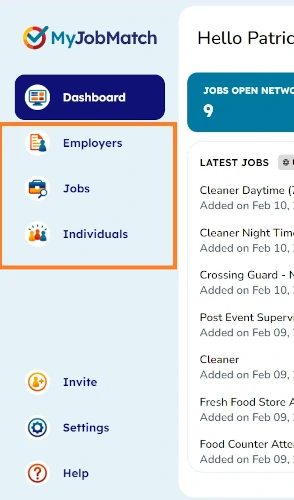
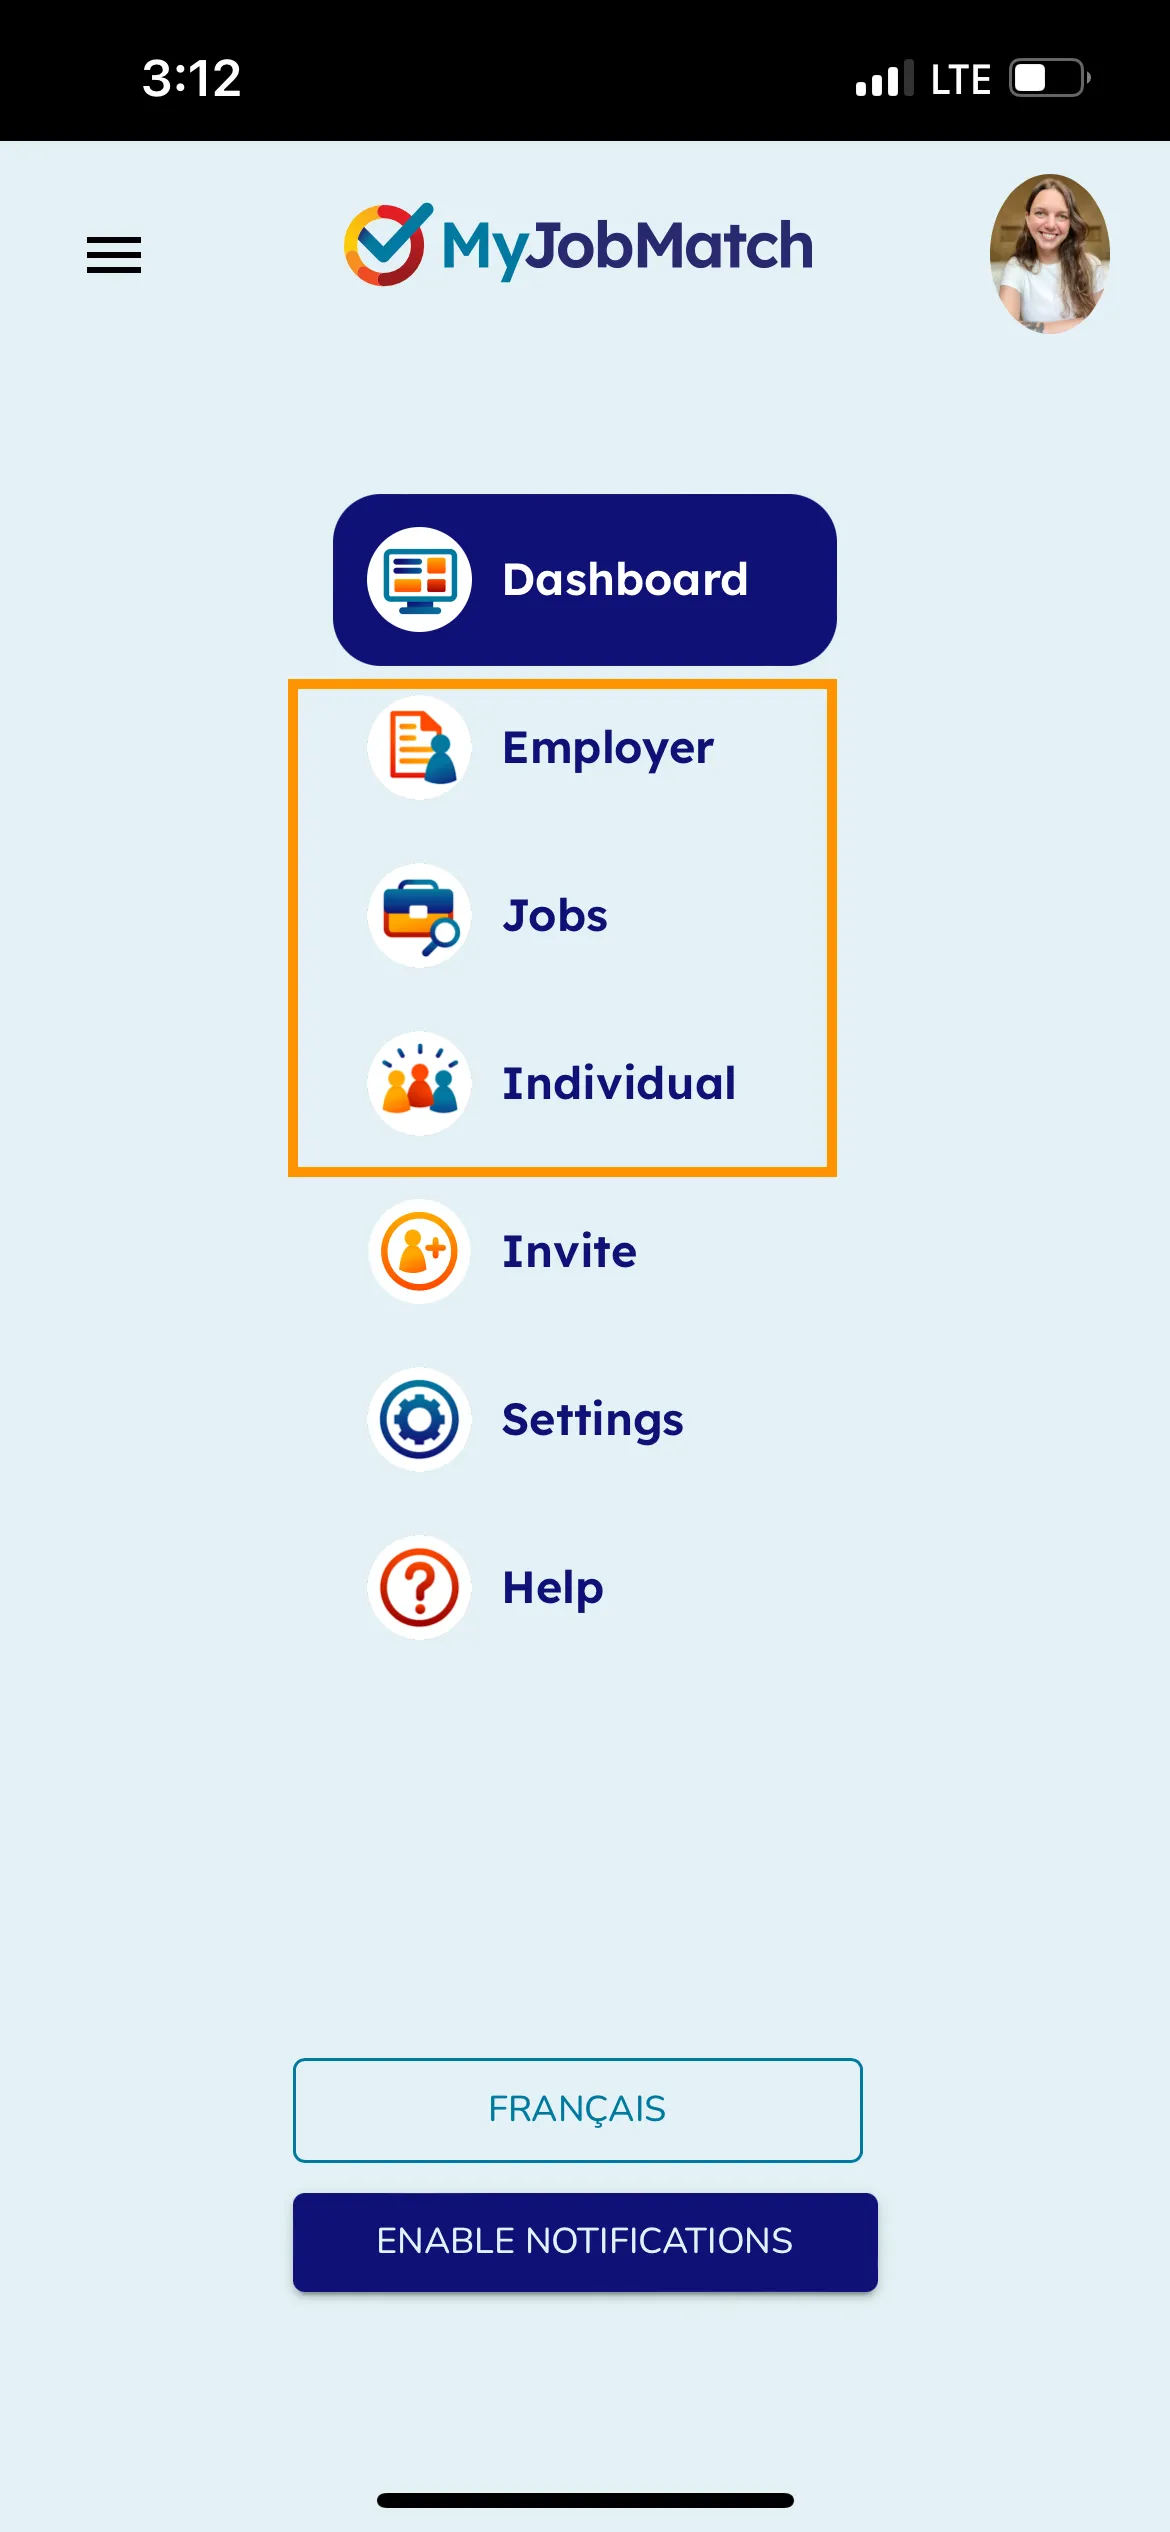
To reduce the size of the navigation on the left side, click the MyJobMatch logo and use the icons to navigate to your desired page. To increase the size of the navigation, click on the MyJobMatch logo again.
Employers
Employers Overview
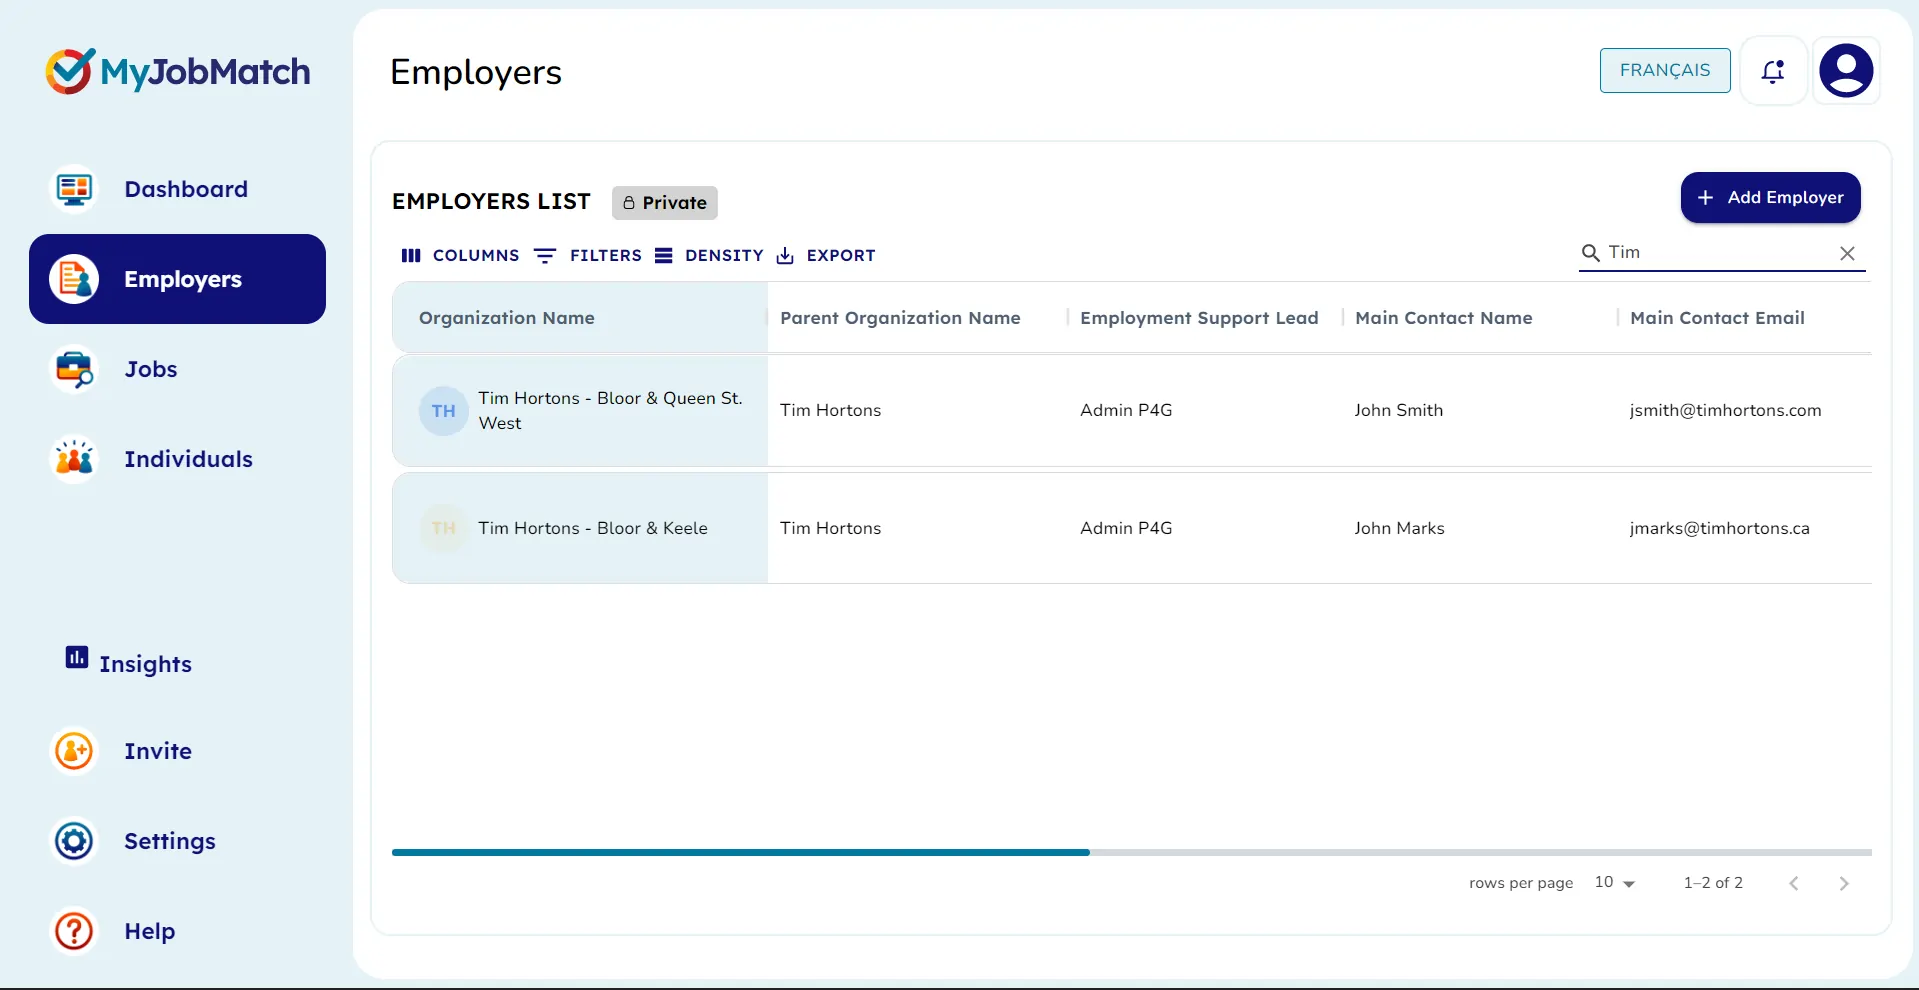
From the Employers page you can review all employers associated with your agency account.
To quickly see more information included on a specific employer scroll left to right.
To see more employers adjust your rows per page.
To add a new employer, select "+Add Employer"
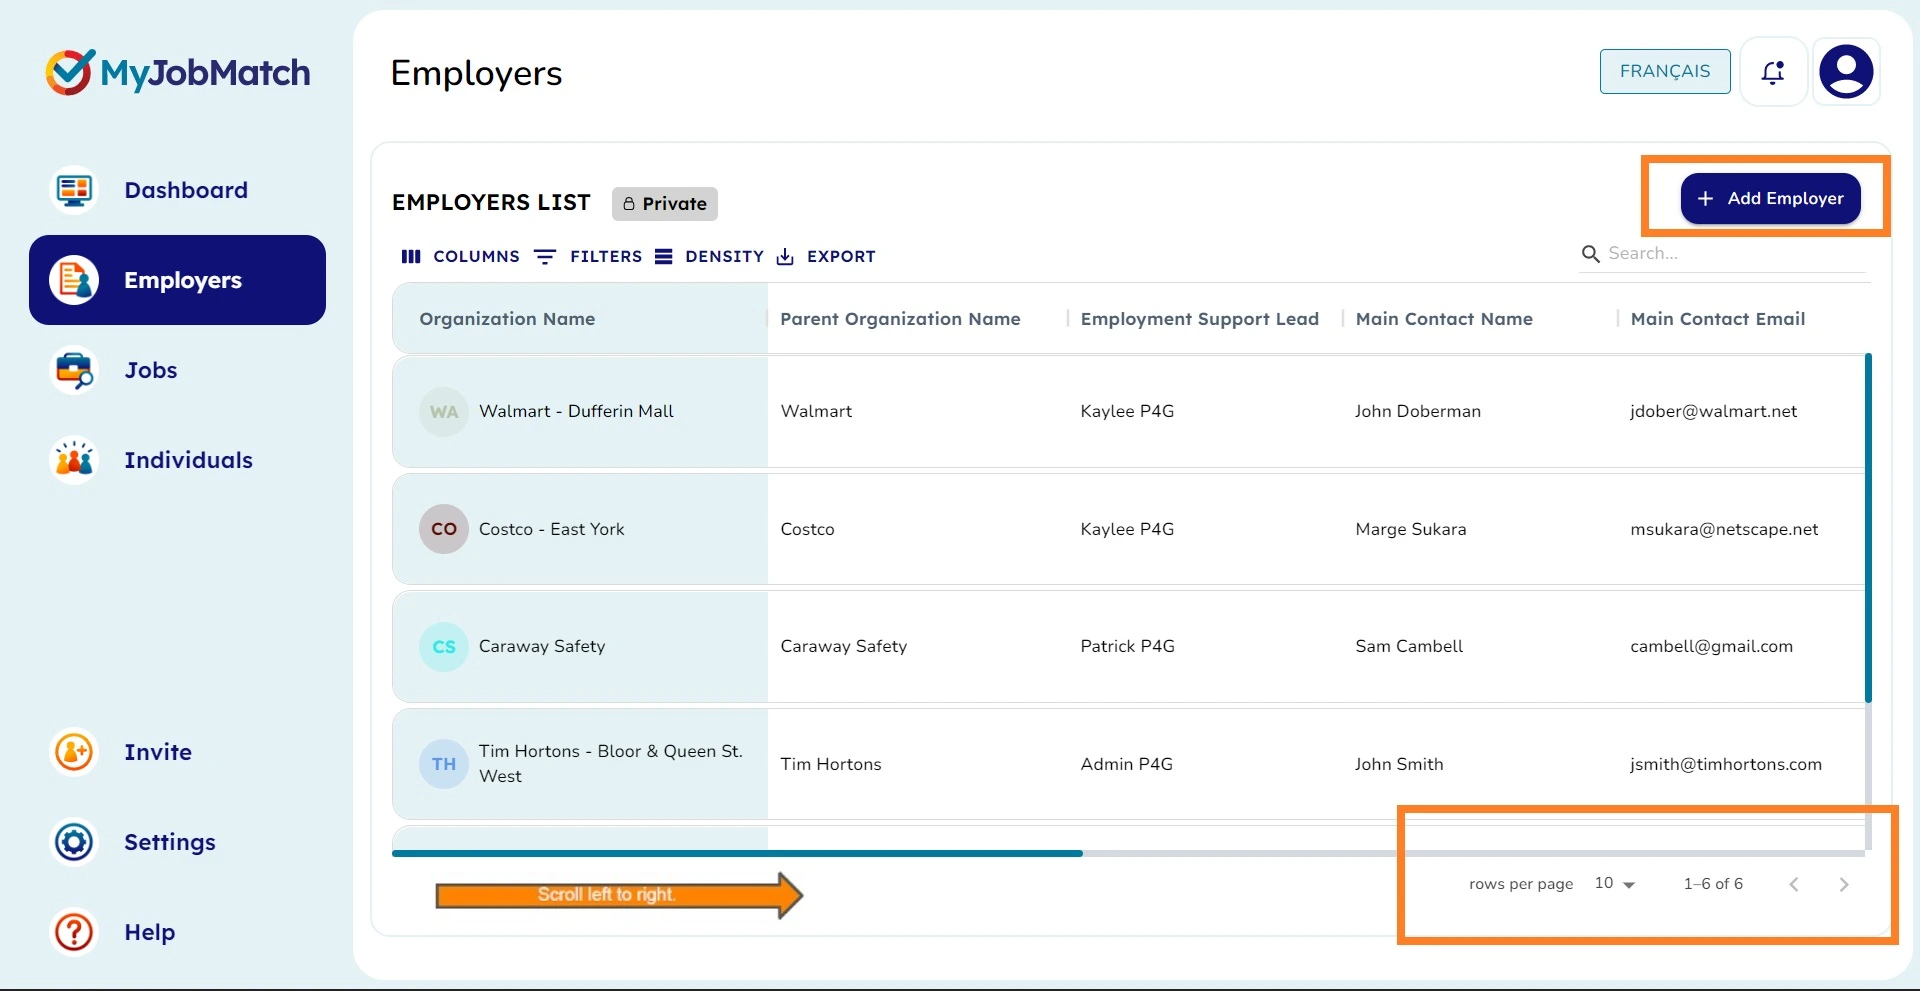
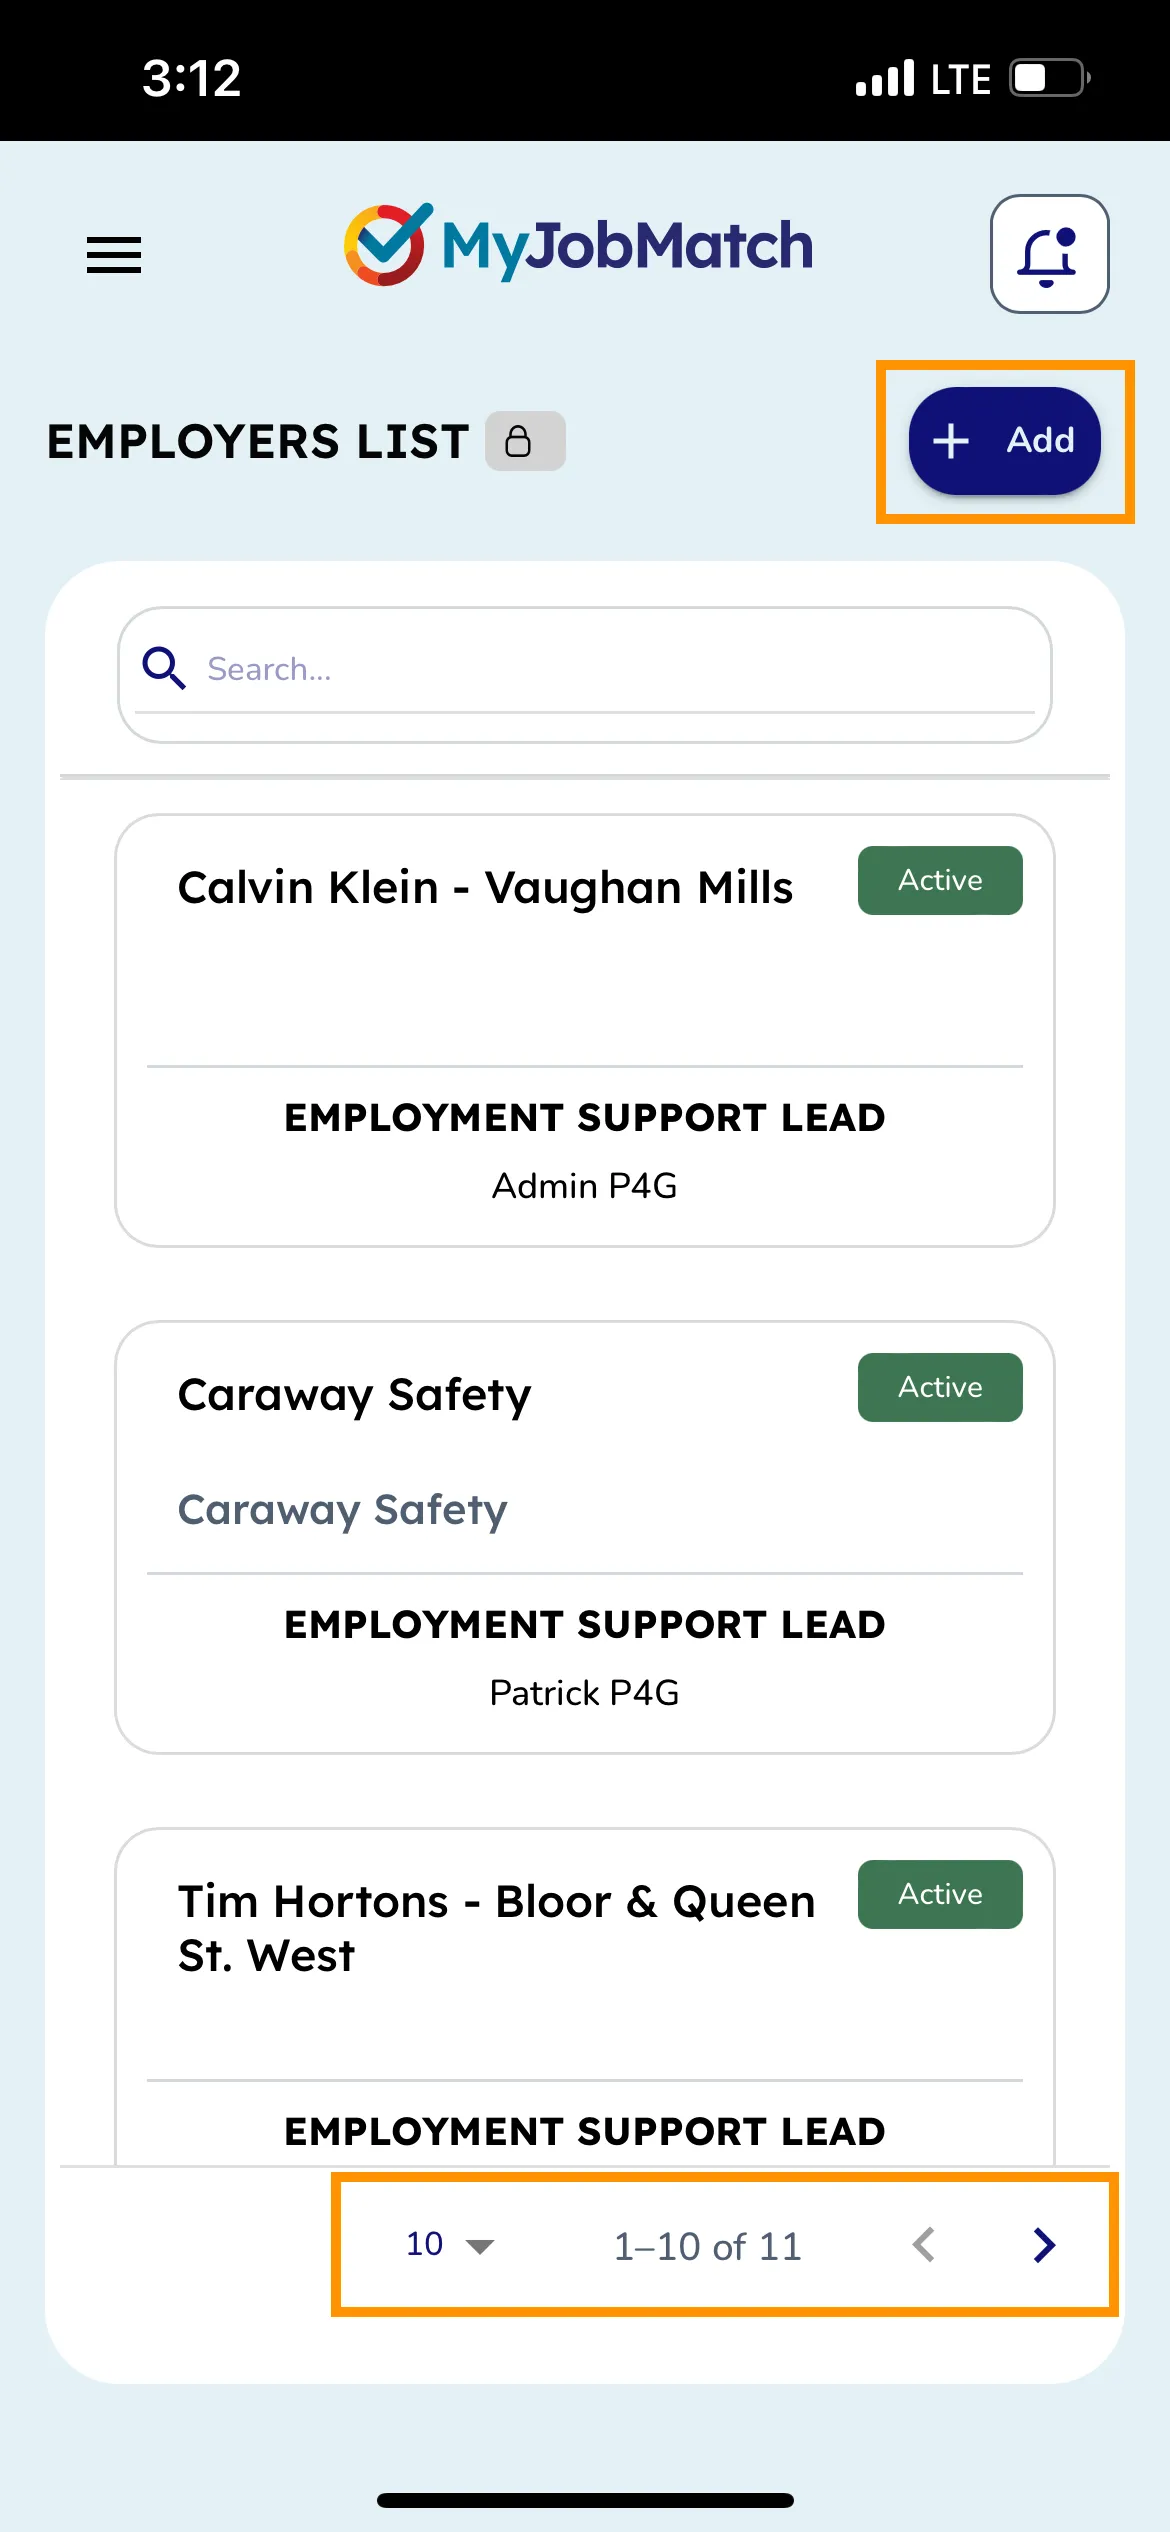
To quickly find an employer (or anything associated to the employer database ex. main contact, email, etc.) use the search bar in the top right corner.

Adding a New Employer
Required information in the Add Employer section is marked with an asterisk* - you may not save the employer information until all required fields have been completed.
To begin there is an option to add an appropriate image of the employer (ex. Logo or picture of the workplace).
Select the appropriate Employer Support Lead name from the drop down list. If you do not see your name, please get in touch with your MyJobMatch administrator.

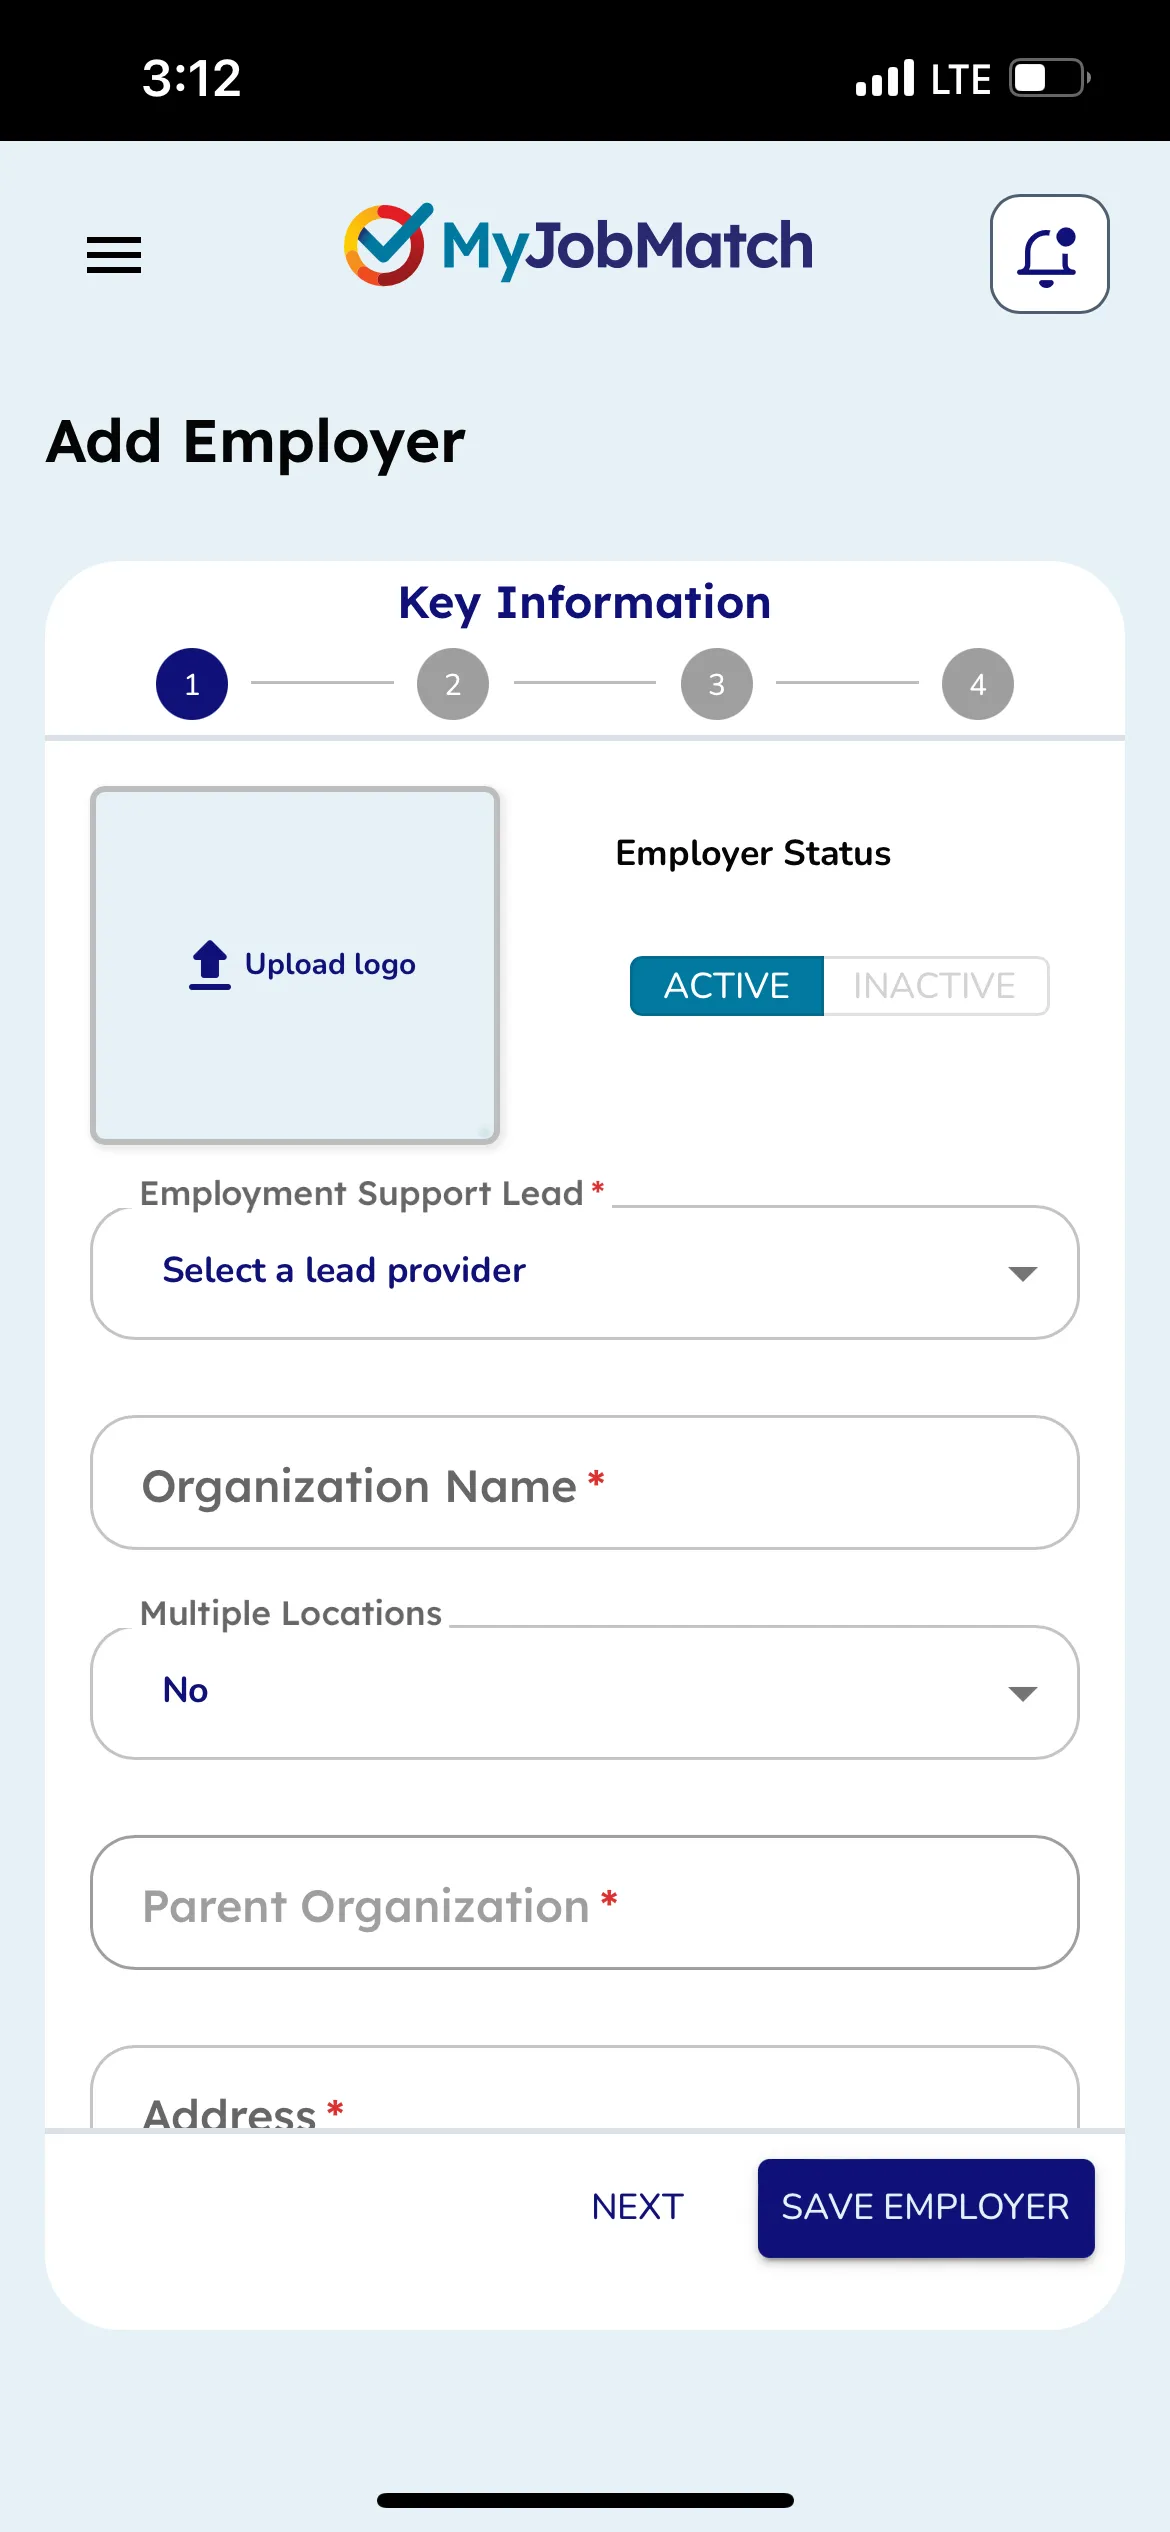
When adding the Organization' s Name and Parent Organization name, please consider the following options:
- Option 1: If there is only one location, the Parent and Organization name can be the same (ex. Patrick's Bakery).
- Option 2: If the Employer has one main location but hires people for multiple locations (ex. Crossing guards or security personnel) the Parent and Organization name can be the same (ex. Carraway Safety). You will have the option to identify the different locations the employer is hiring for when you add a new job (See more information on how to do this in the Job section in this document for more information).
- Option 3: For those employers who have multiple locations (ex. Tim Hortons, Best Buy, Superstore) it is critical to include a unique way to identify that location by adding a street name/branch, etc. (Ex. Tim Hortons - Queen Street). The formula for this is "PARENT ORG NAME - LOCATION/BRANCH/STREET".
A good rule of thumb: If you have one hiring manager, you likely need one employer profile. If there are multiple hiring managers, you likely need to create multiple employer profiles. If you are unsure about how to proceed, contact your MyJobMatch administrator.
Choose your Industry from the drop down list.
Include a brief description about the employer. If you are unsure what to include, consider what you would tell a colleague about this employer. What would be helpful to them?
Type /select the address for the employer.
Include any skills that are required for the job (this is free text that is not factored into the matches).
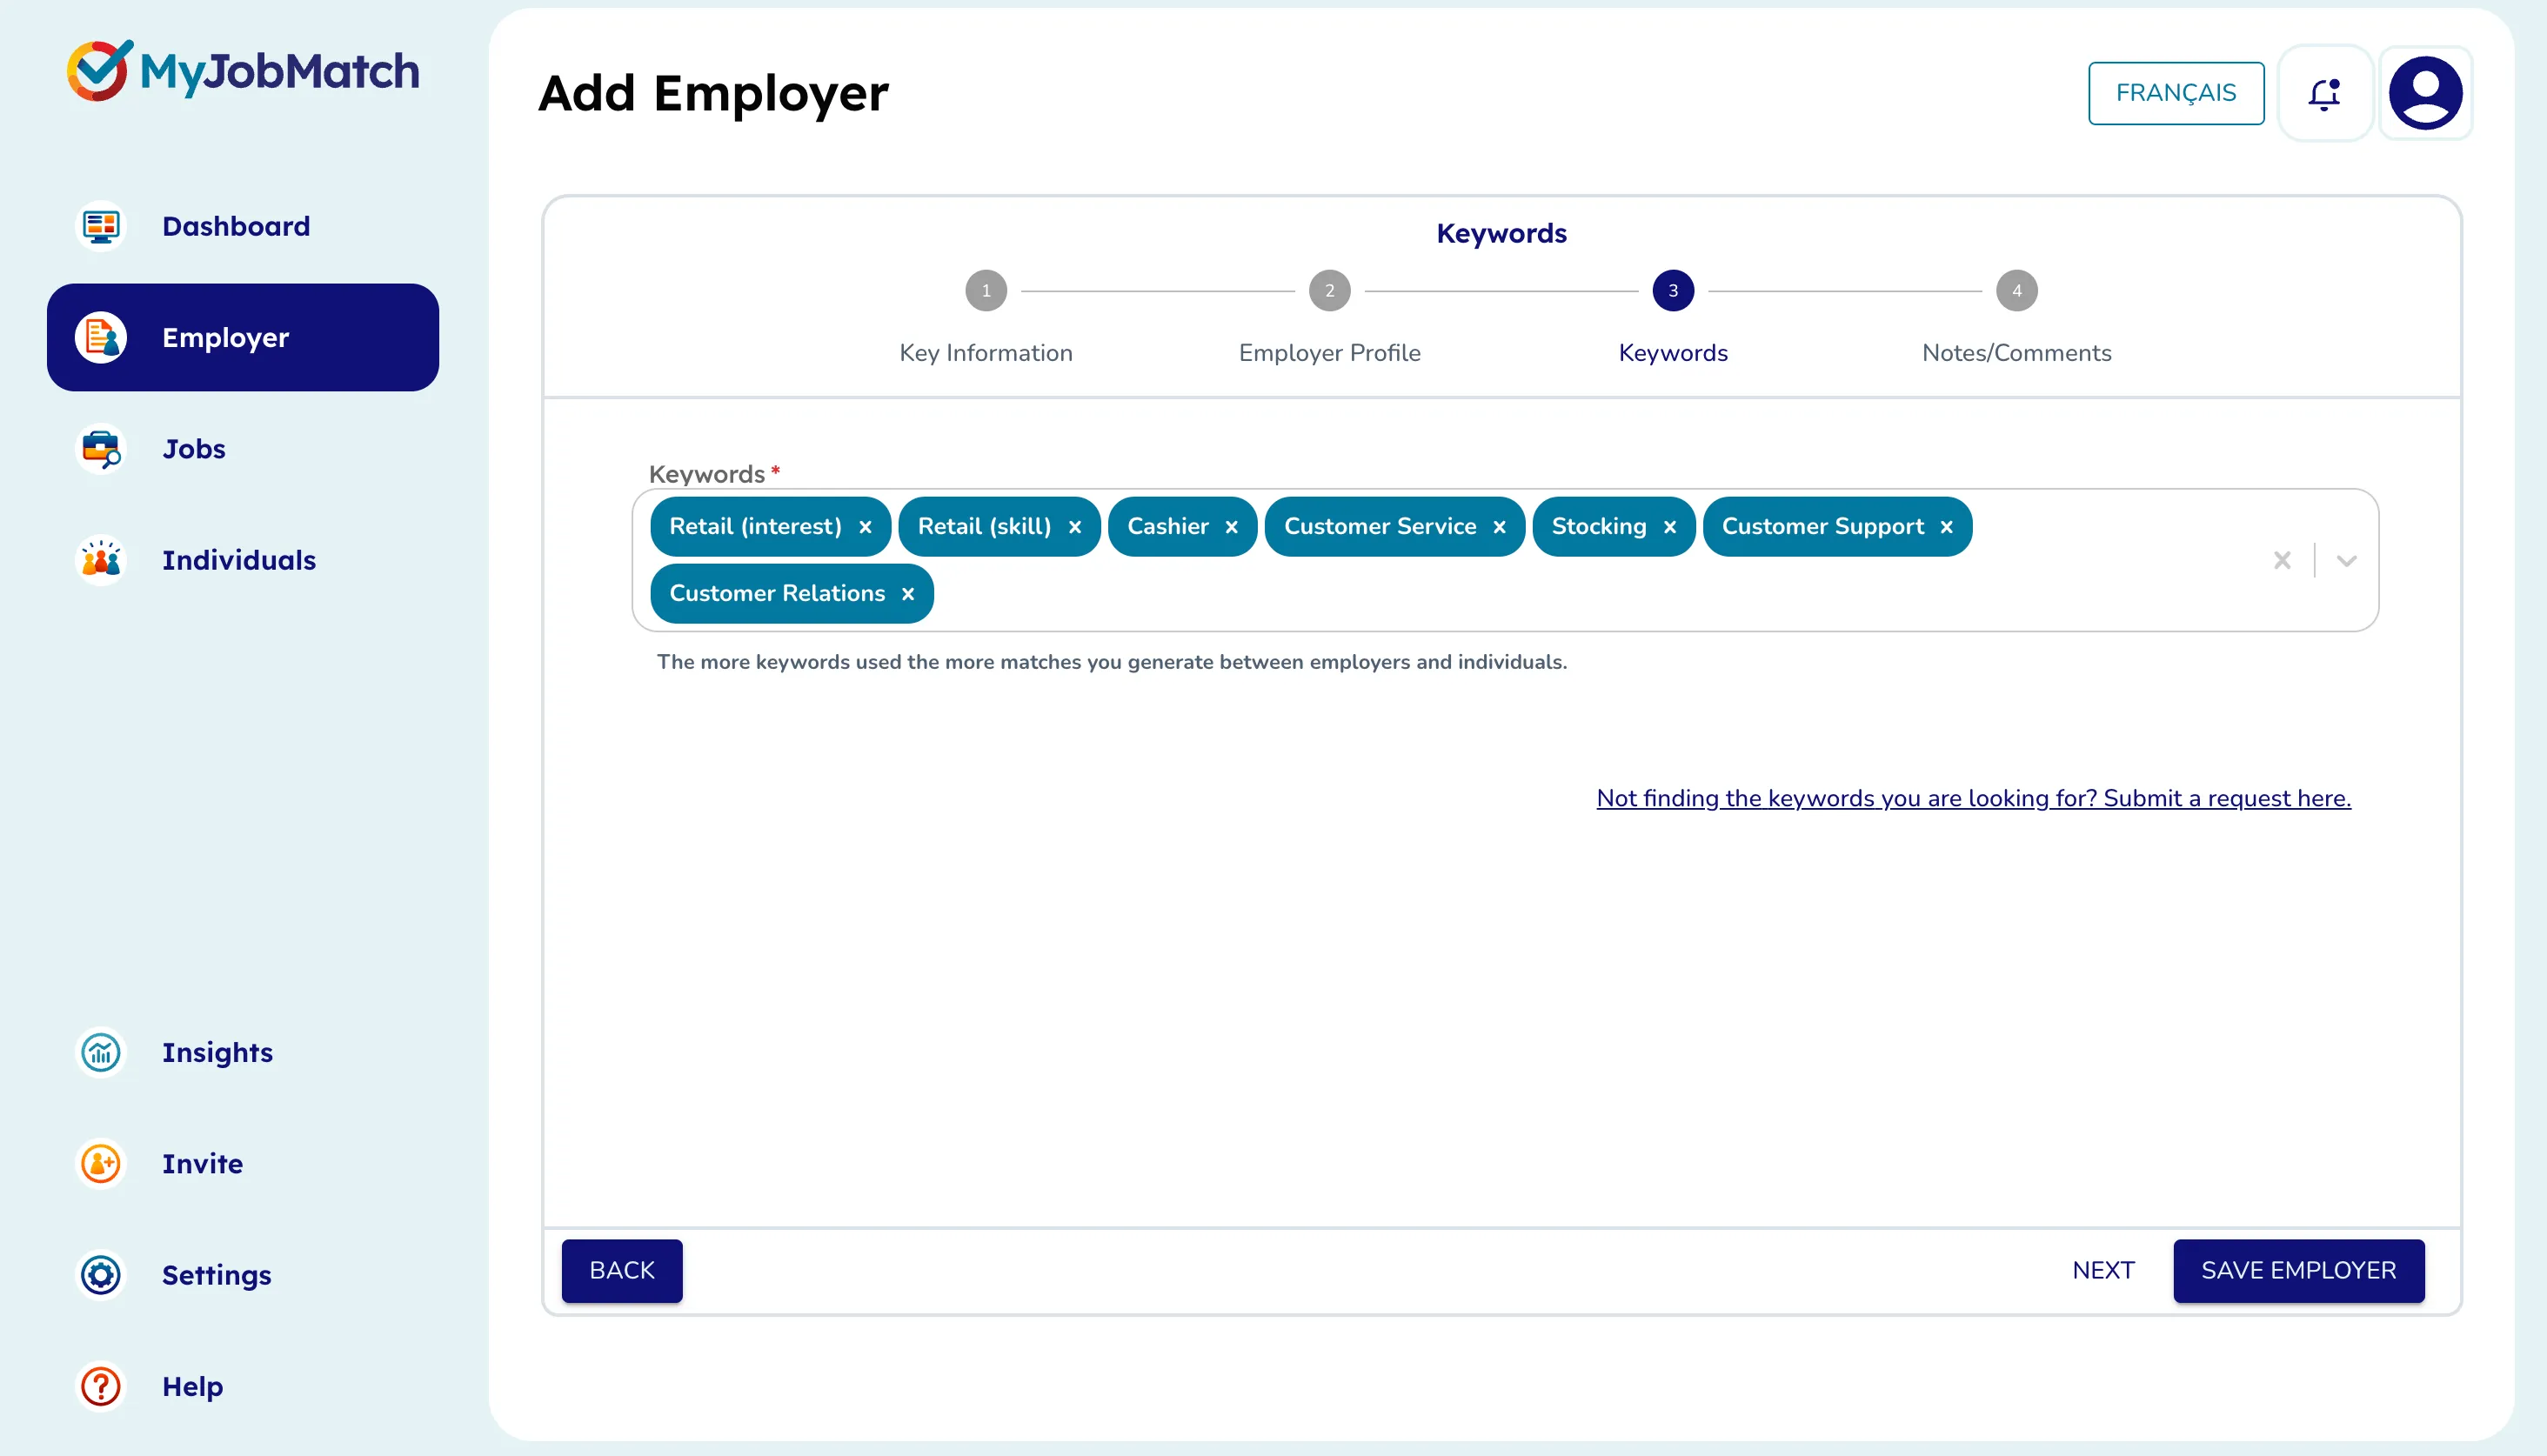
Include any Keywords related to the employer or the kind of work that happens. These tags are all factored into the Matches).
Keywords that are identified as both a Skill and Interest can be selected twice.

The Main Contact's First Name, Last Name, Phone Number and Email are all for the contact you work with mostly for this employer (ex. Hiring manager, owner, manager, etc.)
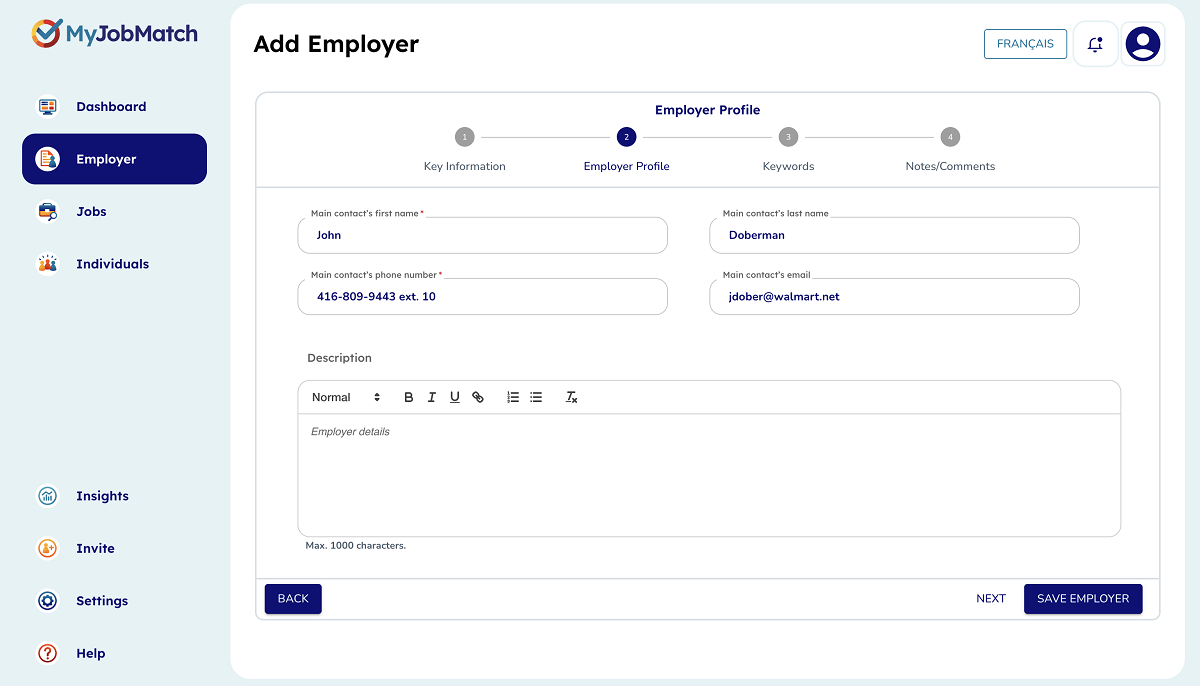
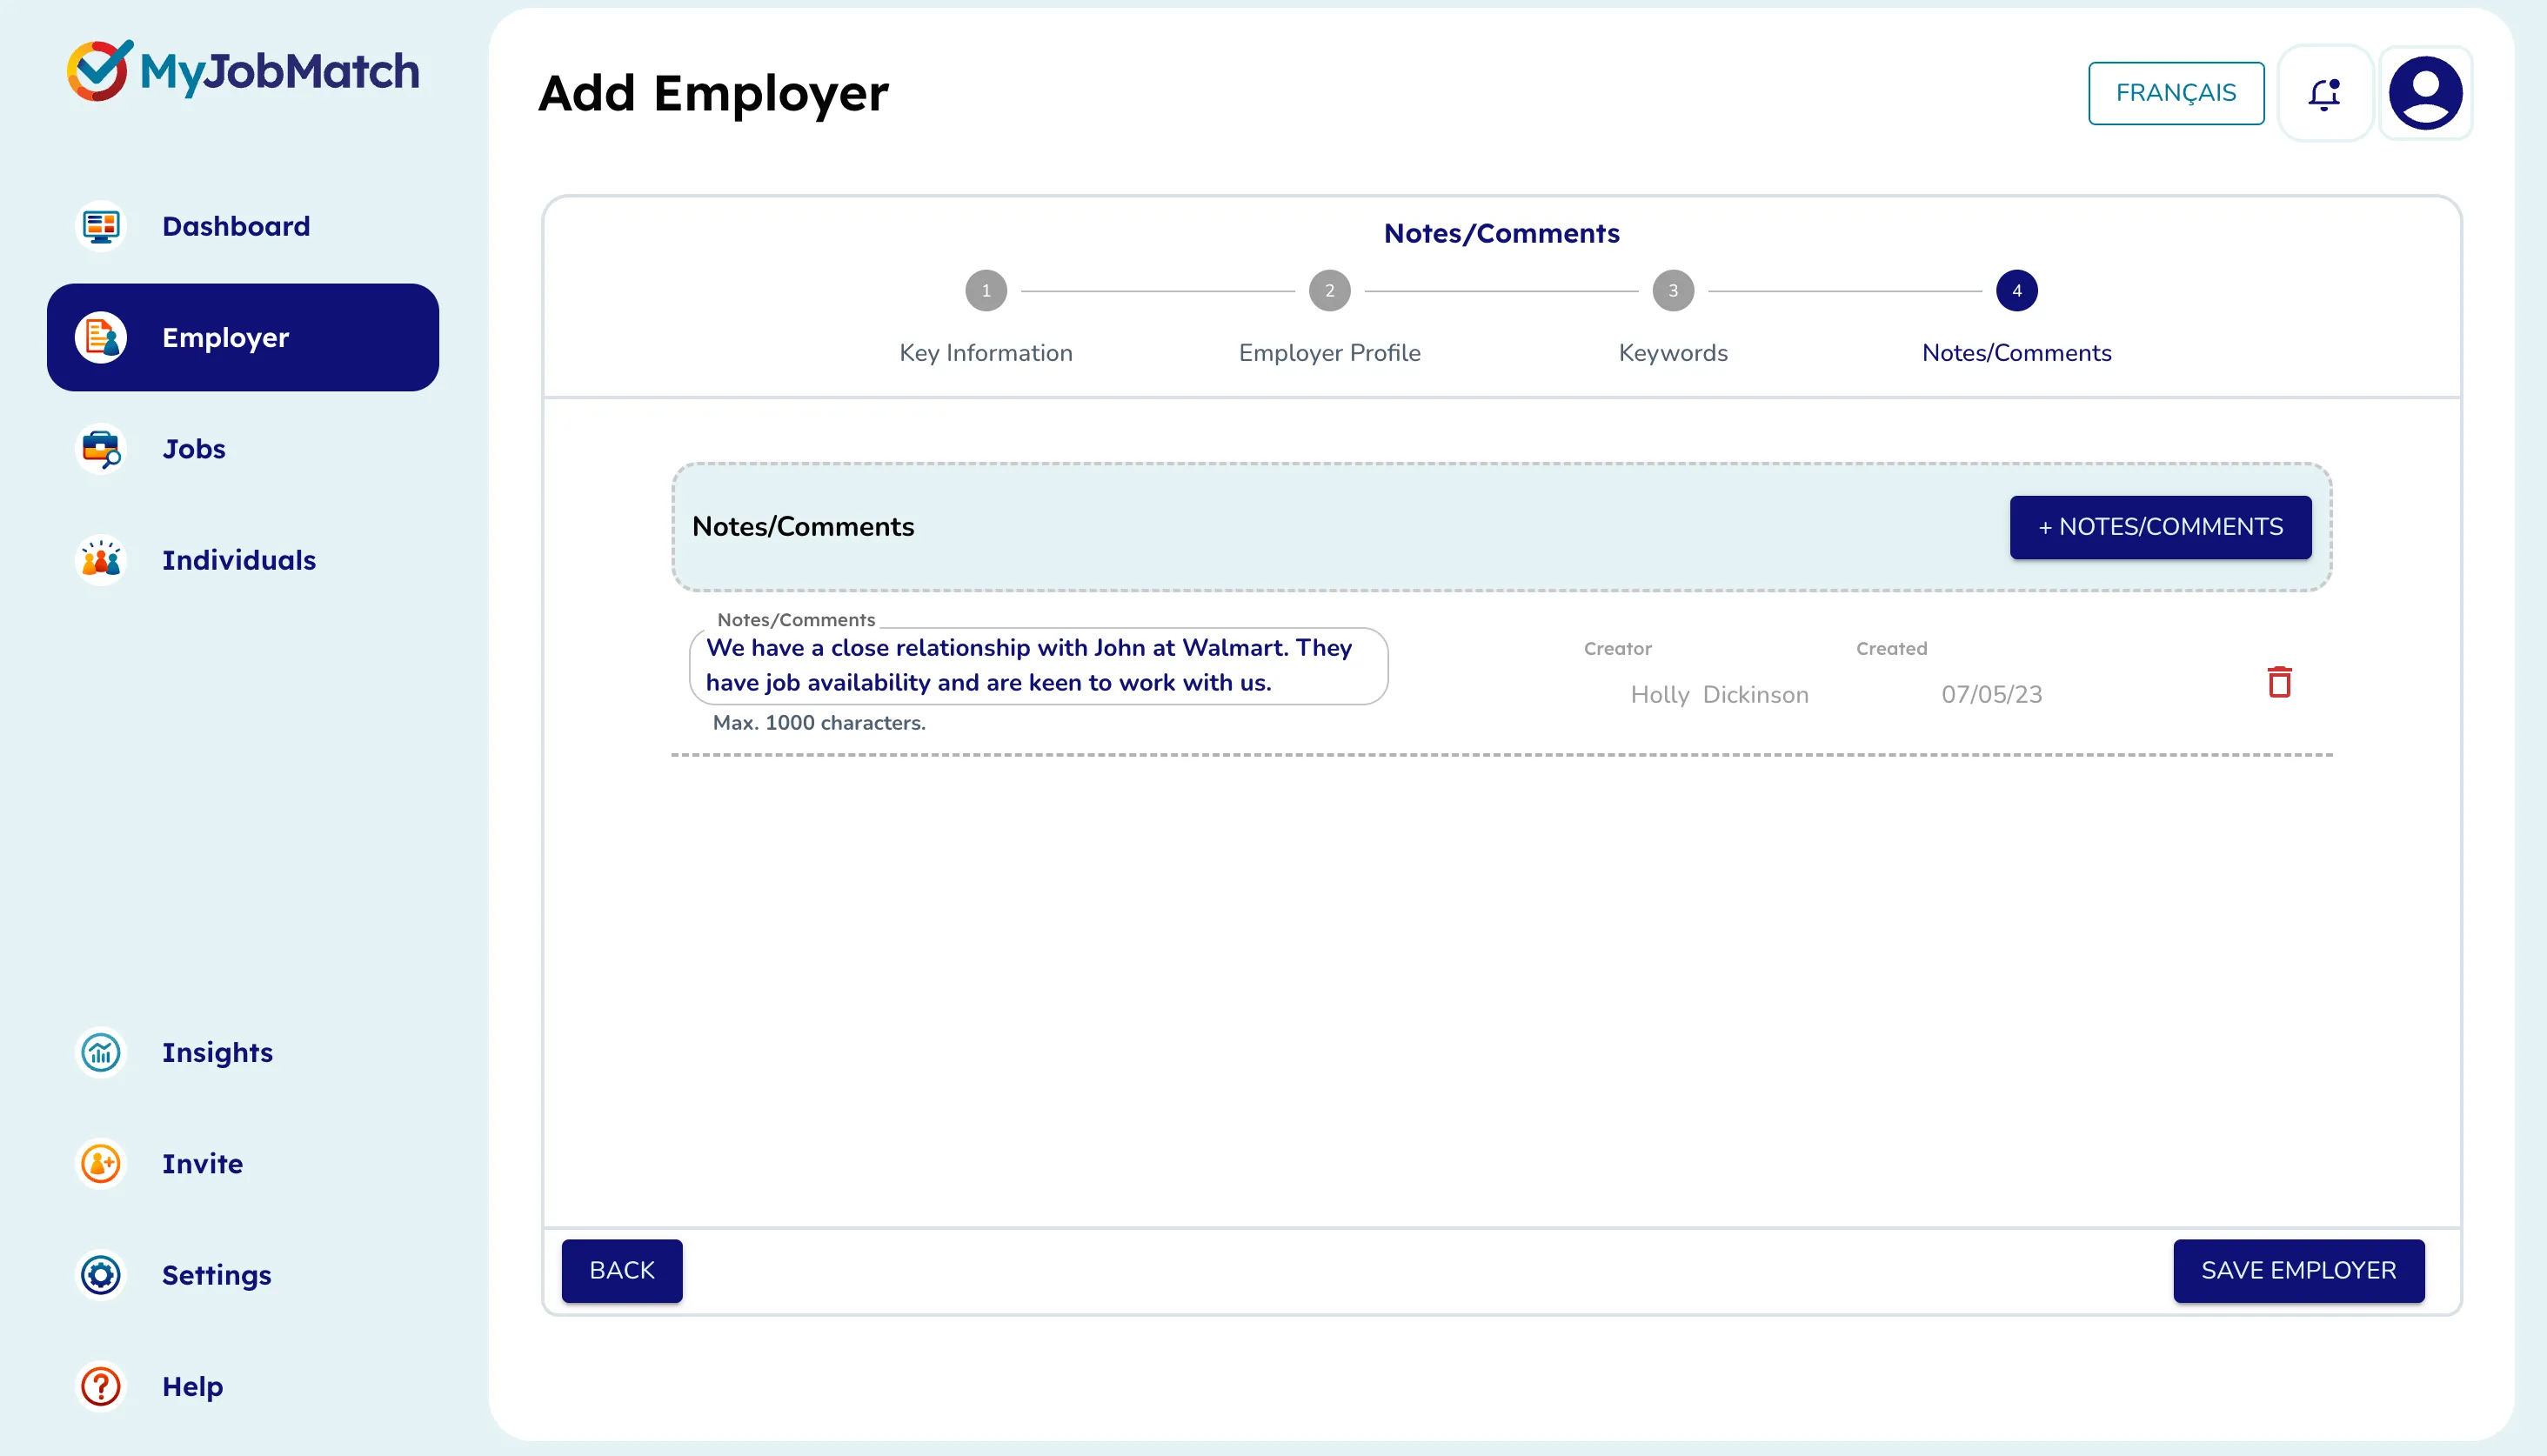
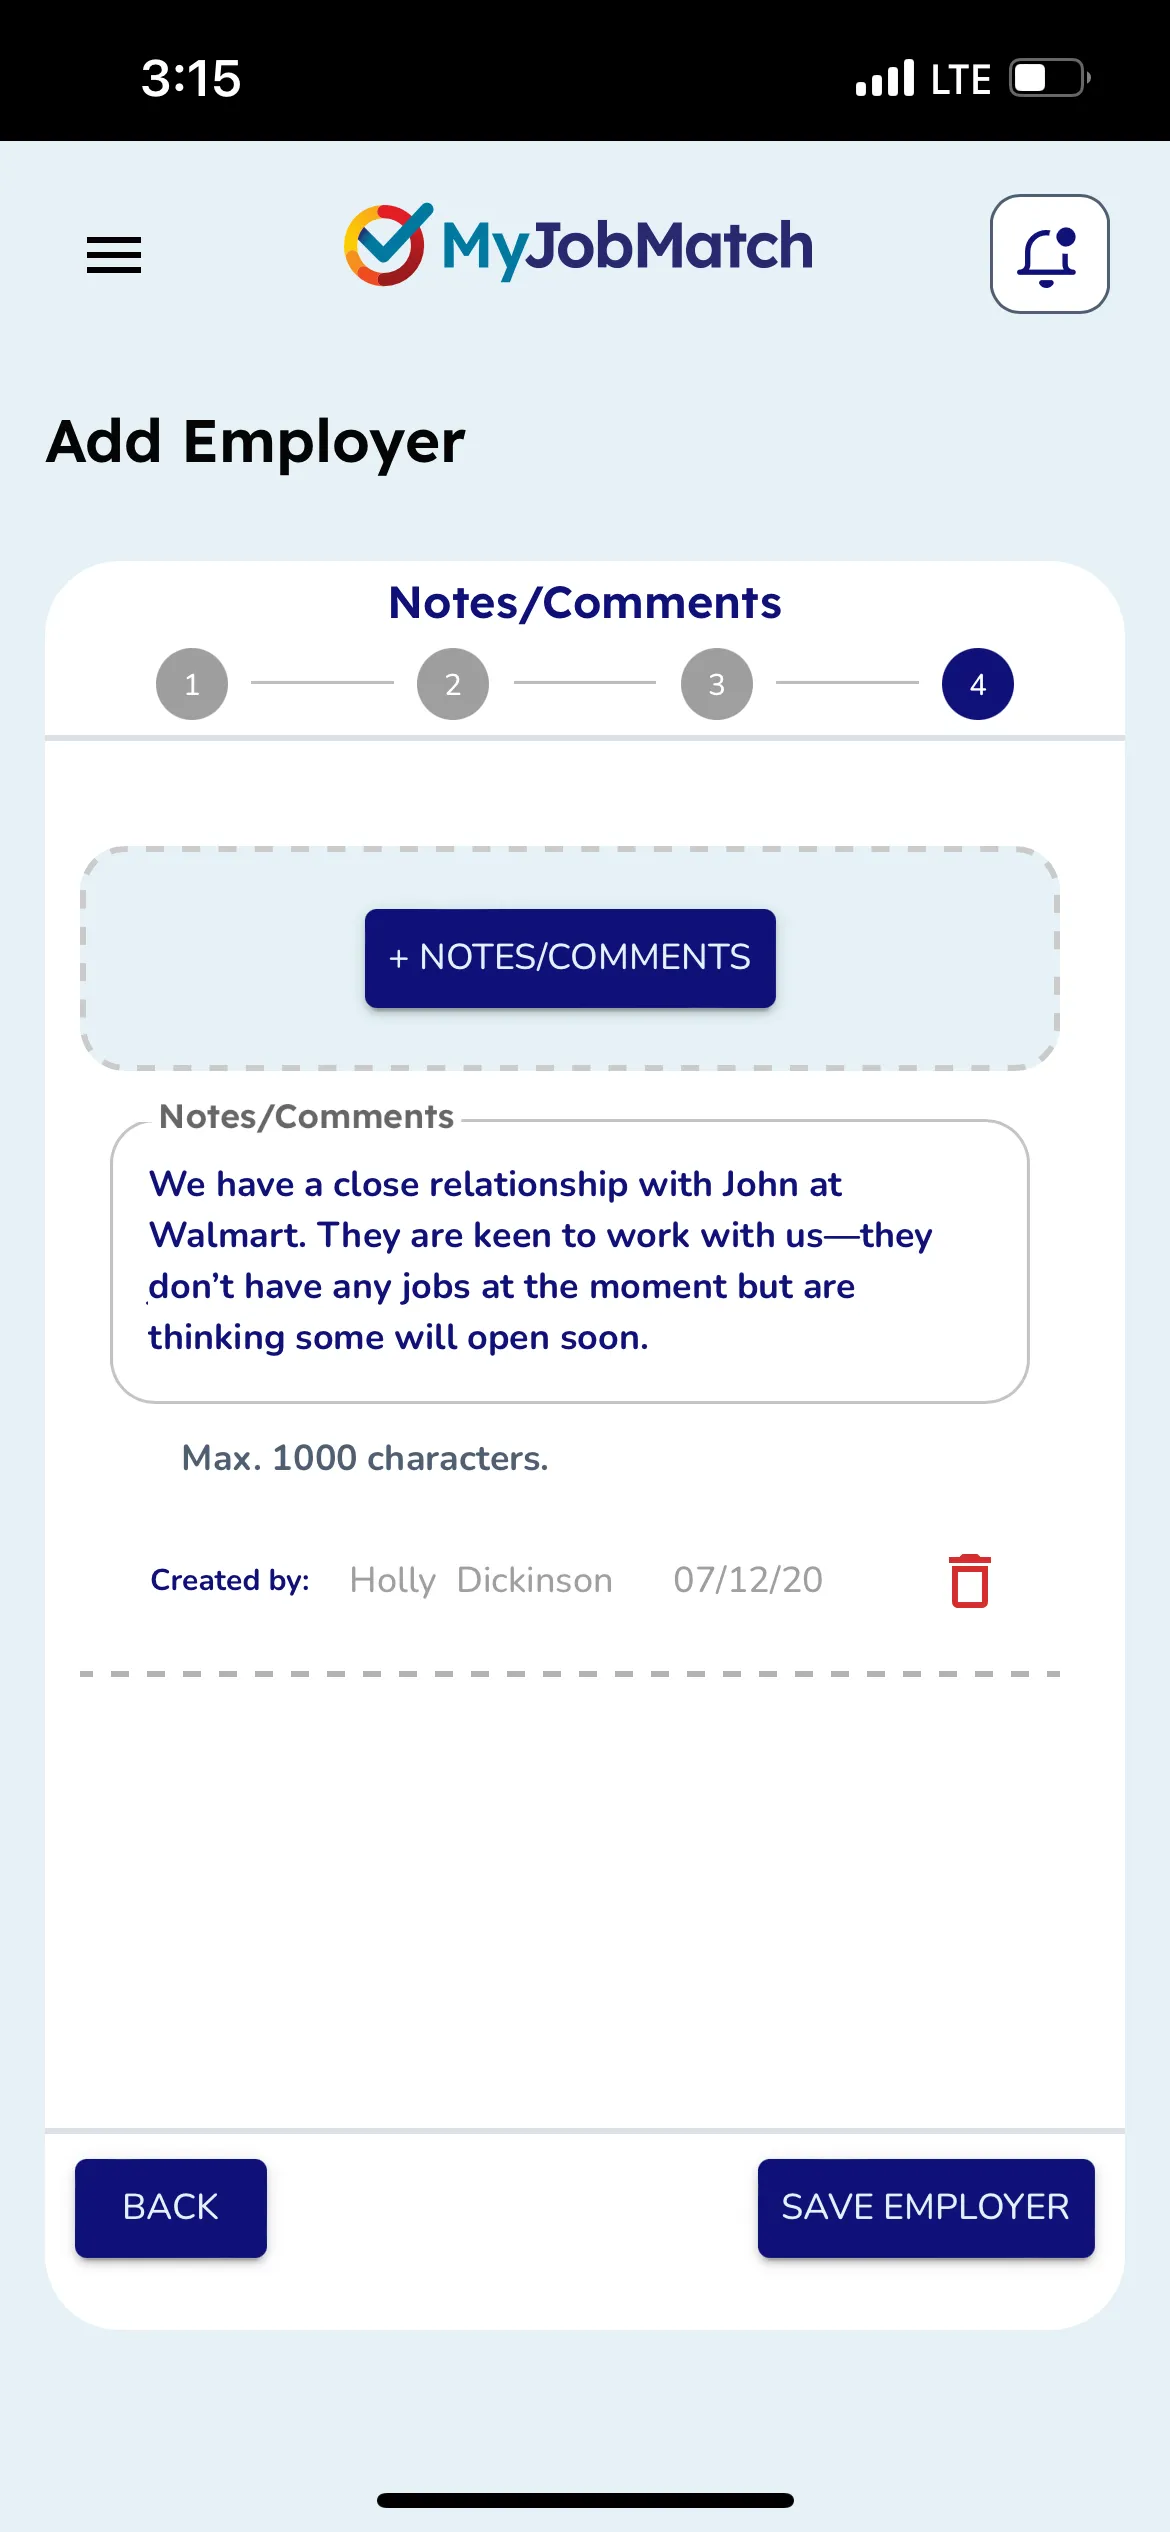
You may choose to add in a +Comment/Note by selecting that button. Please note, notes are kept private to your organization.
When you've completed all required information, you can click Save Employer. This will add the Employer to your agency's database.
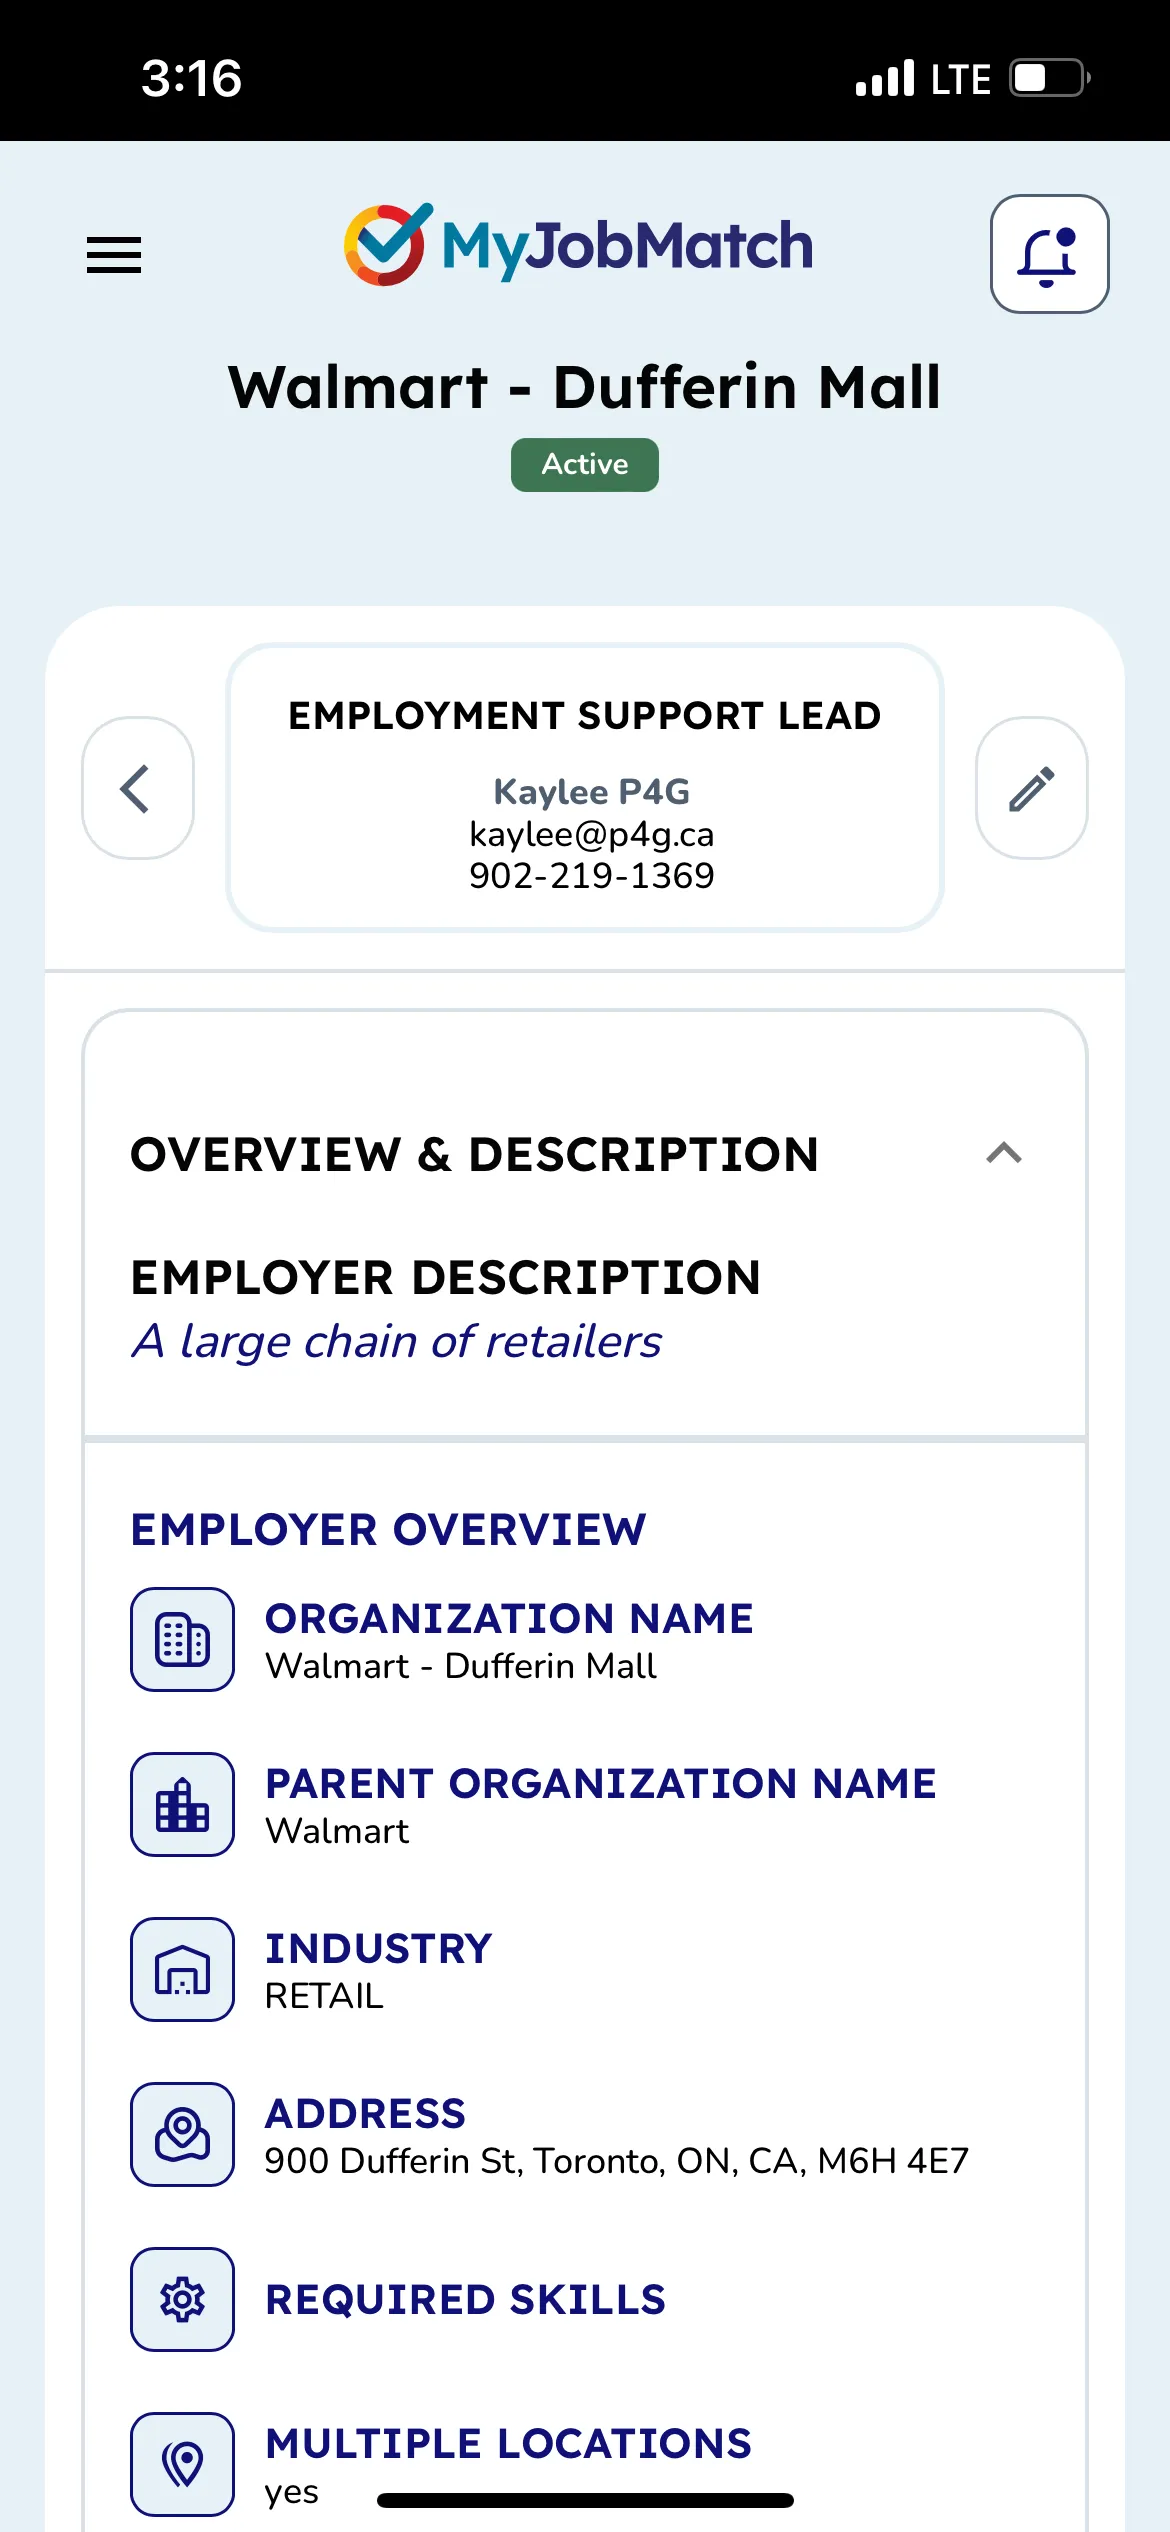
Employer Profile
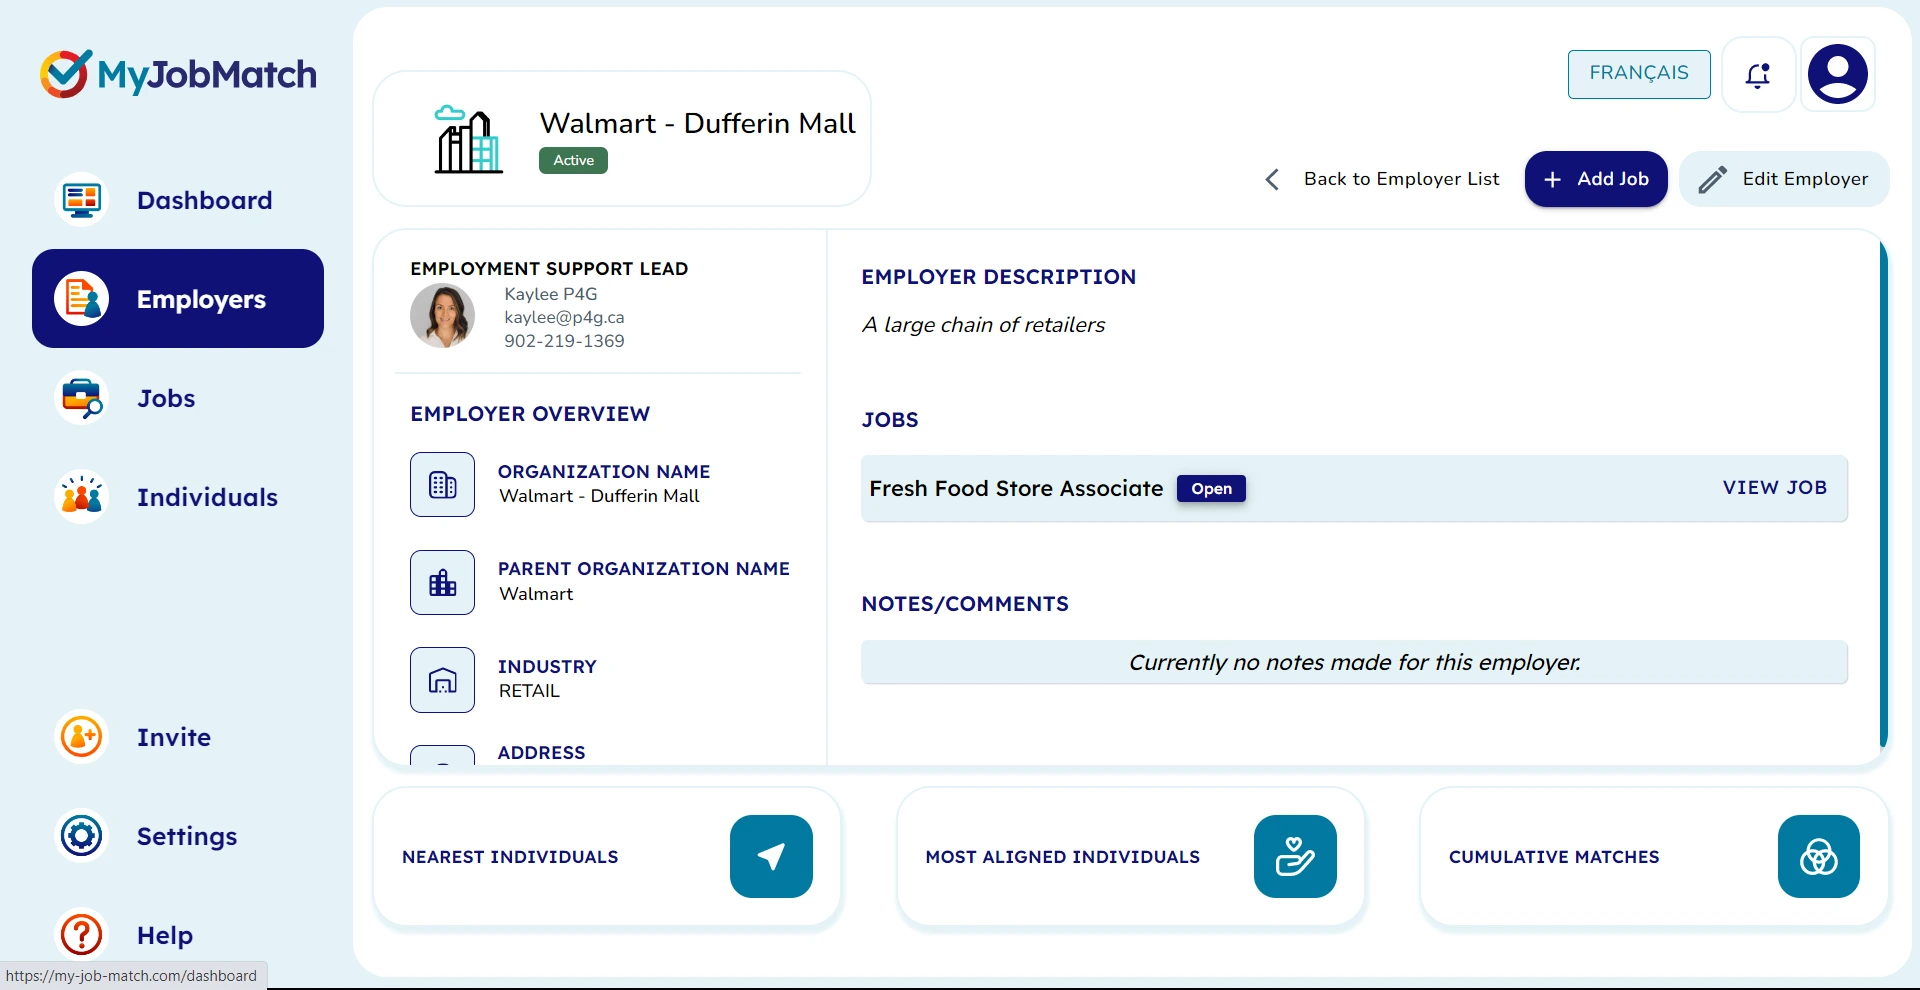
Now that you have saved your Employer profile click View Employer to see their full profile.
From this view, you can + Add Job (1) Edit Employer (2) information or check out the Matches for this employer (3).
- + Add Job will be covered in the Job Section of this document.
- Edit Employer will allow you to go back to the previous view to edit/update information about the employer.
- Matches will be covered further in the Matches section of this document. Please note, when you choose matches from this view, it will identify Individuals who are Recommended to this Employer.
Employer Matches
Please note, when you choose matches from the Employer profile view, it will identify Individuals who are Recommended to this Employer.
Matches will be covered further in the Recommender section of this document.
Jobs
Important Message: Jobs are Public
It is important to note that all Jobs added to the MyJobMatch platform are public to everyone on the platform.
This means any job you upload will be visible by all of your colleagues, and colleagues at other agencies outside of the one you are assigned to.
Employers and Individuals can only be seen by people/users who belong to the same agency as you. 27
Jobs Overview
From the Job page you can review all Jobs available on the platform.
To quickly see more information included on a specific job scroll left to right.
To see more Jobs adjust your rows per page.
To add a new Job, select "+Add Job"
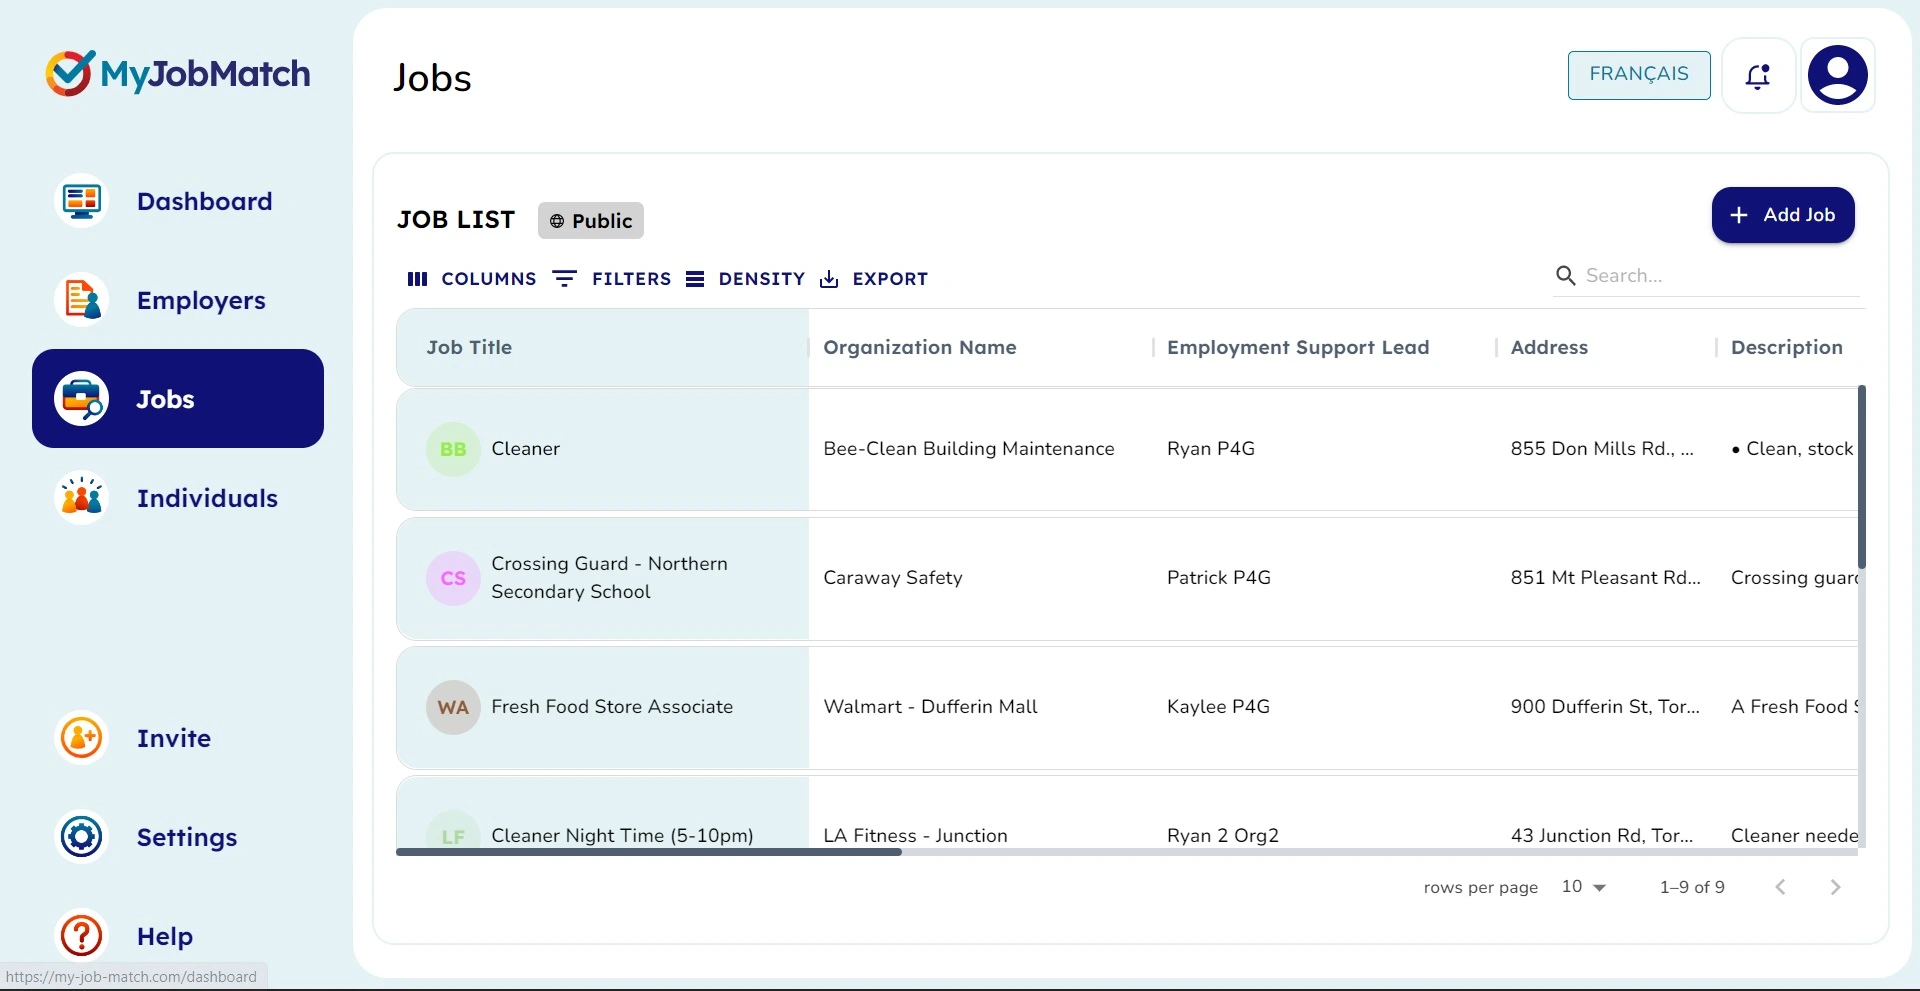
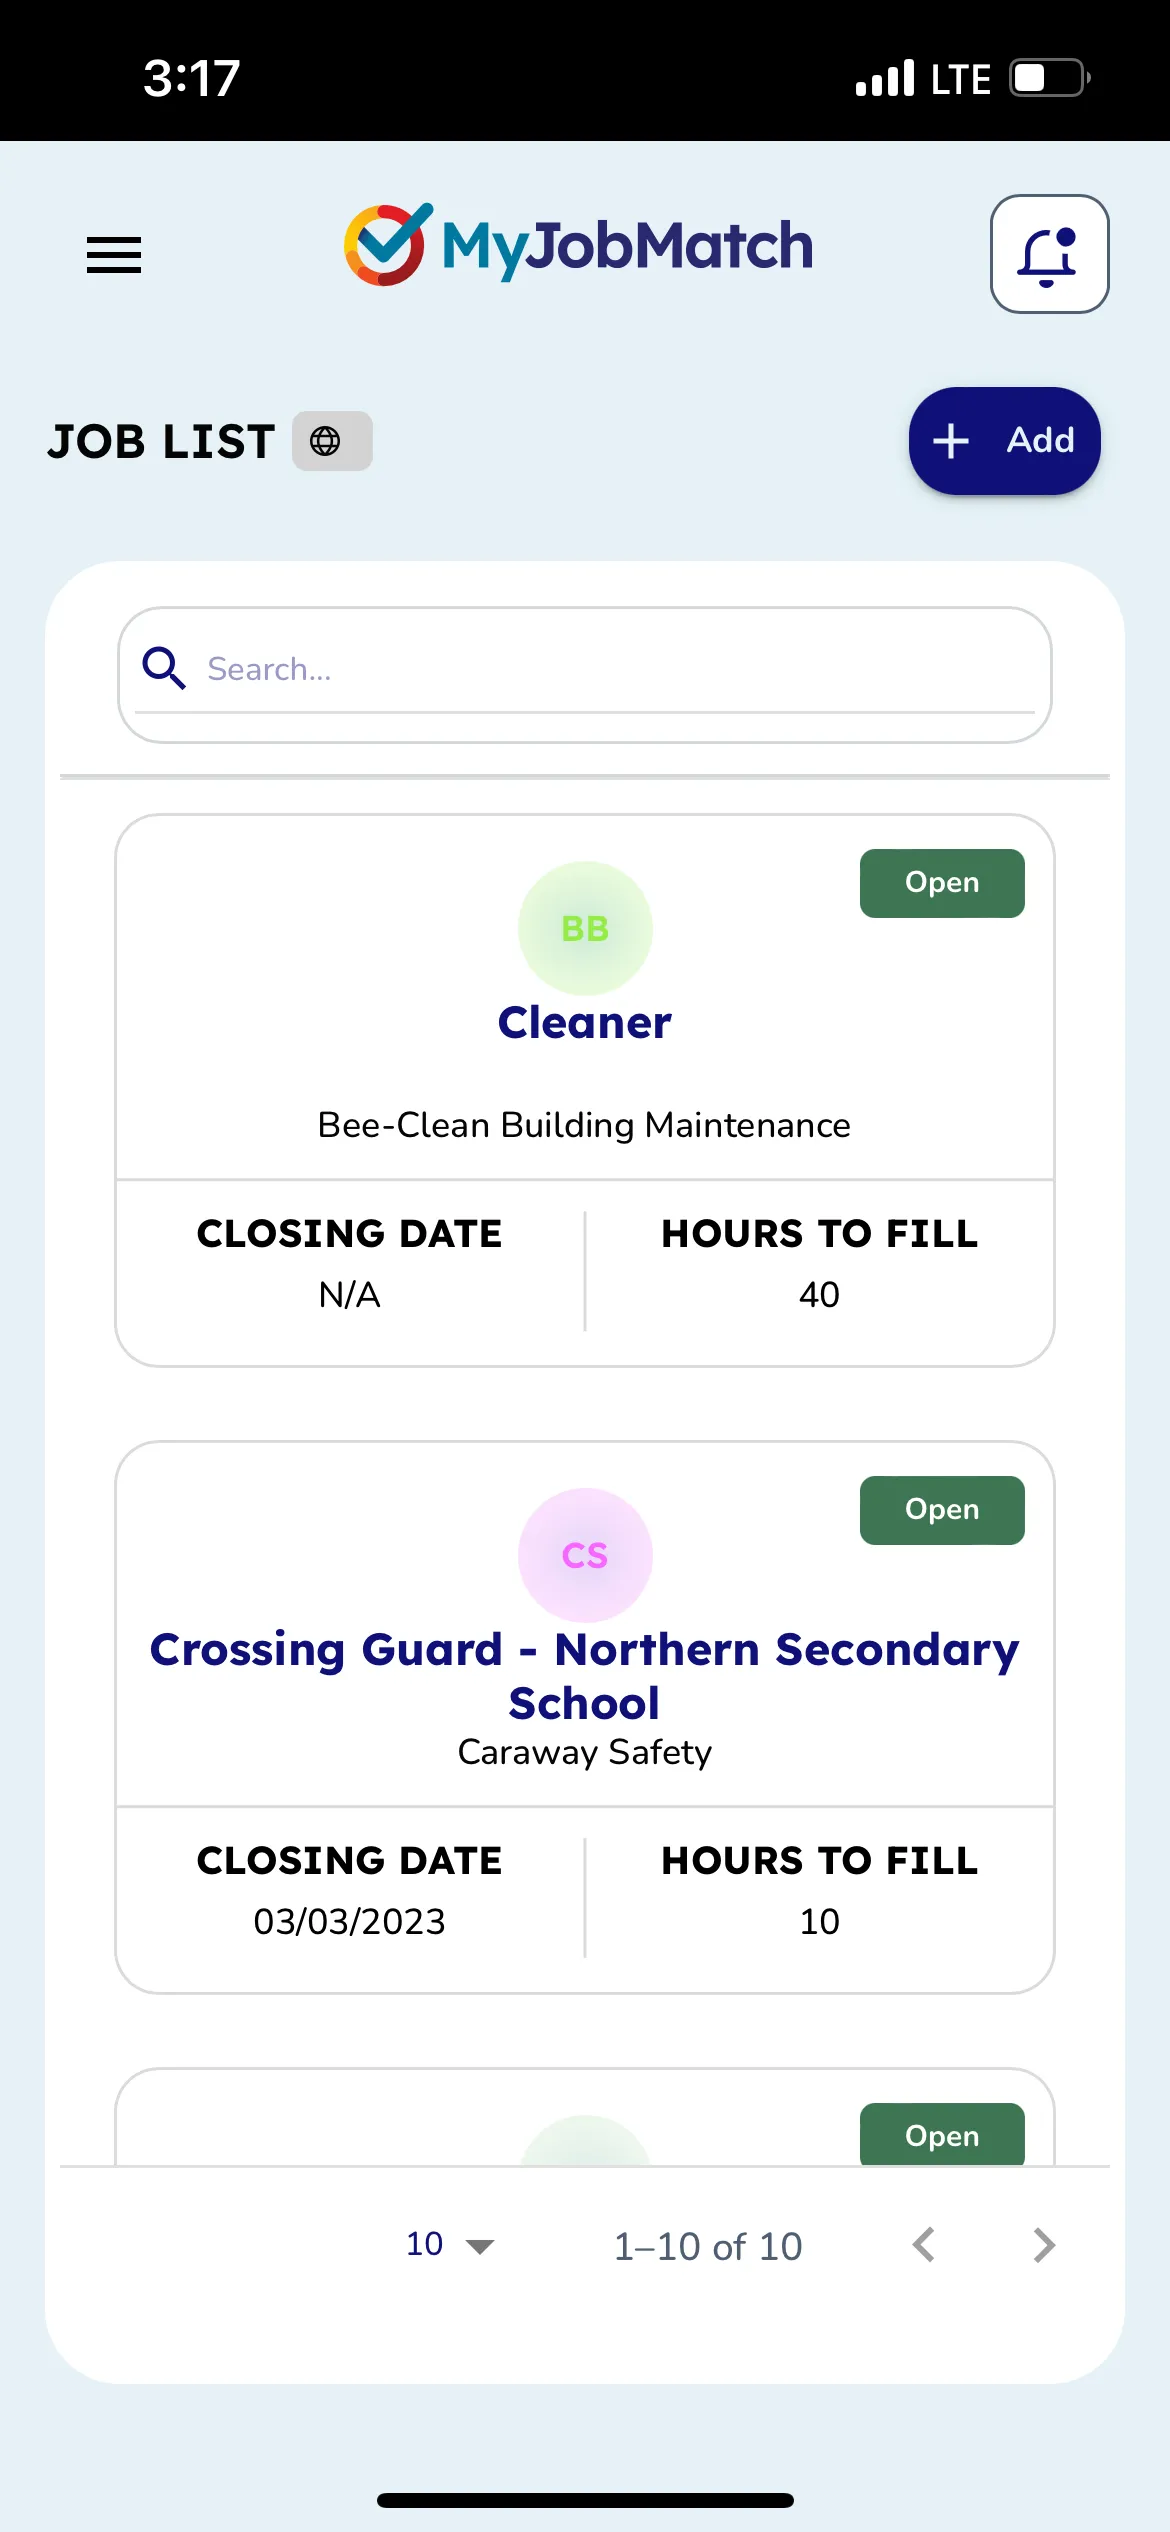
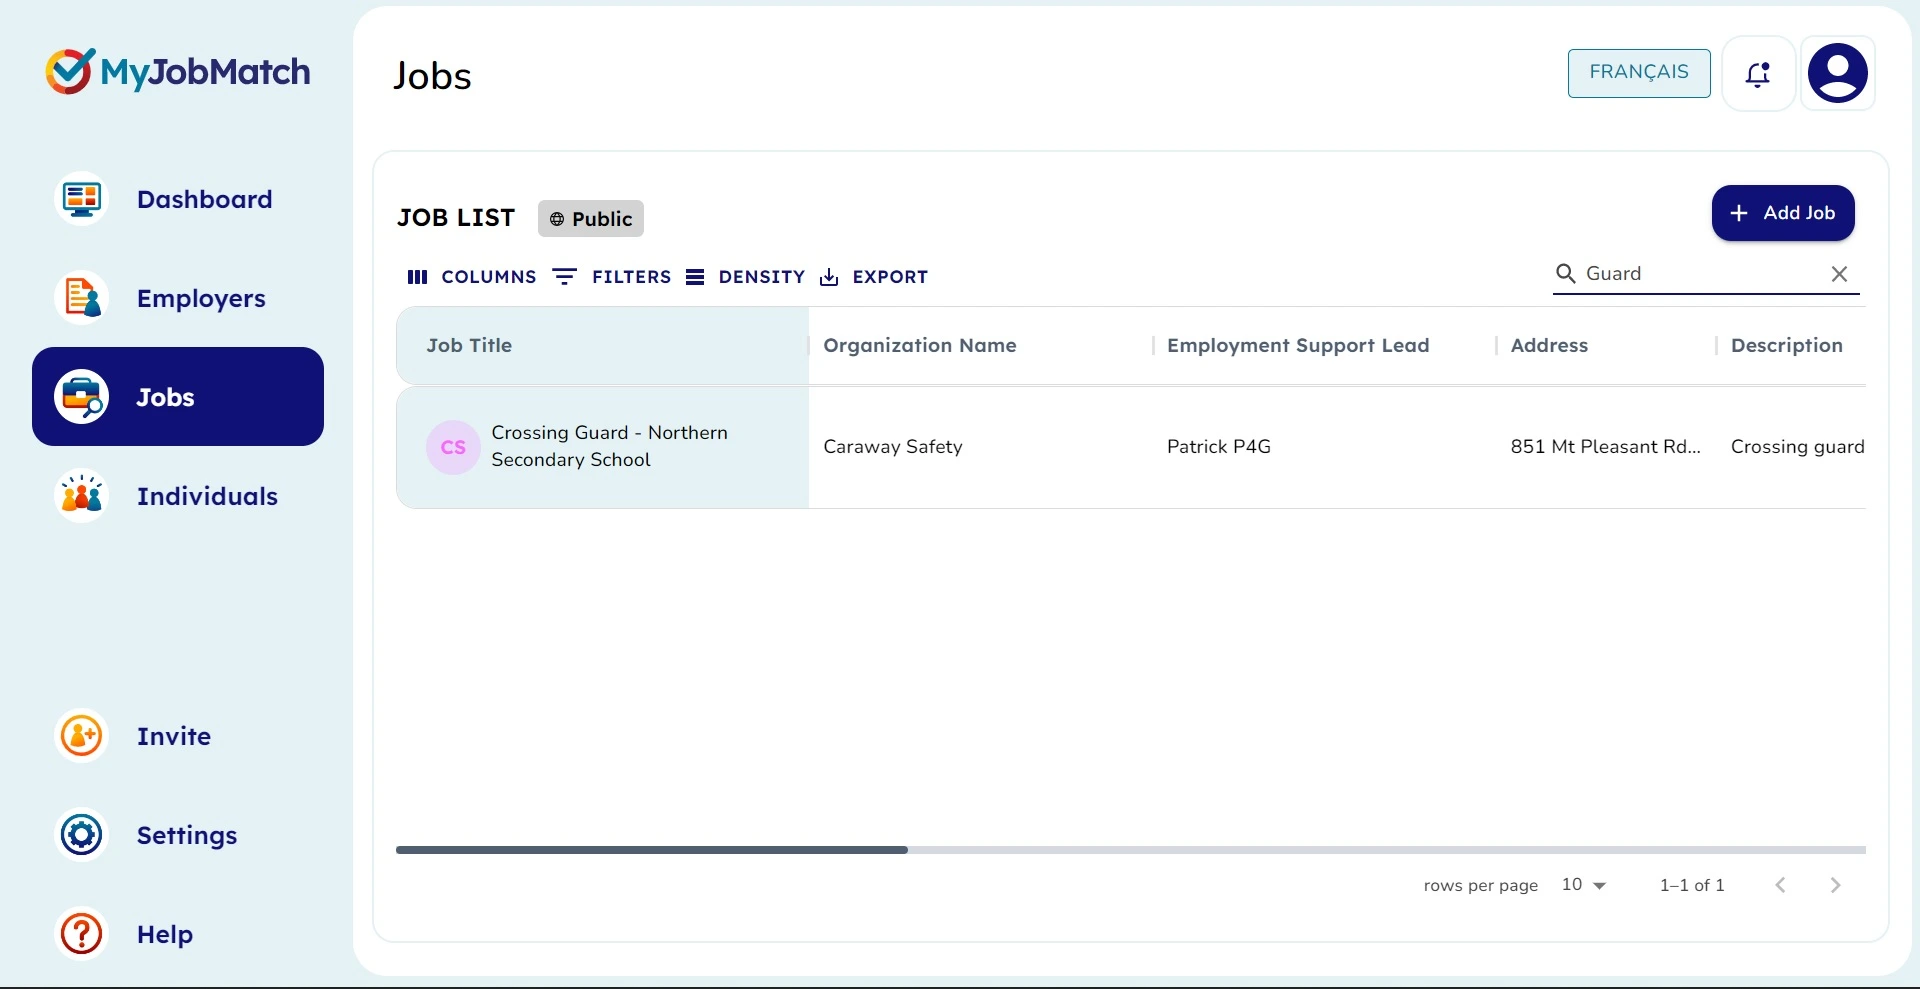
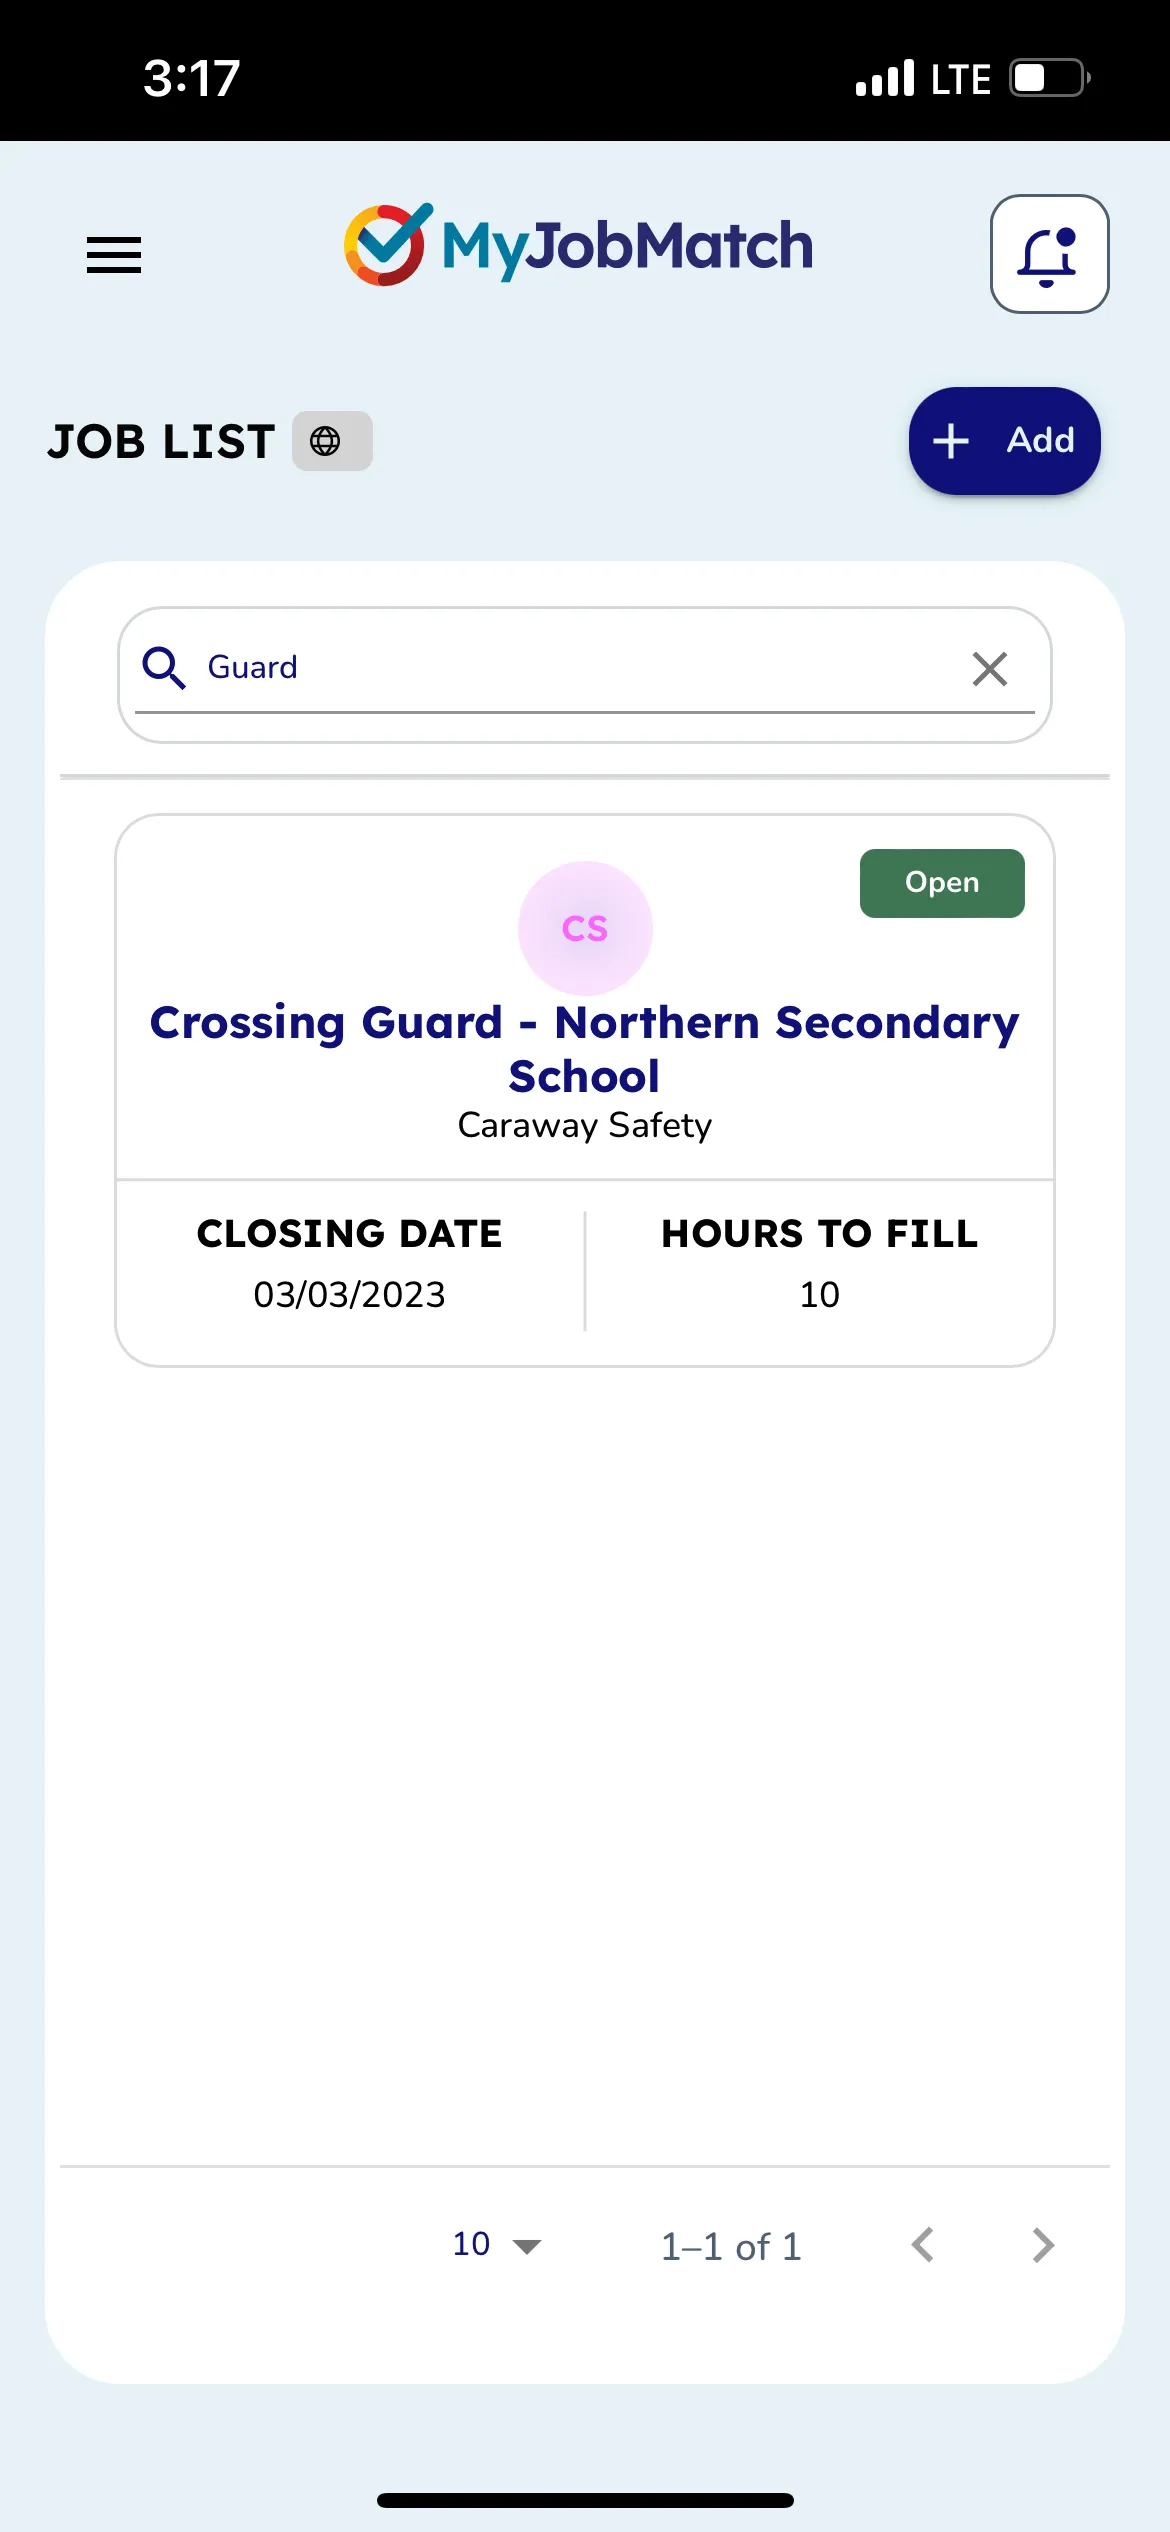
Use the search bar in the top right corner to find any information about a specific job, or search by a certain word.
This search will review all the data associated to Jobs. Ex. If you typed 'helping' it would filter all jobs with the word 'helping' in it.
Add a new Job
Required information in the Job section is marked with an asterisk* - you may not save the Job until all required fields are completed.
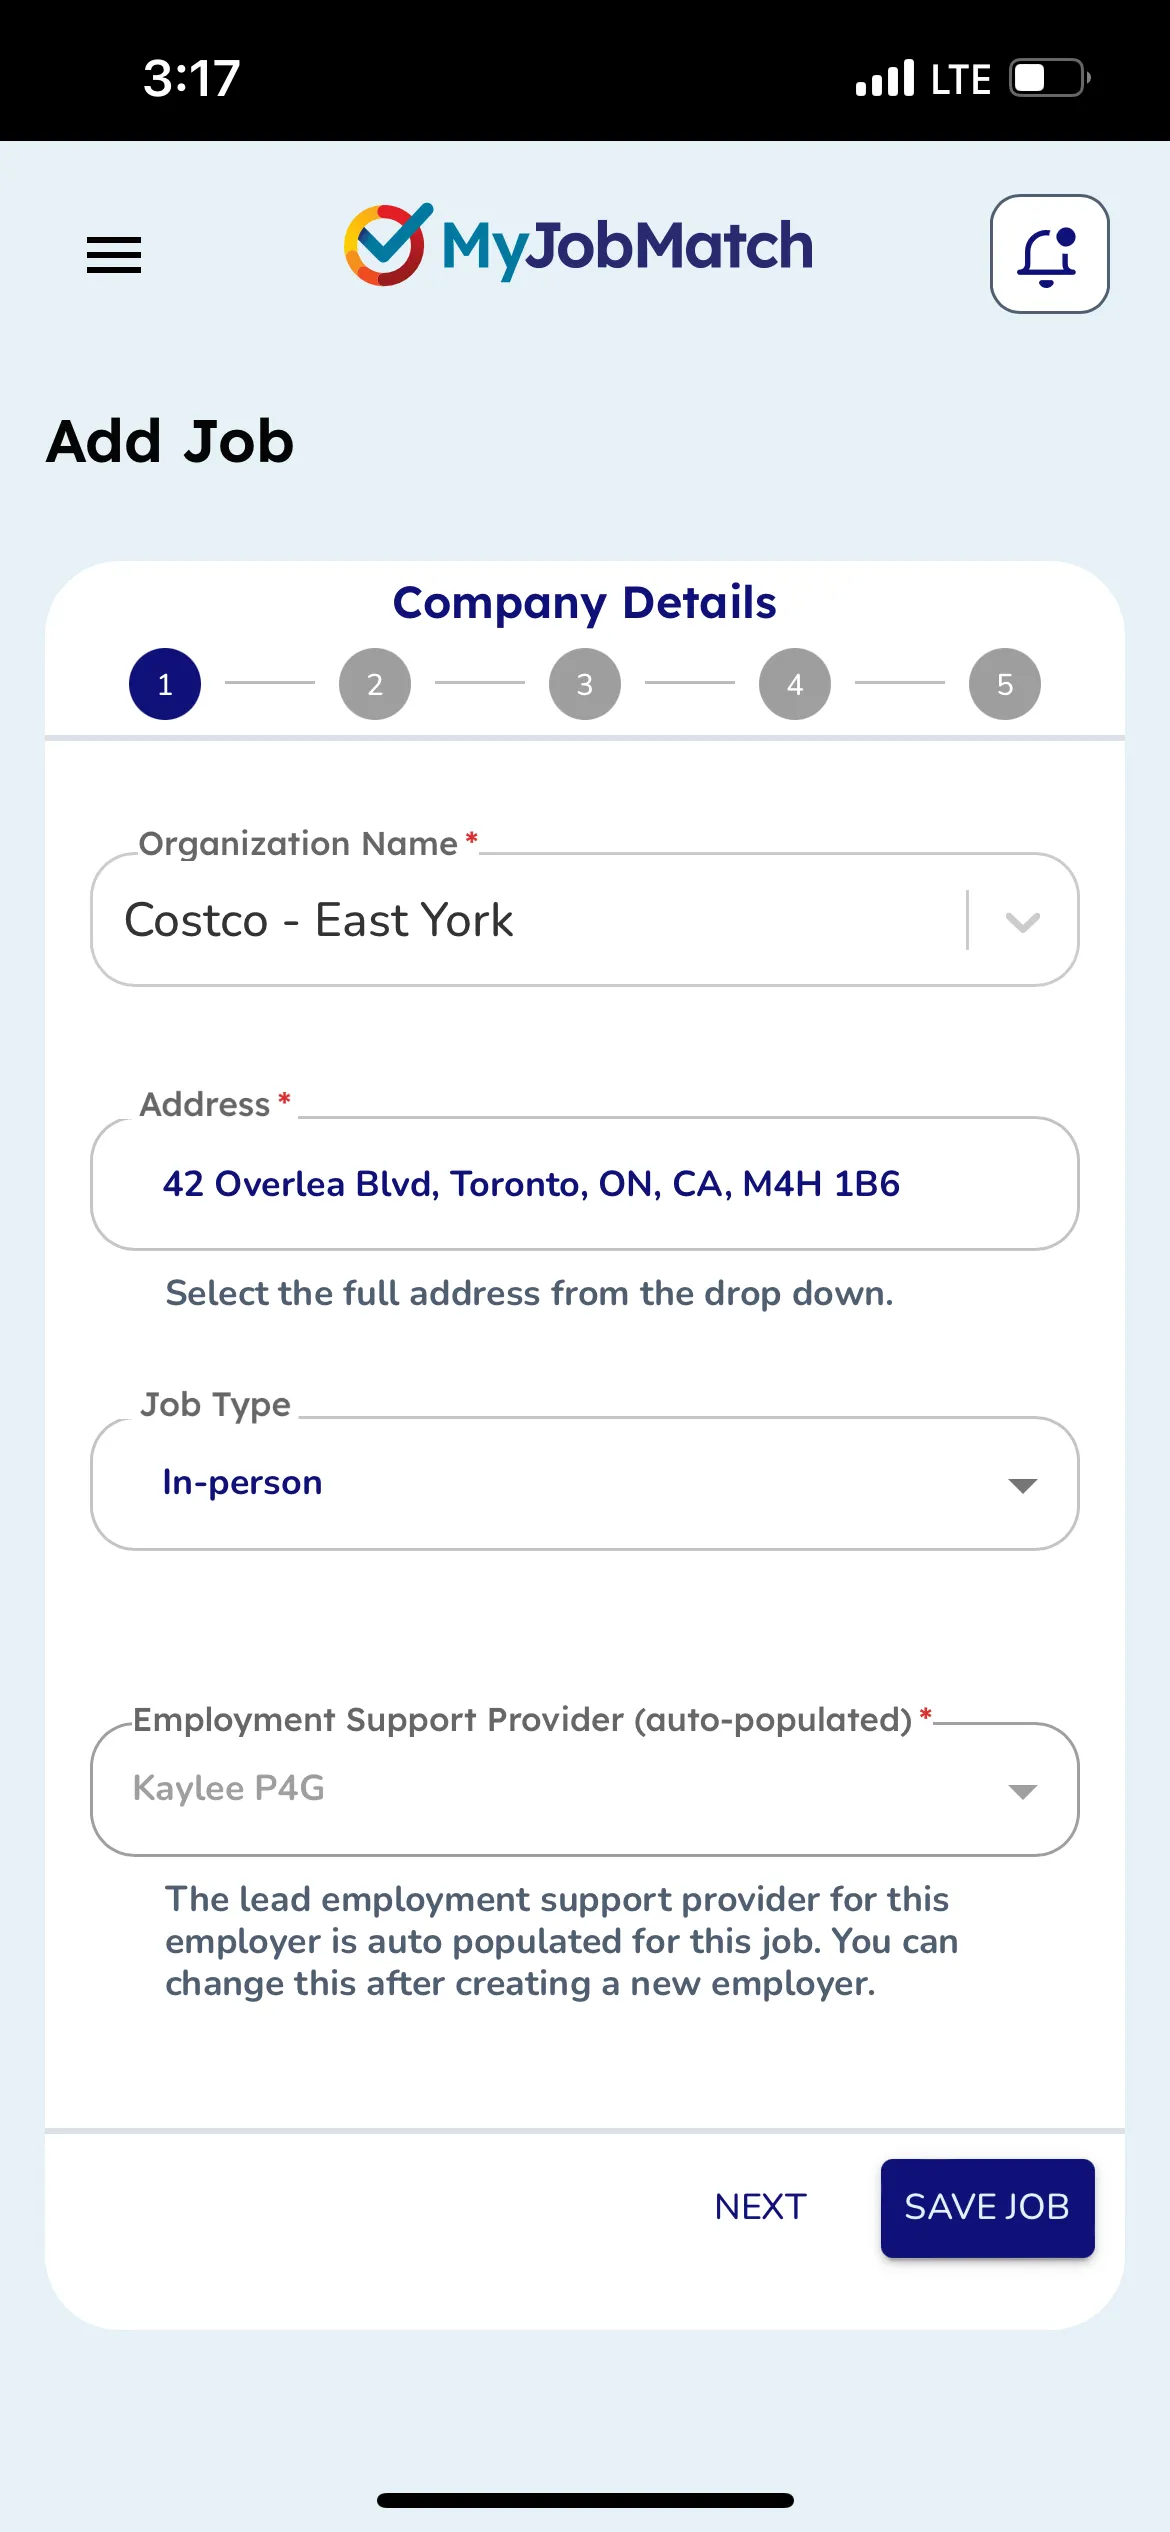
Start by choosing the Organization associated to this job from the drop down list. If you do not see the organization, you will need to add it via the Employer page (see Employer section for 'how to').
Identify if the job is Open or Closed, and if it's In-person, Remote or Hybrid. Hybrid means it offers both in-person and/or remote.
As you type the address, a drop down will appear with address options. Choose the correct address.
The Employment Support Provider will auto-populate with your name. If you need this name to be changed, please contact your MyJobMatch administrator.
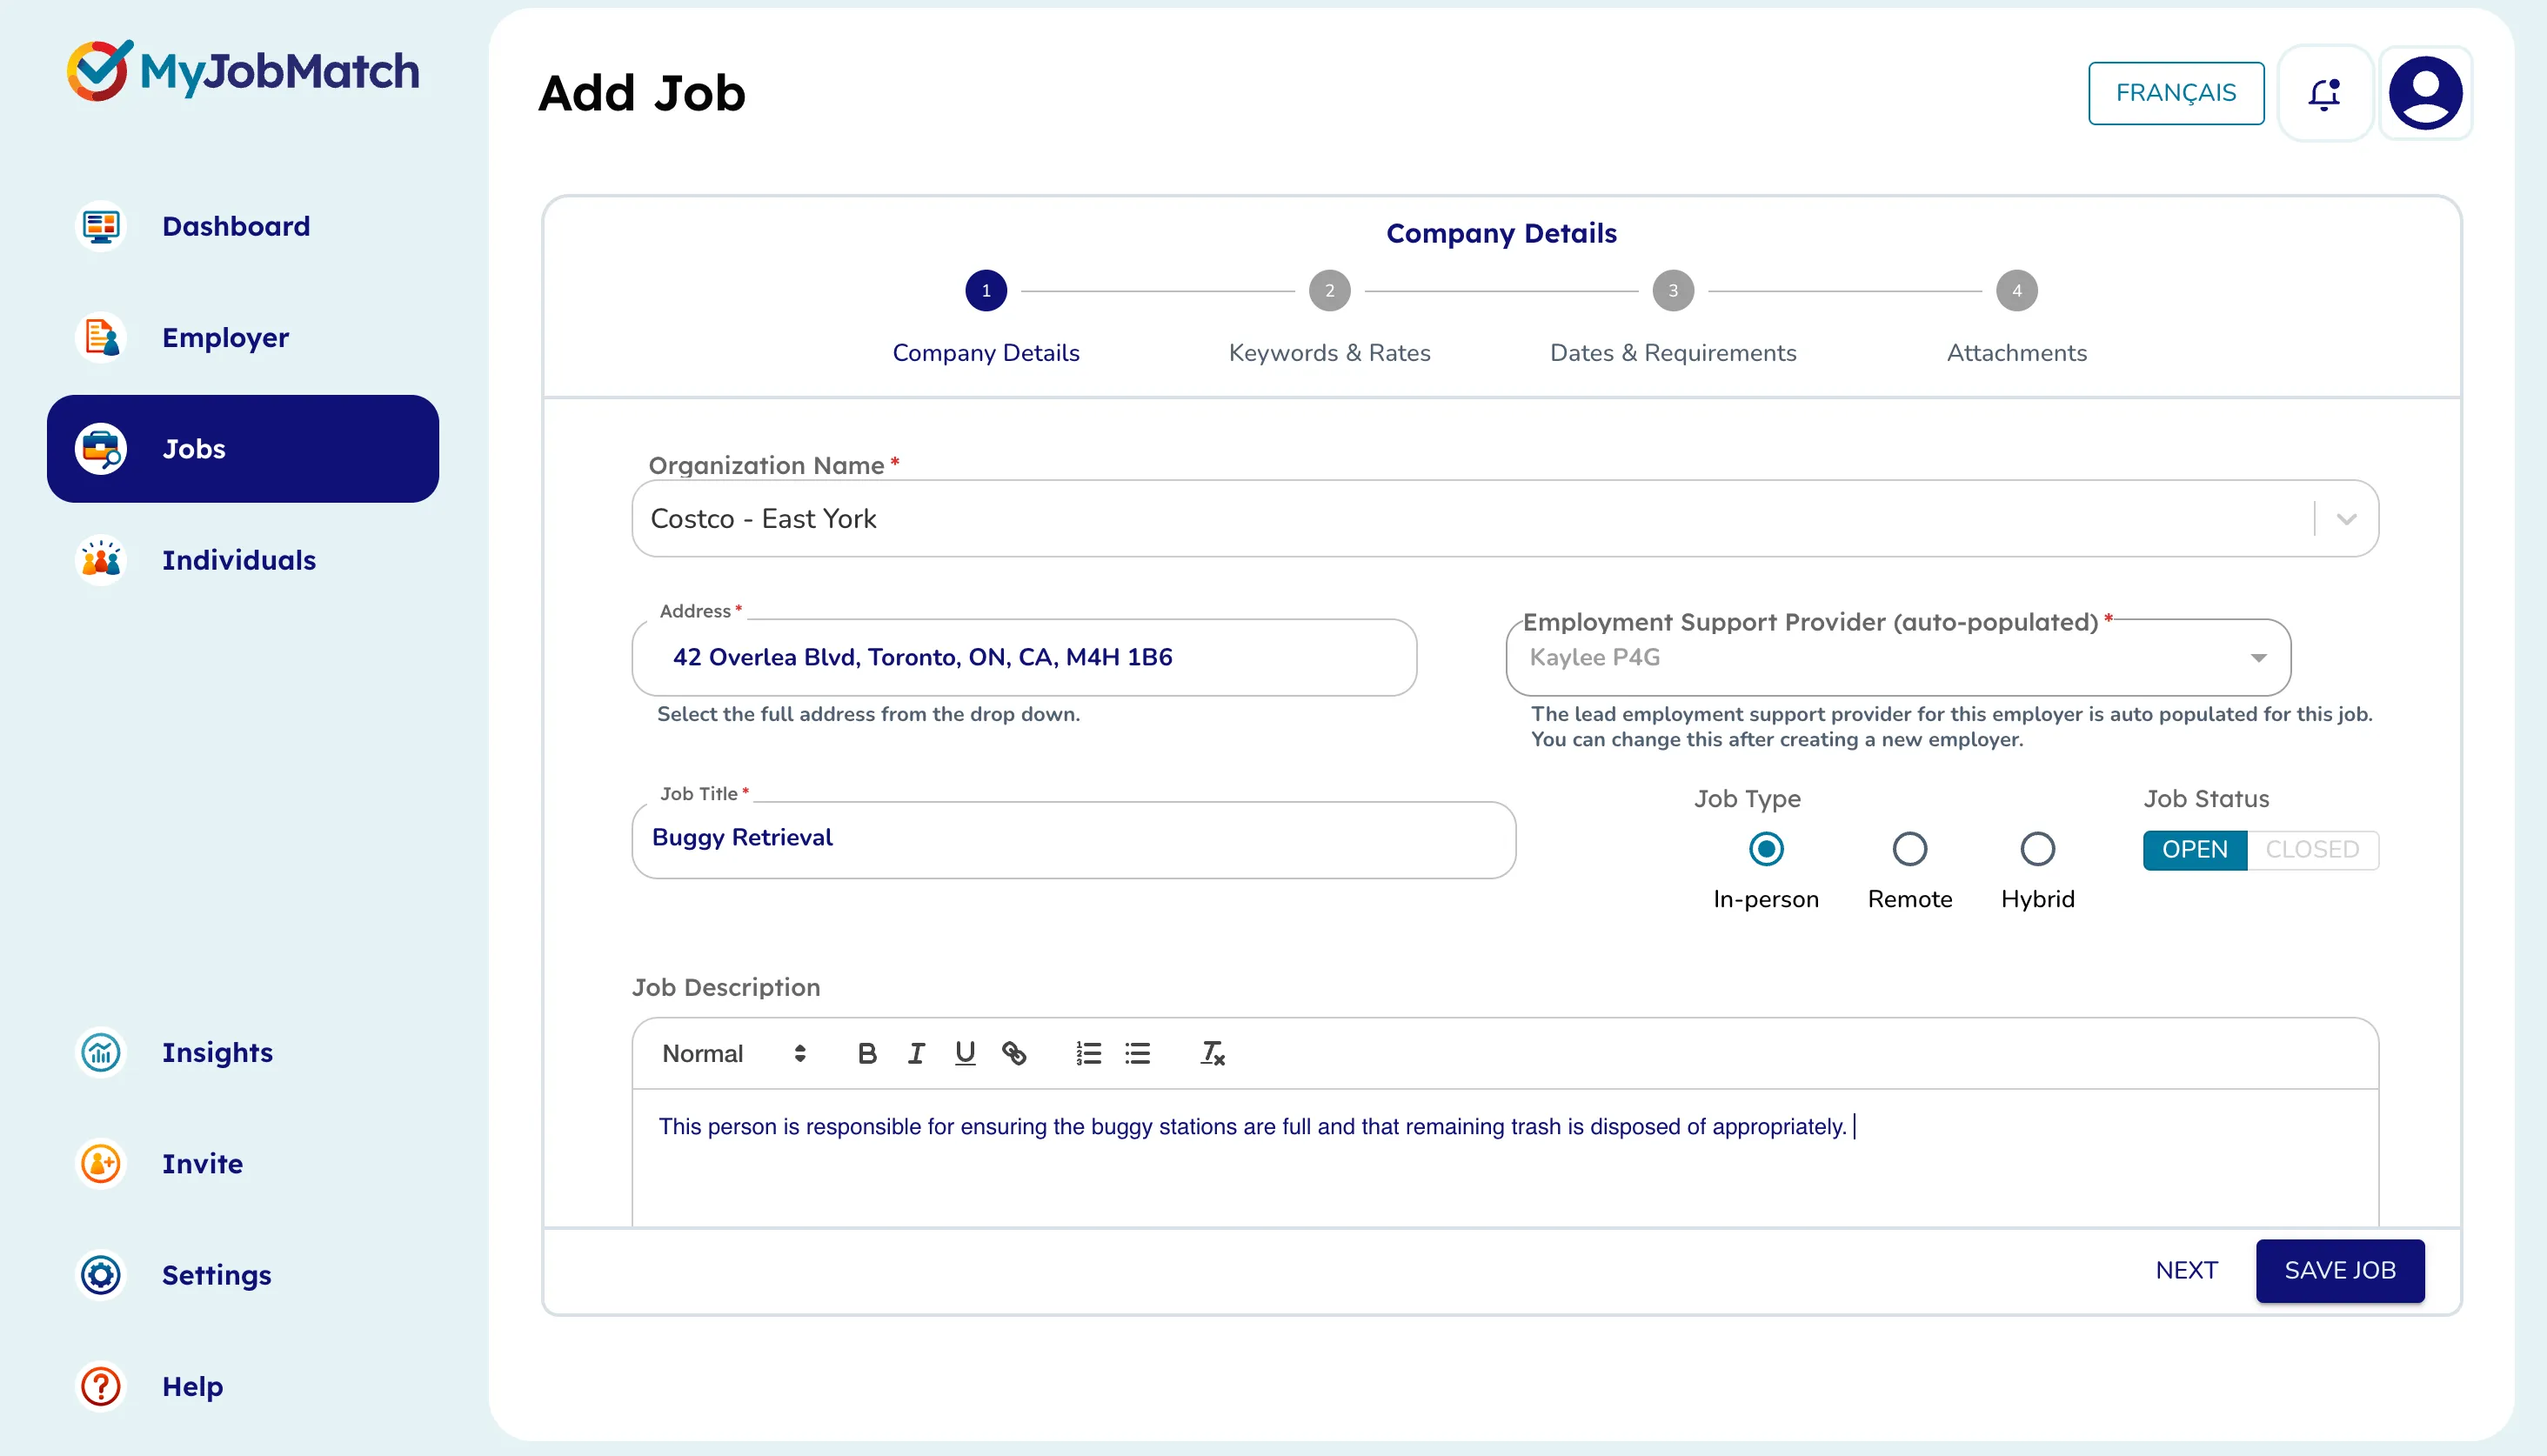
Add in the Job Title and a brief Job Description. Include details that are key to the job that your colleagues should know. You will be able to upload a full job description if you choose to later.
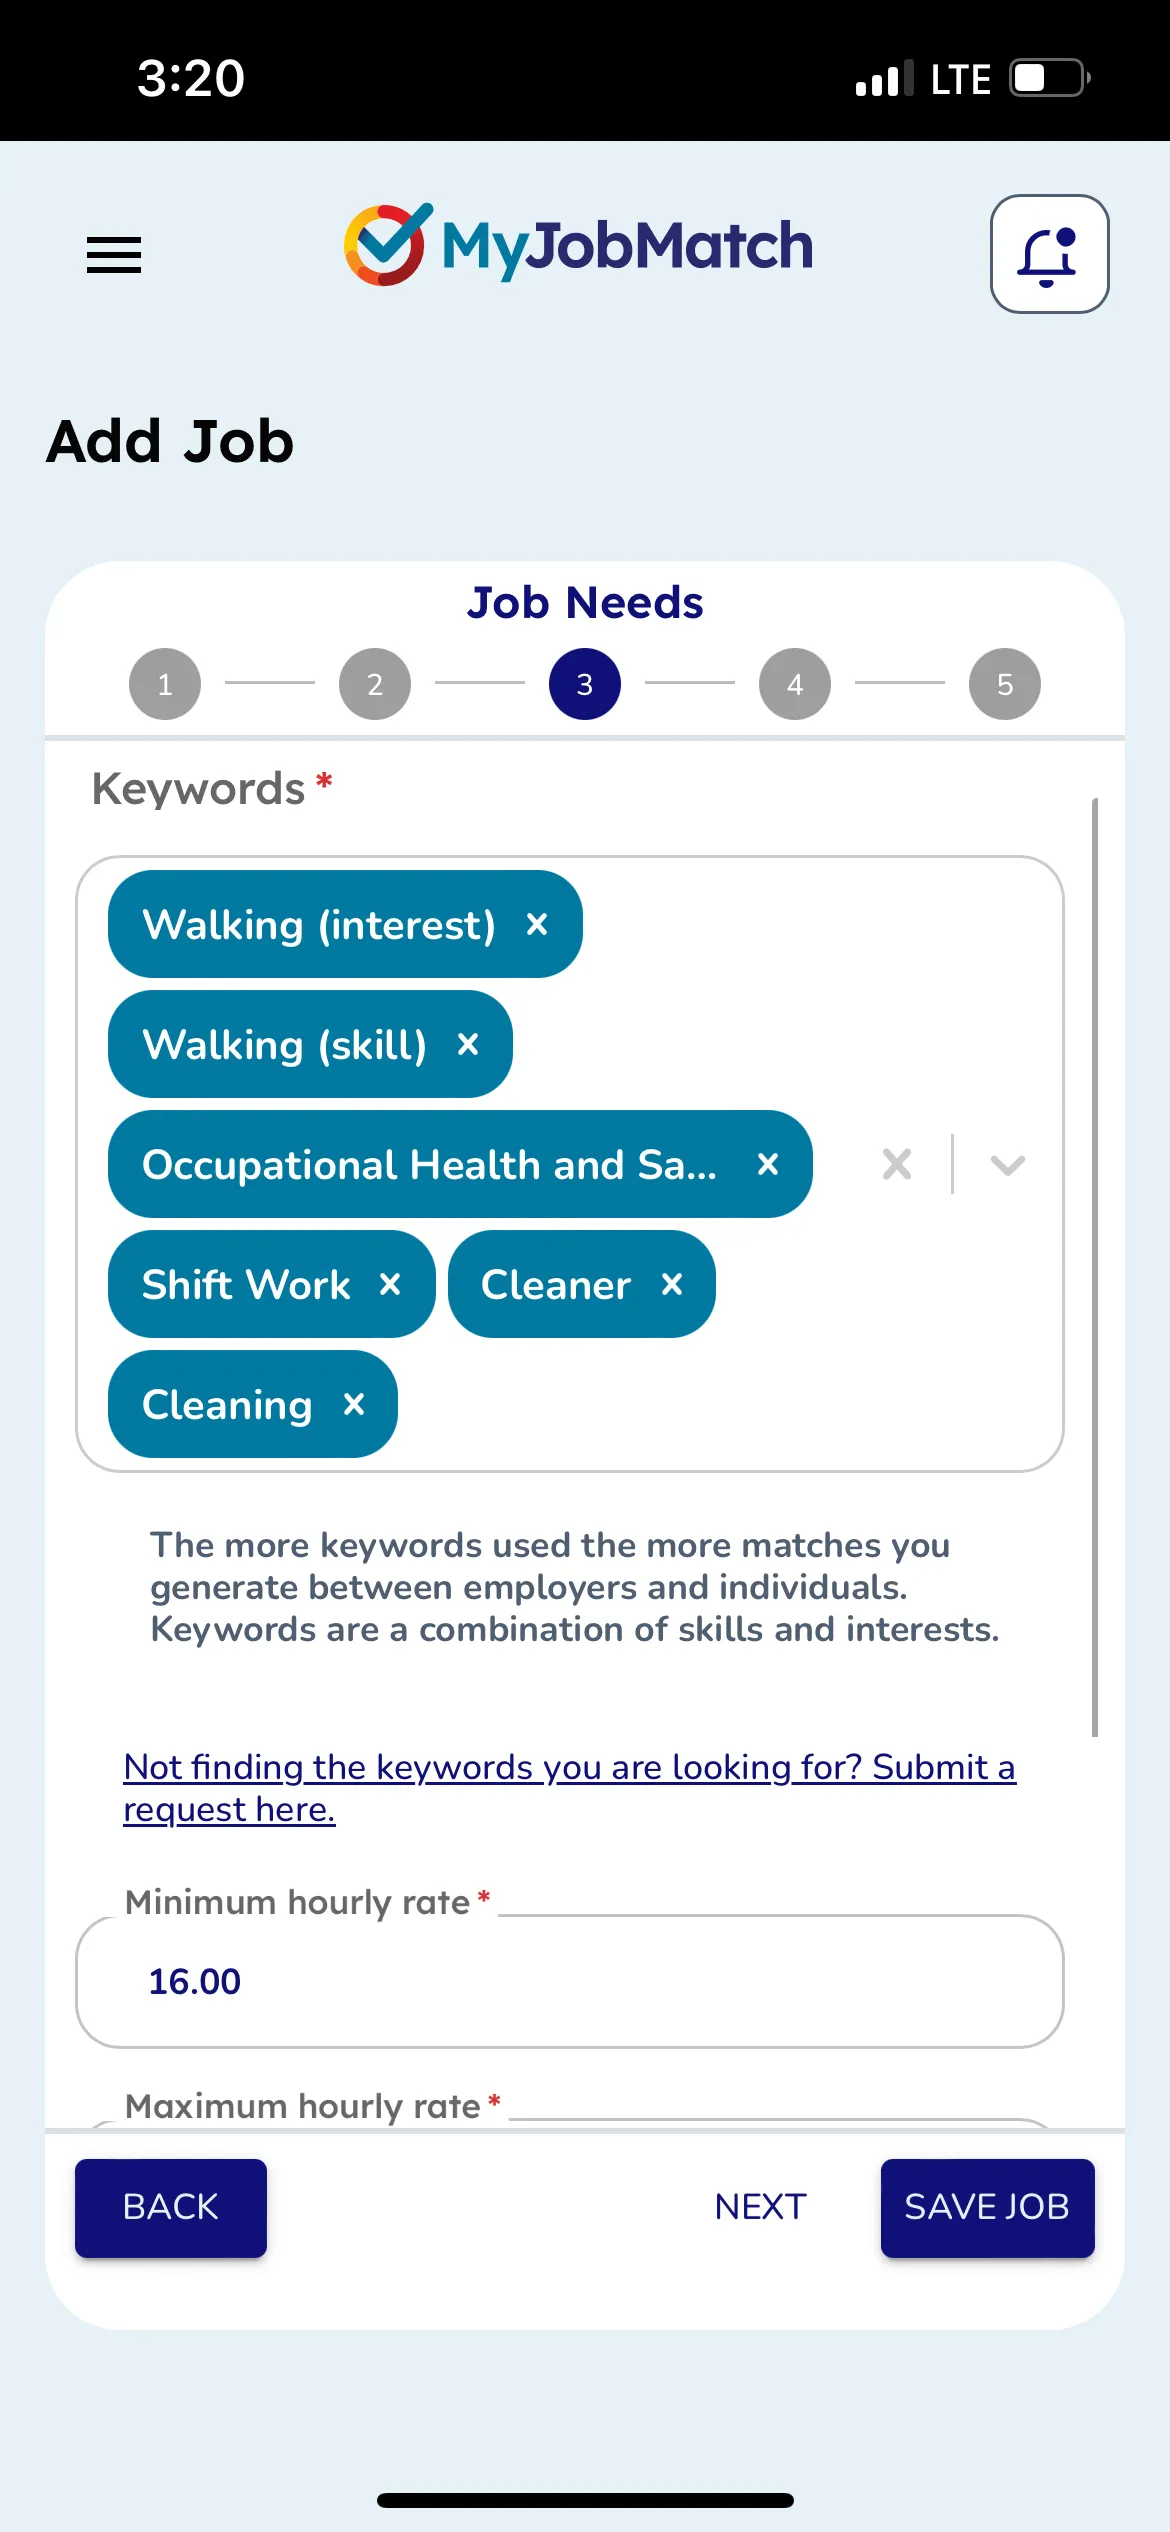
Identify keywords associated to the job. If a keyword has 'interest' or 'skill' in brackets, choose the one that is most appropriate for the job OR both. Remember the more keywords the more matches you will create.
If there is anything additional for skills or interests that wasn't available in keywords, include them in the skills and interests free-form field. Please note these are not factored into Matches.
Identify the minimum and maximum hourly rate.
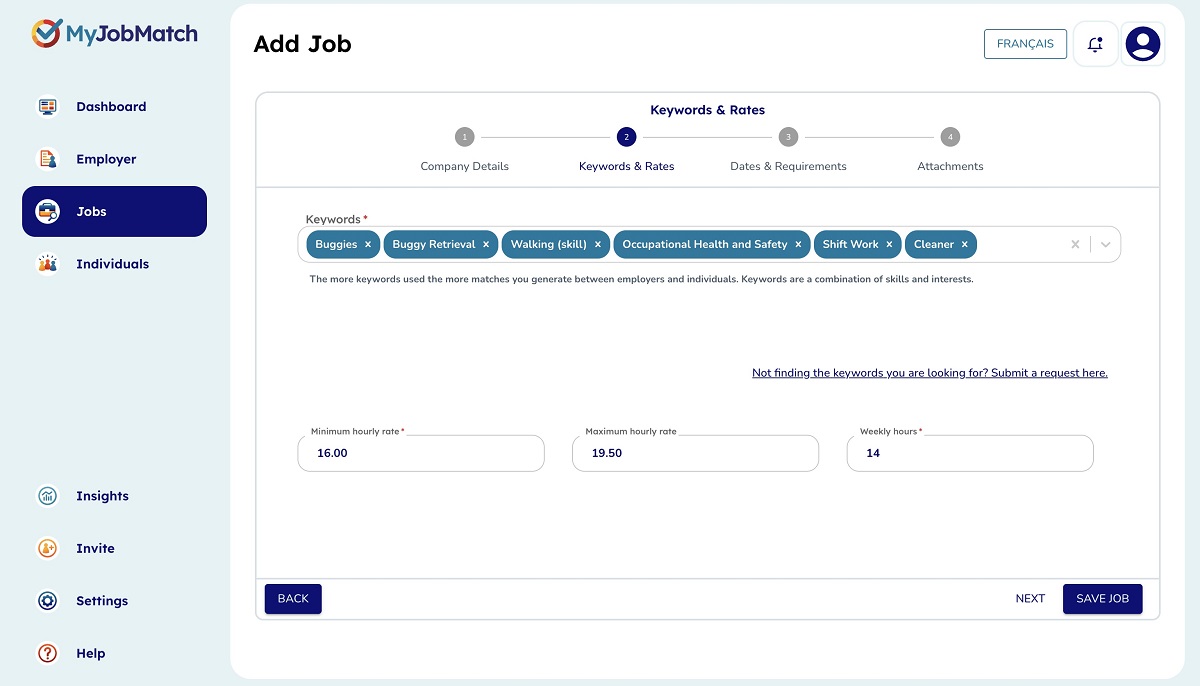
Identify the total number of weekly hours that are available for the job.
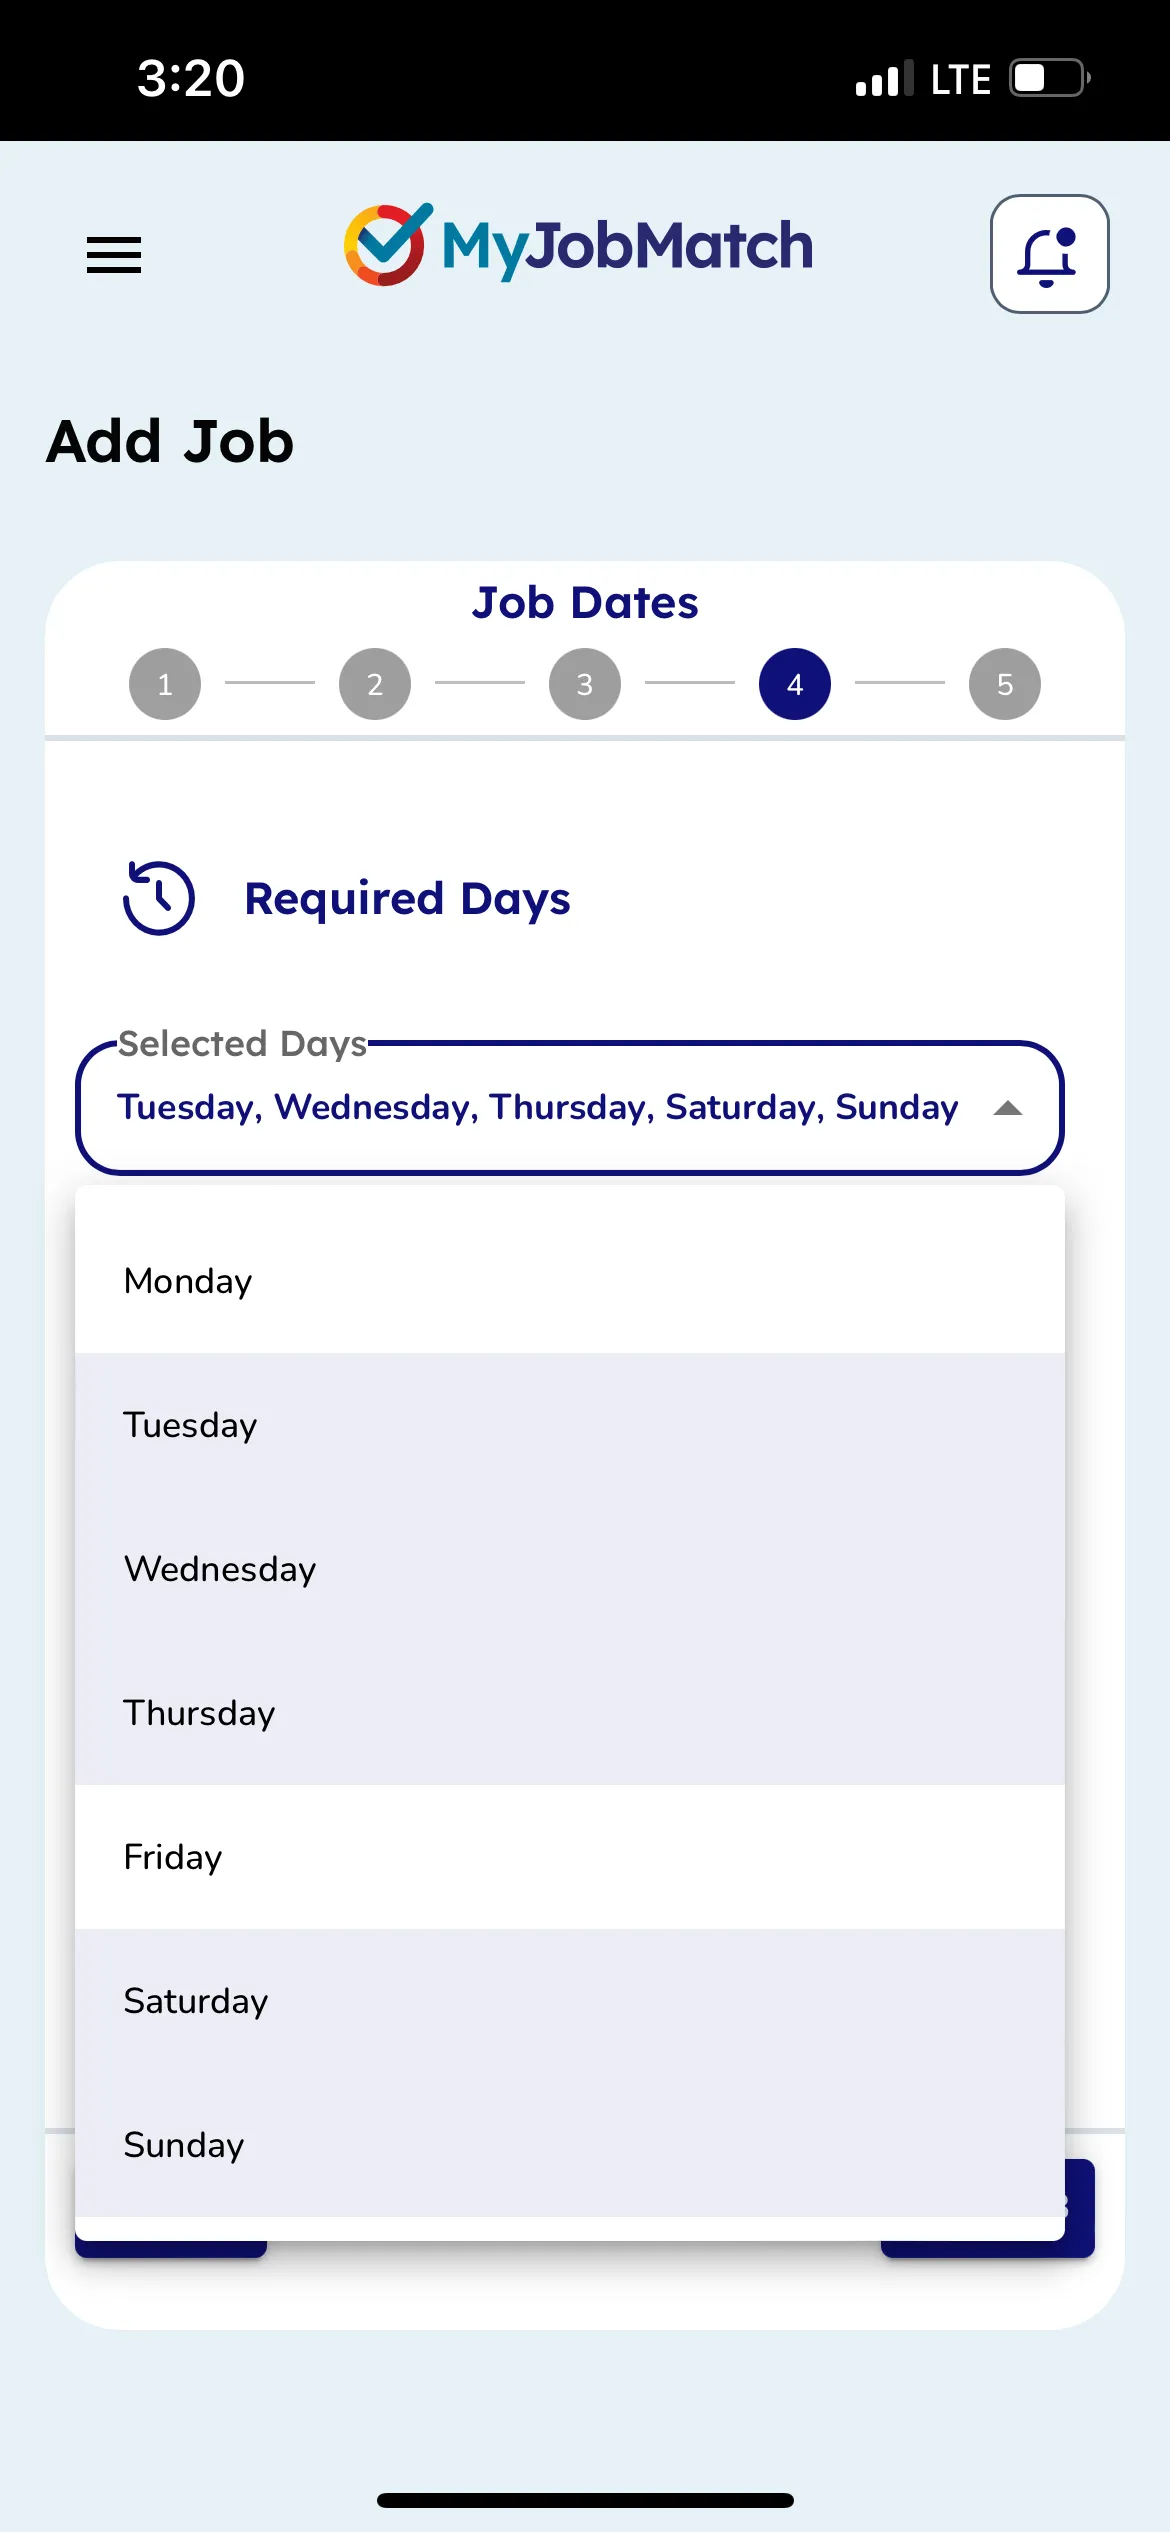
Then select the Required or Applicable Days of the week that are available.
If all are available, click all.
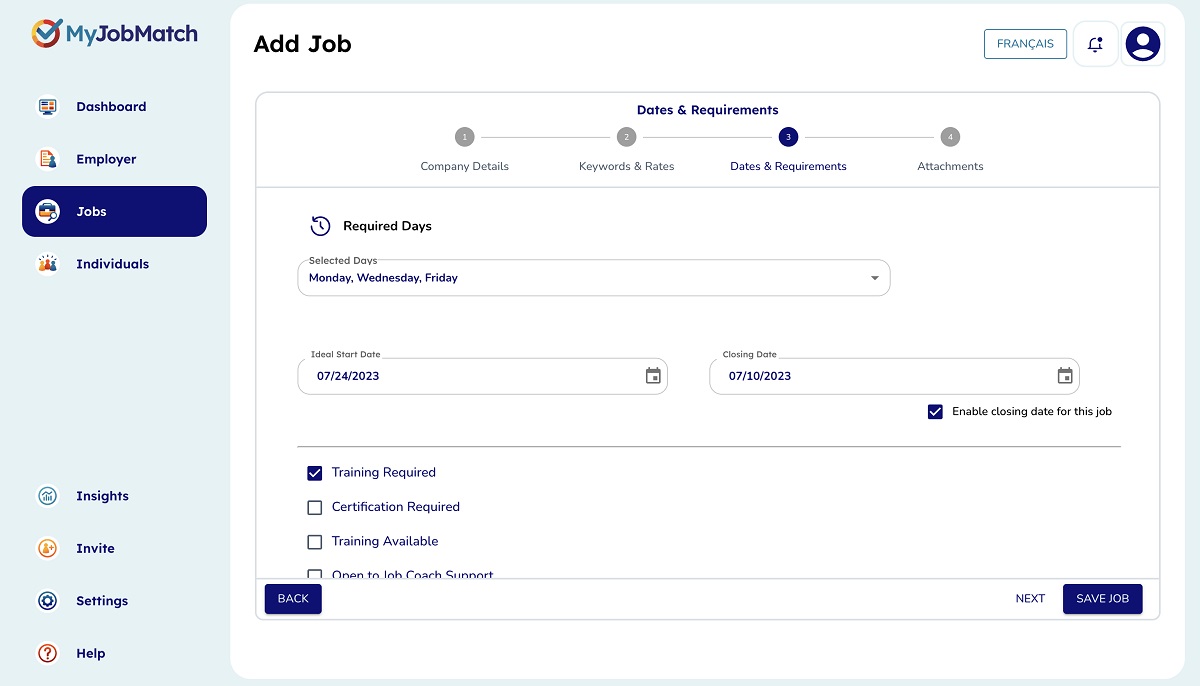
Identify the Ideal Start and Closing Date. If there is no closing date, remove the check mark from Enable Closing Date.
Select any of the Training or Certifications options that apply for this job.
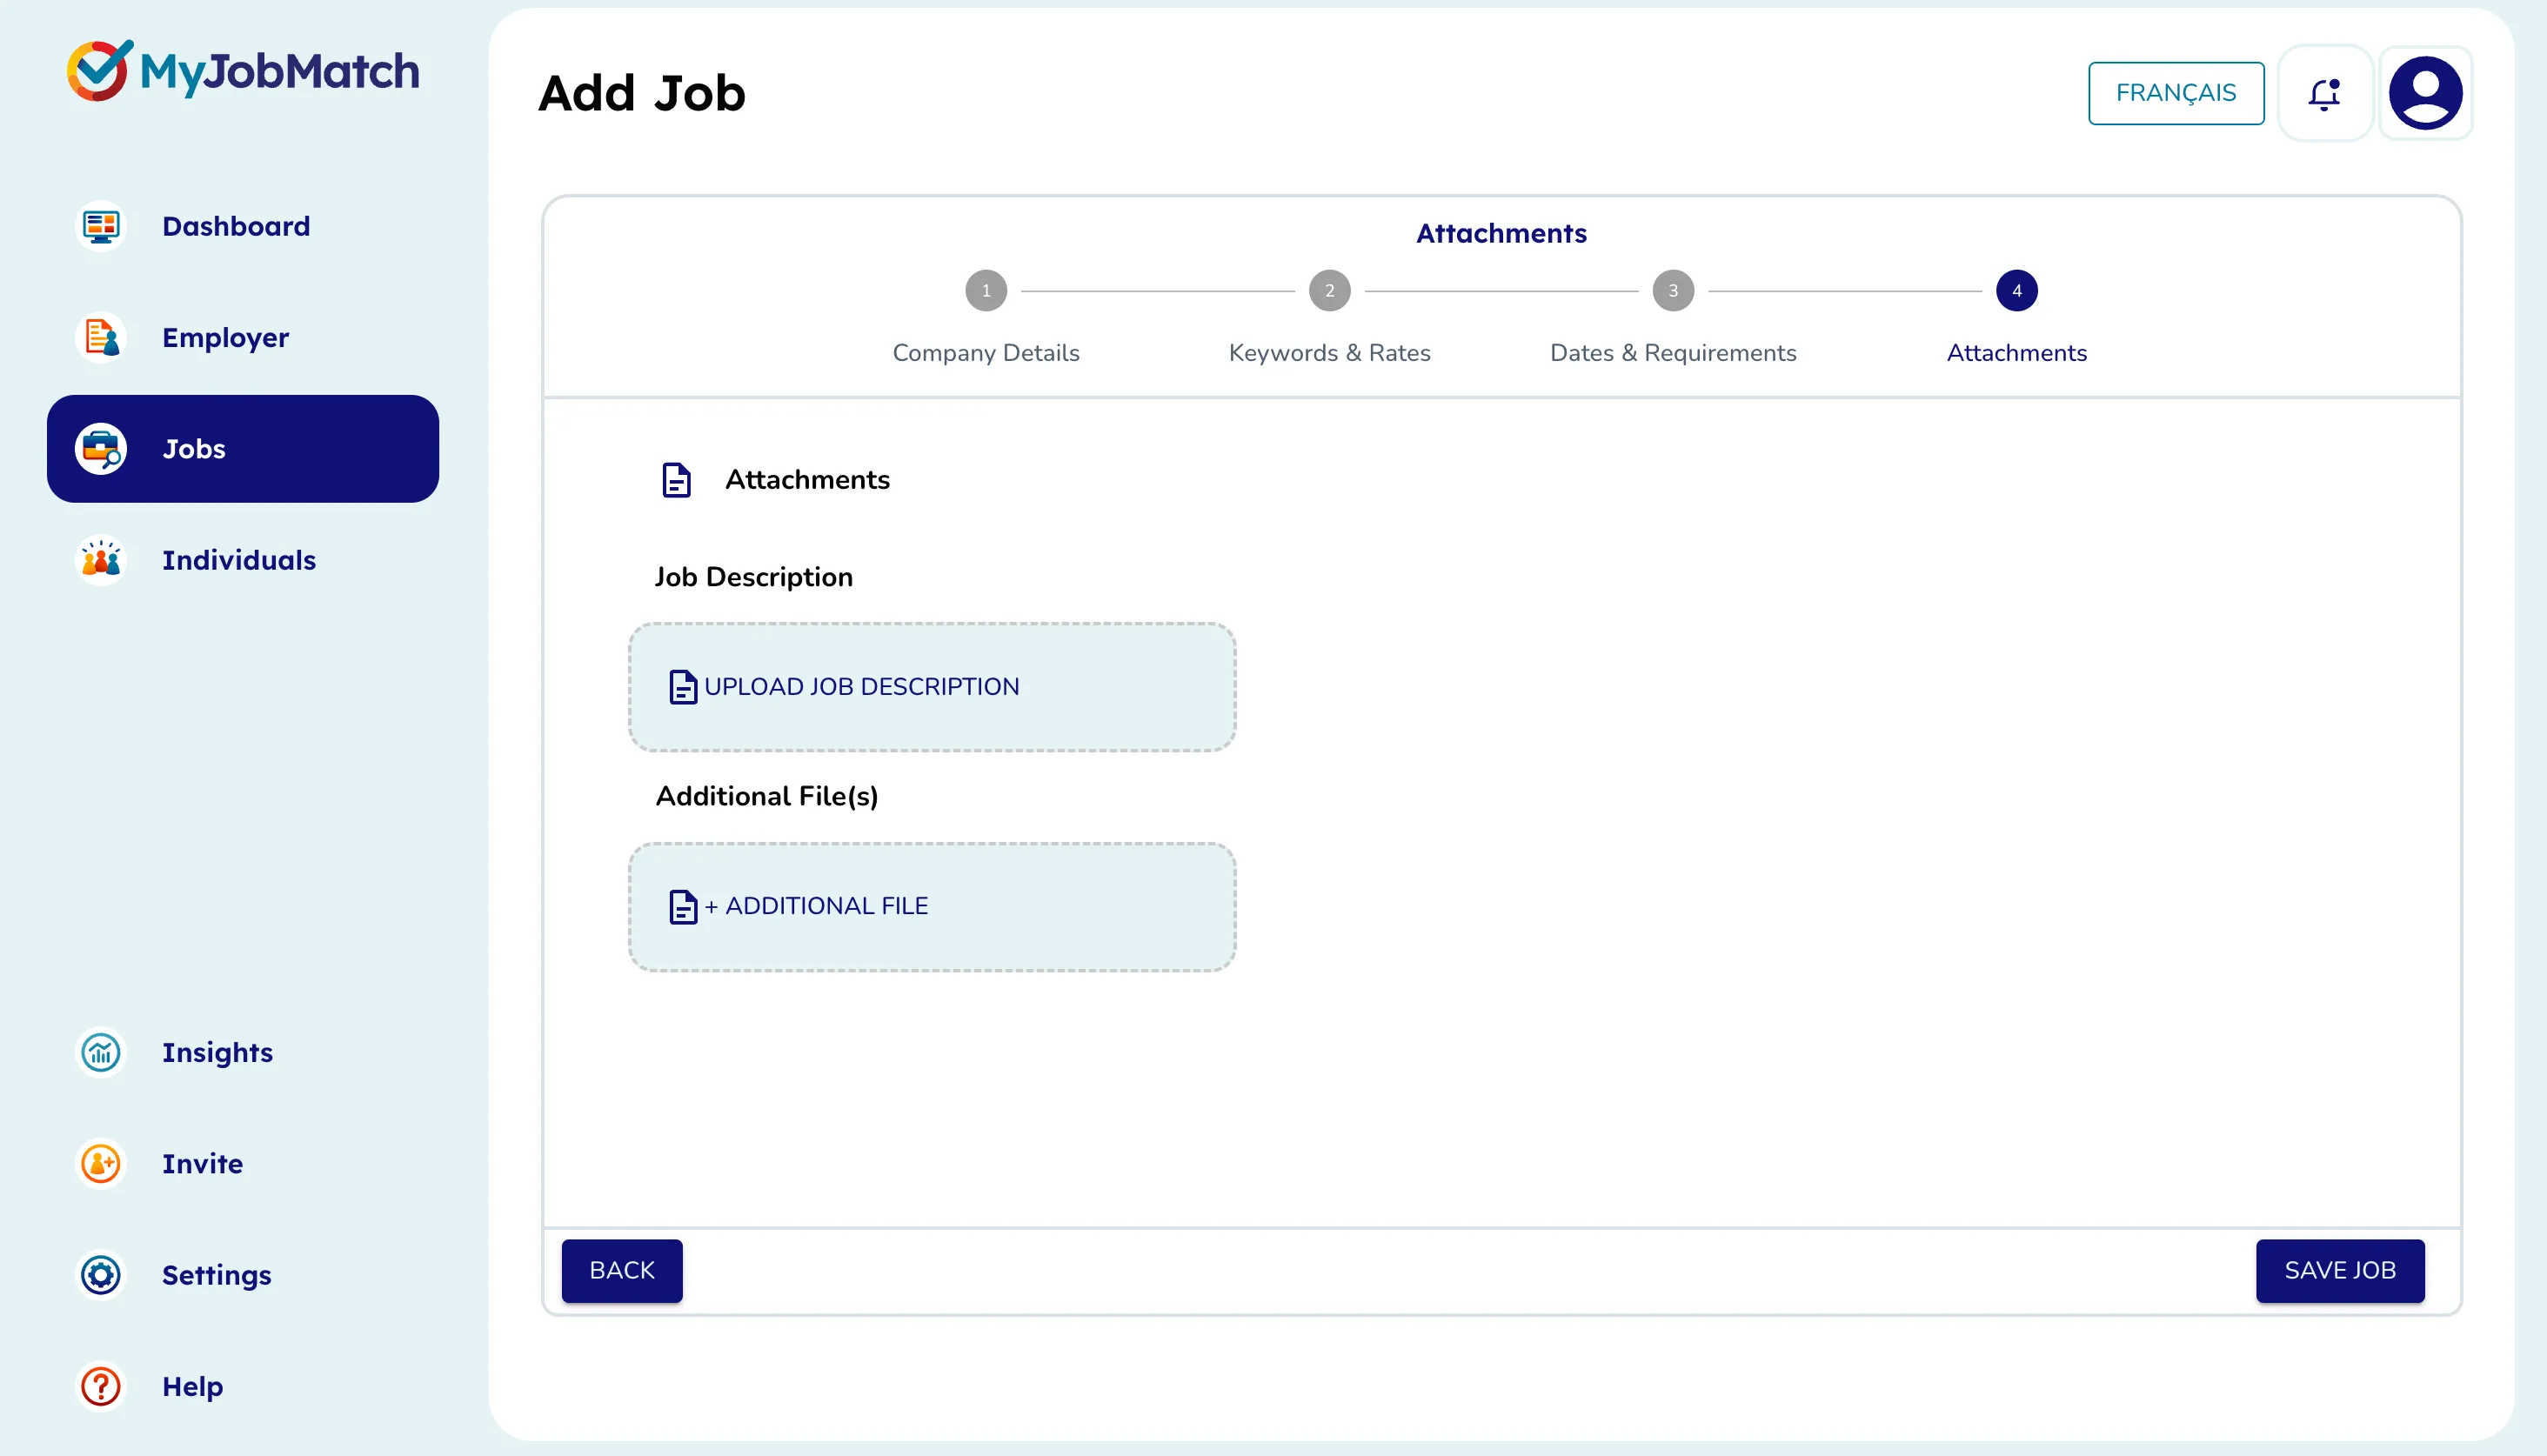
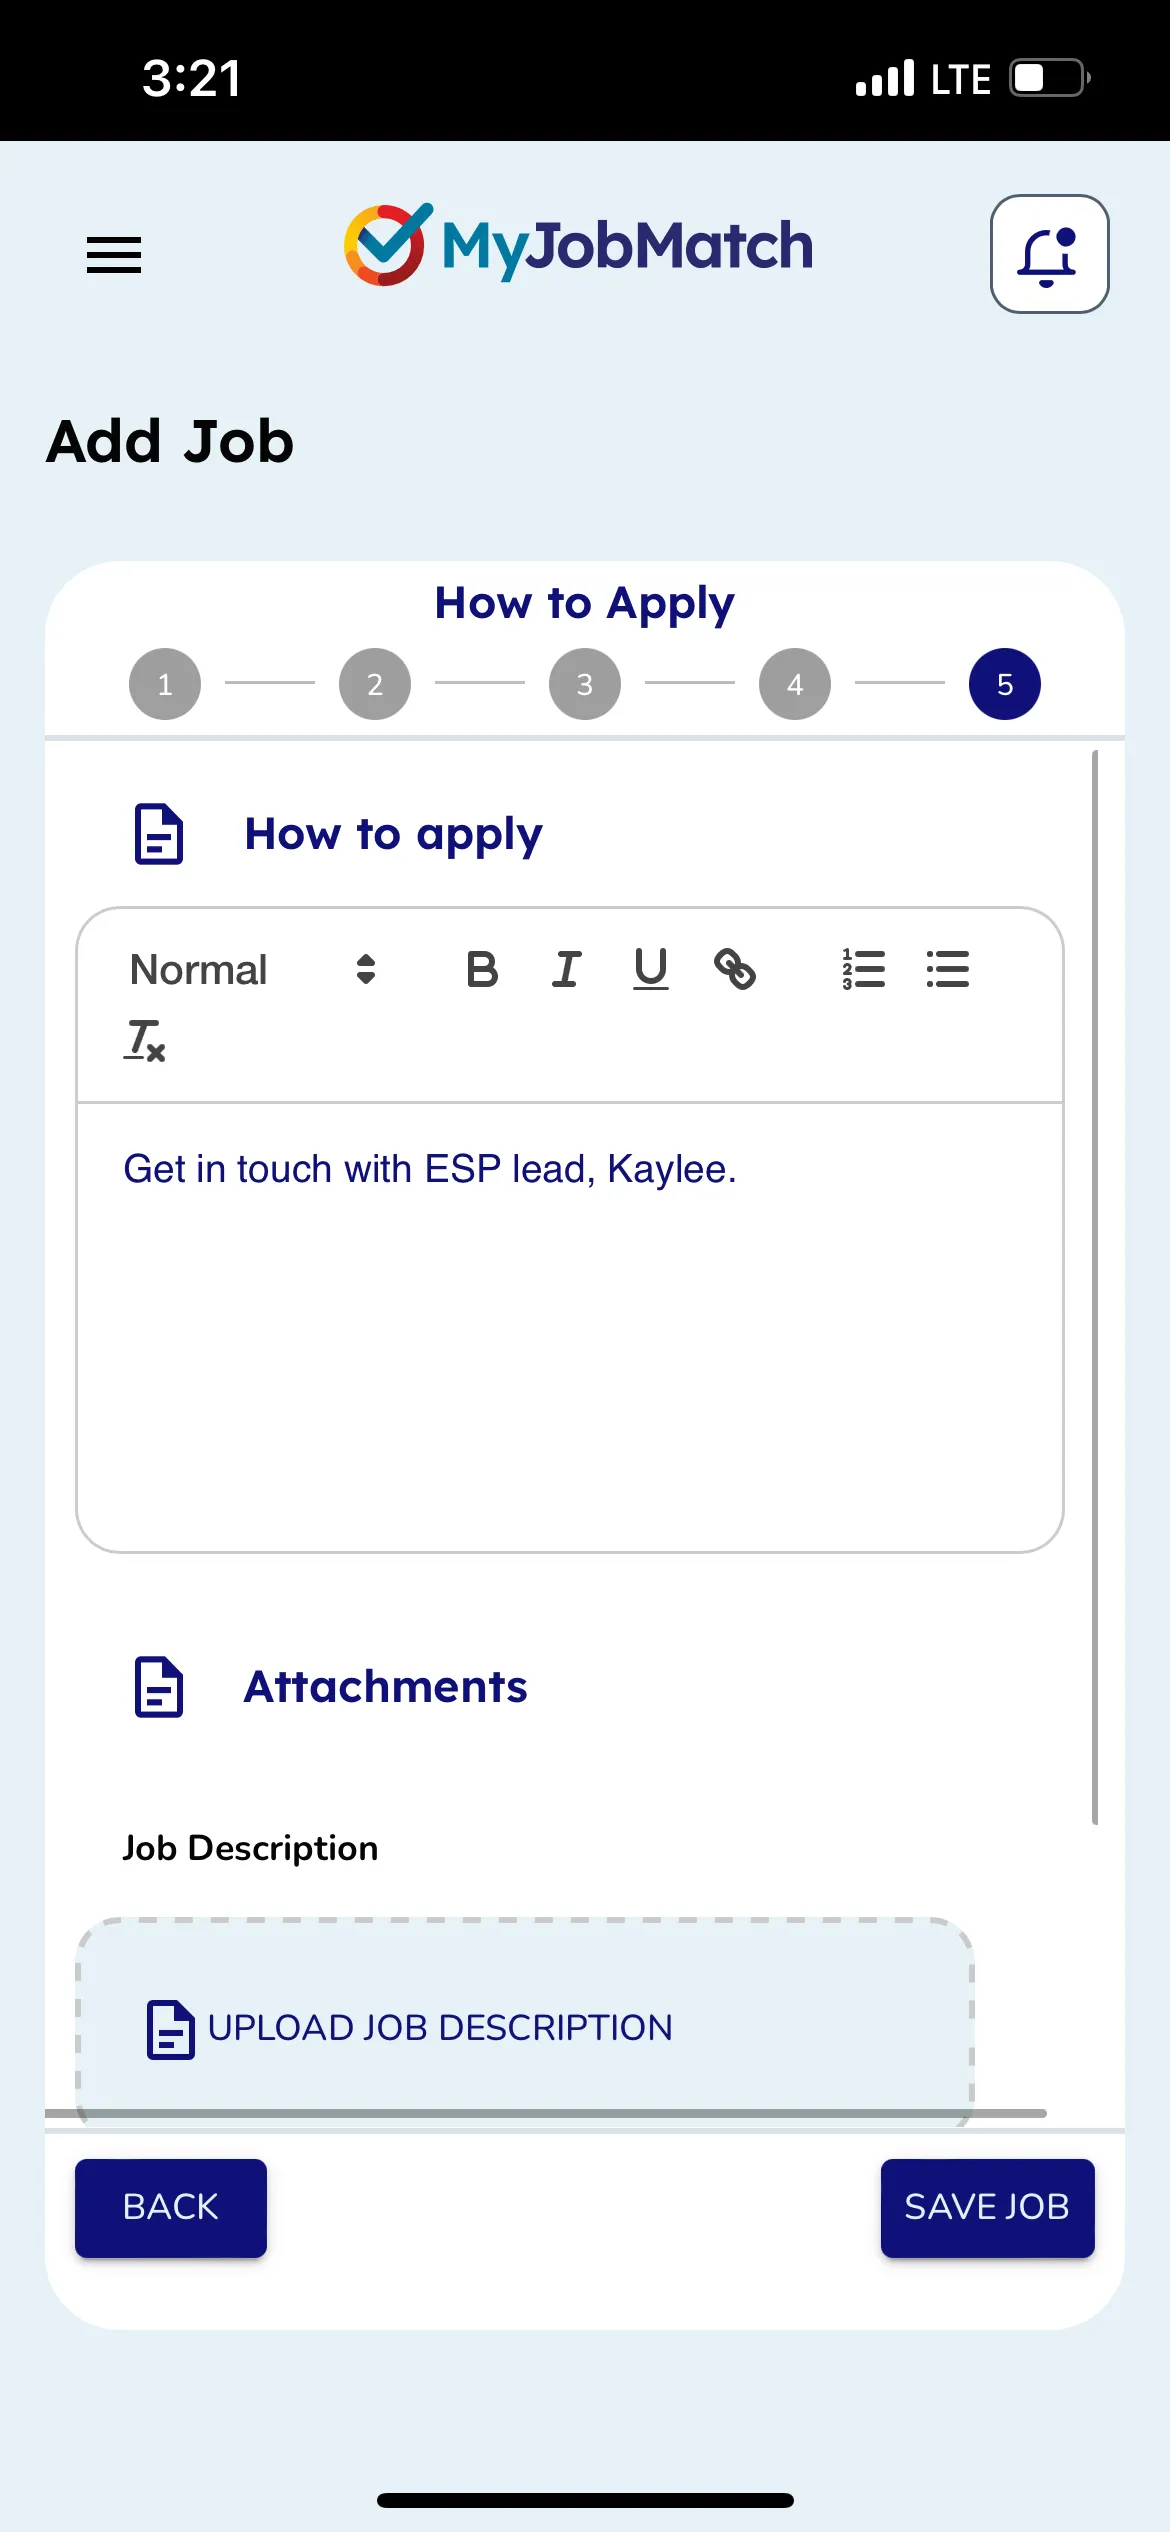
In How to Apply let other Employment Support Providers know how to apply for this job. Ex. In most cases we recommend they get in touch with the lead ESP. If the Employer prefers people to apply directly, let the ESP providers know where and how to apply.
When the required fields are complete, select Save Job.
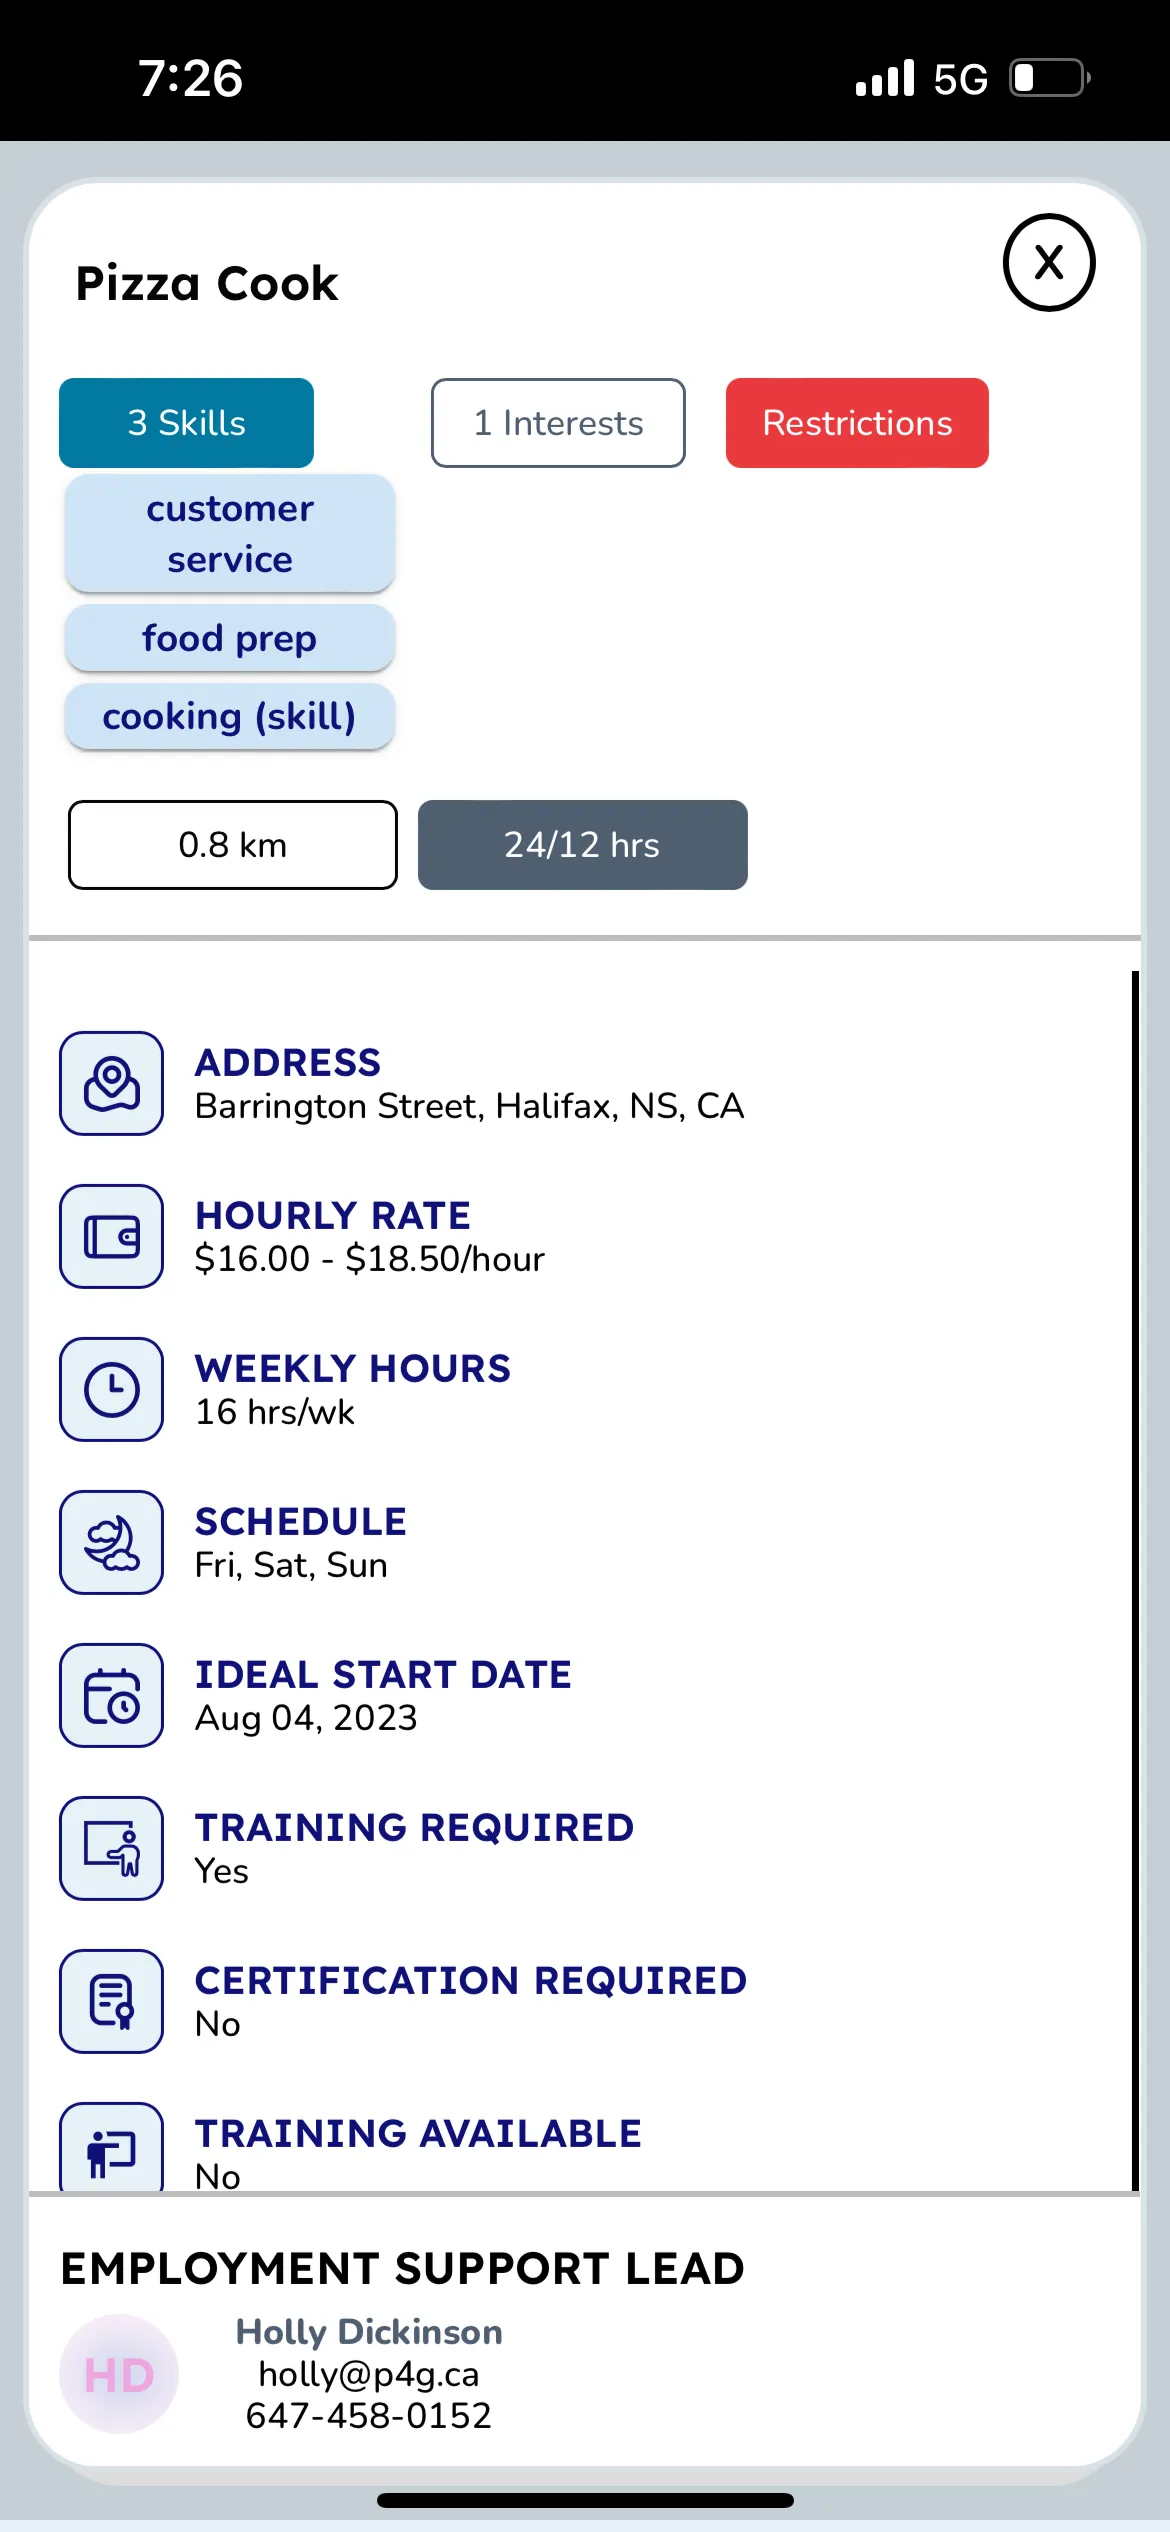
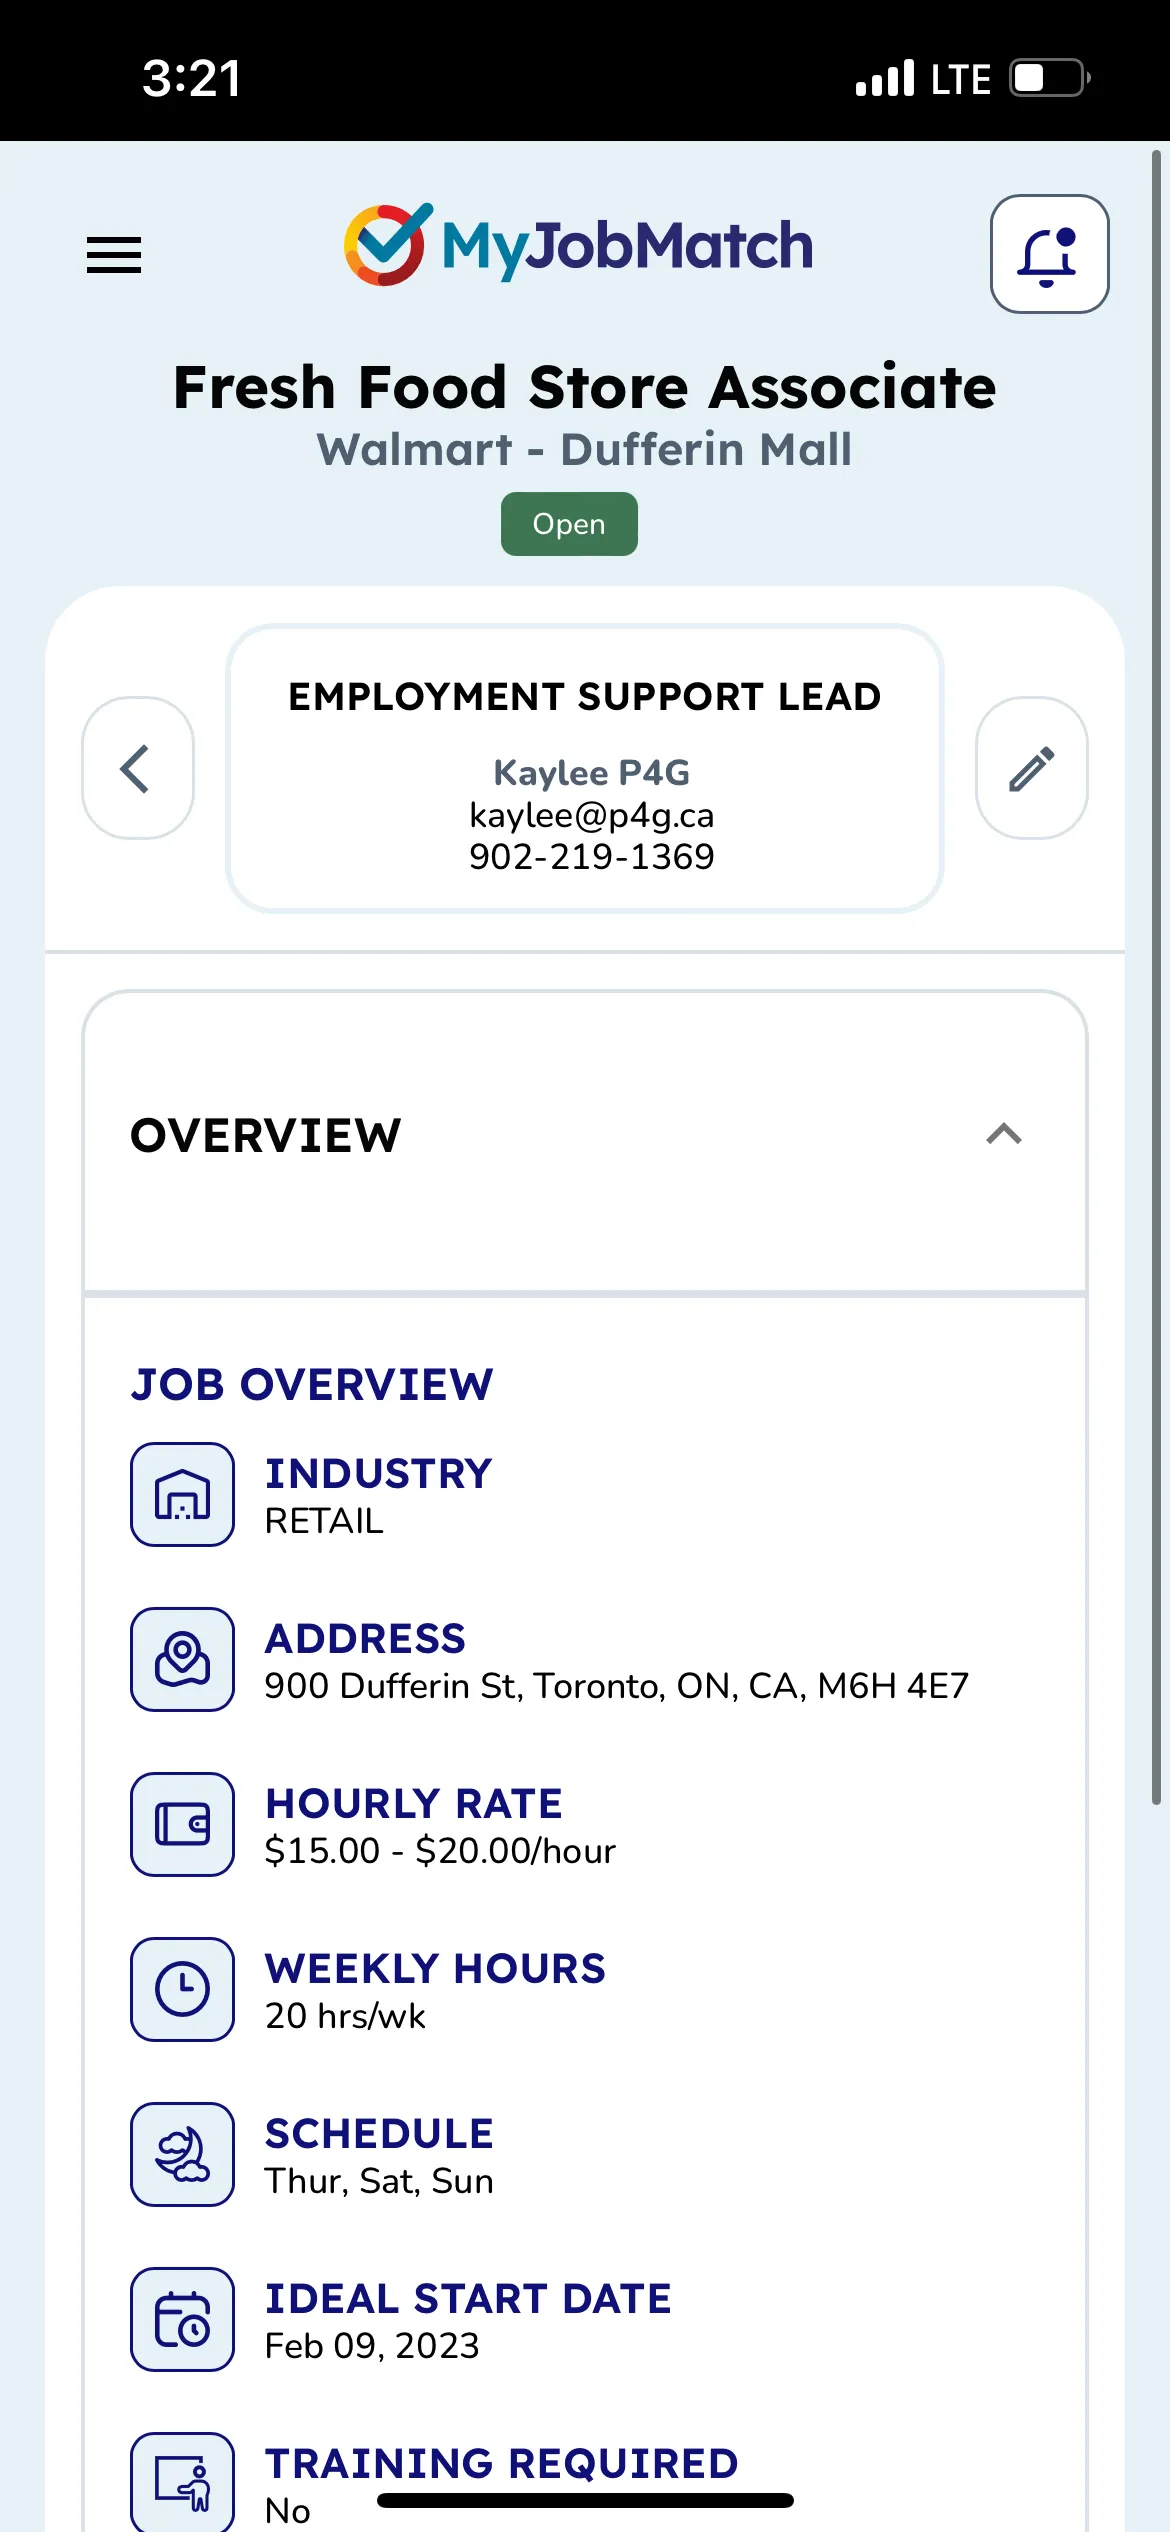
Job Profile
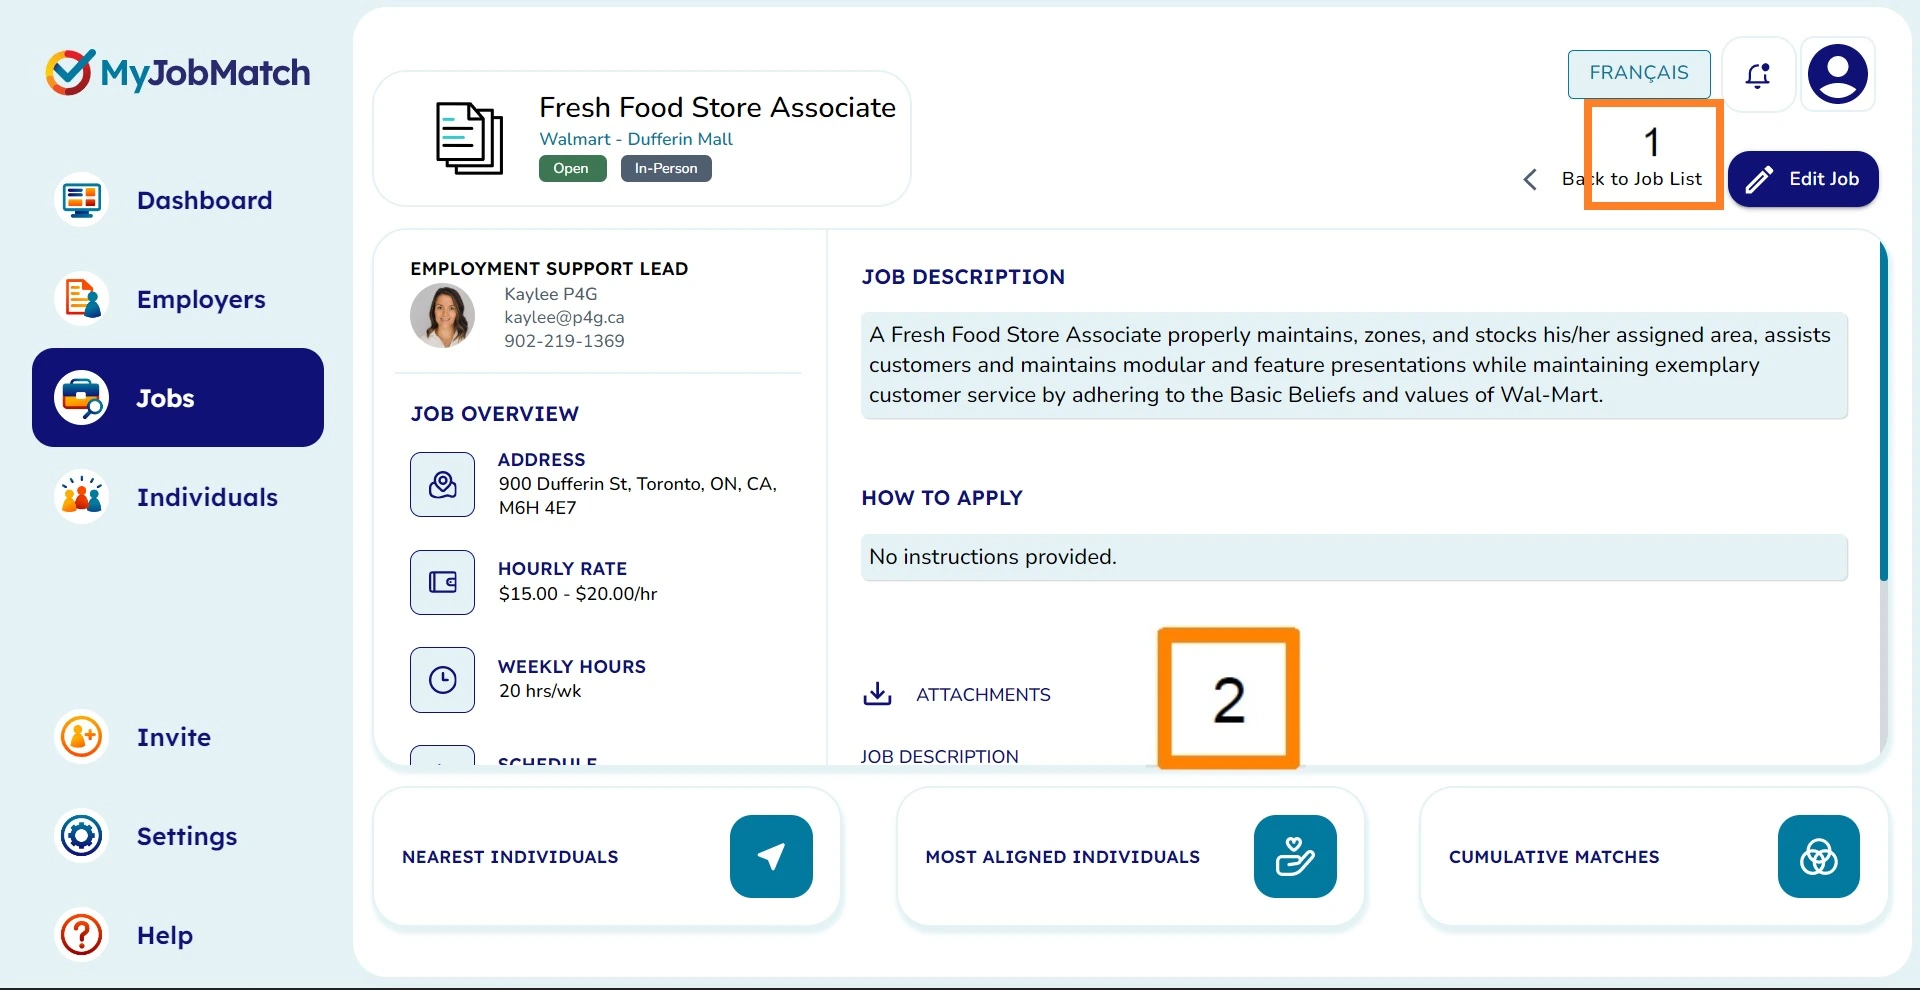
Now that you have saved your Job click View Job to see the full profile.
From this view, you can Edit Job details (1) information or check out the Matches for this Job (2).
Edit Job will allow you to go back to the previous view to edit/update information about the Job.
Matches will be covered further in the Recommender section of this document. Please note, when you choose matches from the Job view, it will identify Individuals who are Recommended based on this Job.
Job Matches
Please note:
When you choose matches from the Job profile view, it will identify Individuals who are Recommended to this Job.
You will only see Individuals who are associated with your agency account. You will not see Individuals from other agencies.
Matches will be covered further in the Recommender section of this document.

Individuals
Important Privacy and Health Information
Privacy
It's important to note that all information stored on Individuals in MyJobMatch is kept confidential to that agency account/database.
No other agency will be able to see individuals from your agency or vice versa. When looking for matches for Jobs or Employers, you will only ever see individuals who are associated to your agency and vice versa.
Health
Important to note, do not store any health information in the MyJobMatch database. This information should be stored in another secure platform at your agency. When there is health information relatable to an individual's job search, we encourage you to make a note on the individuals account that advises the Employment Solutions Provider to "see personal file for more information".
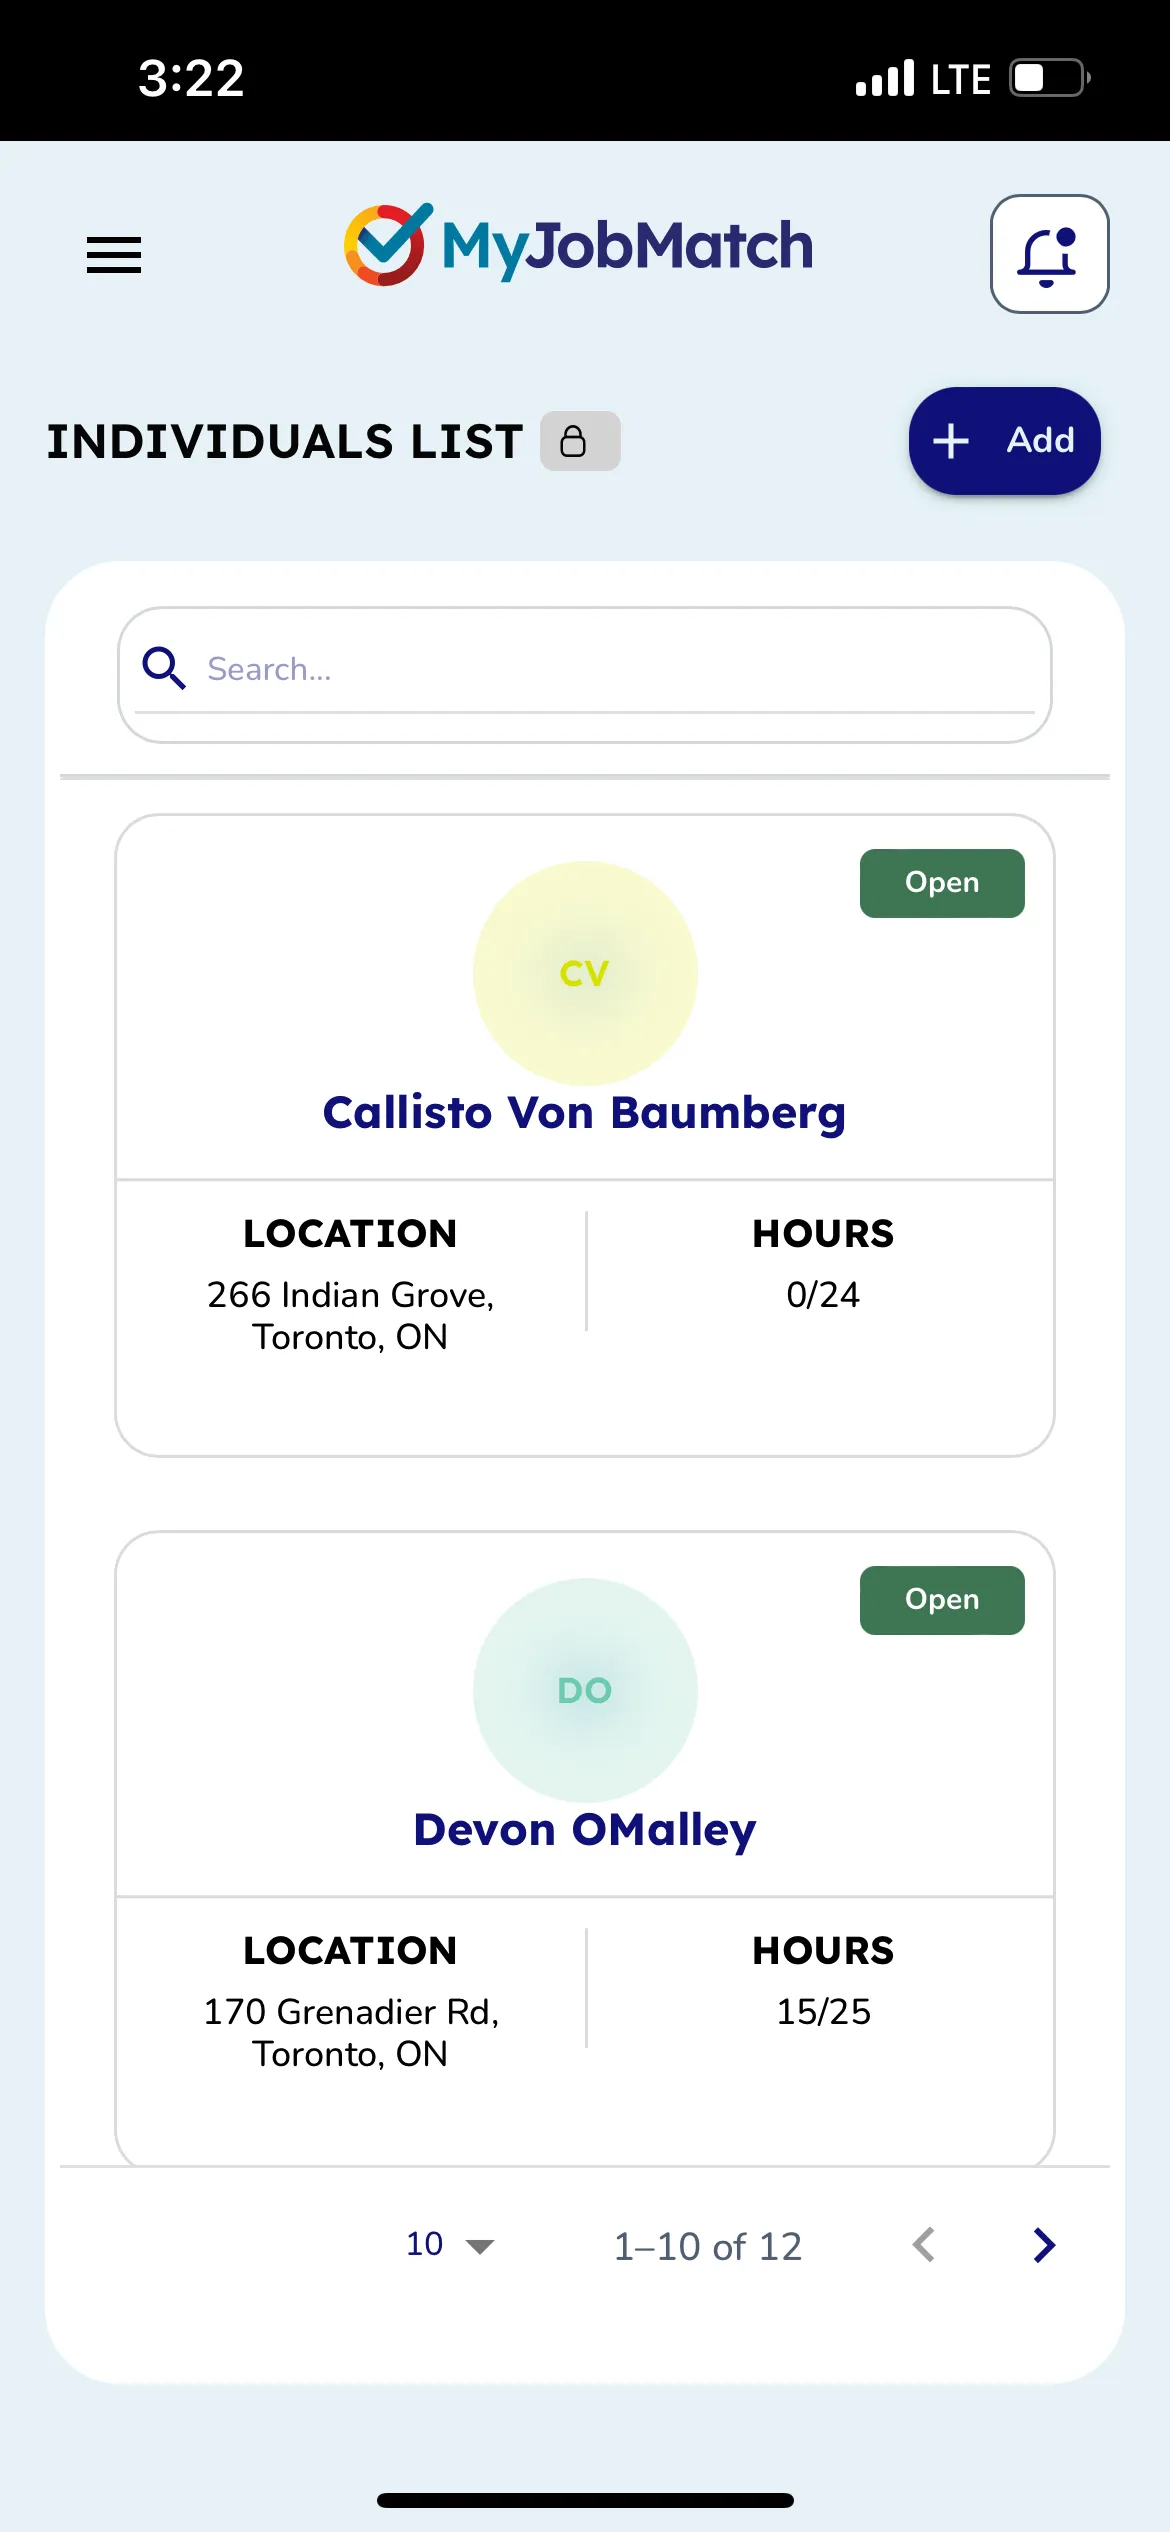
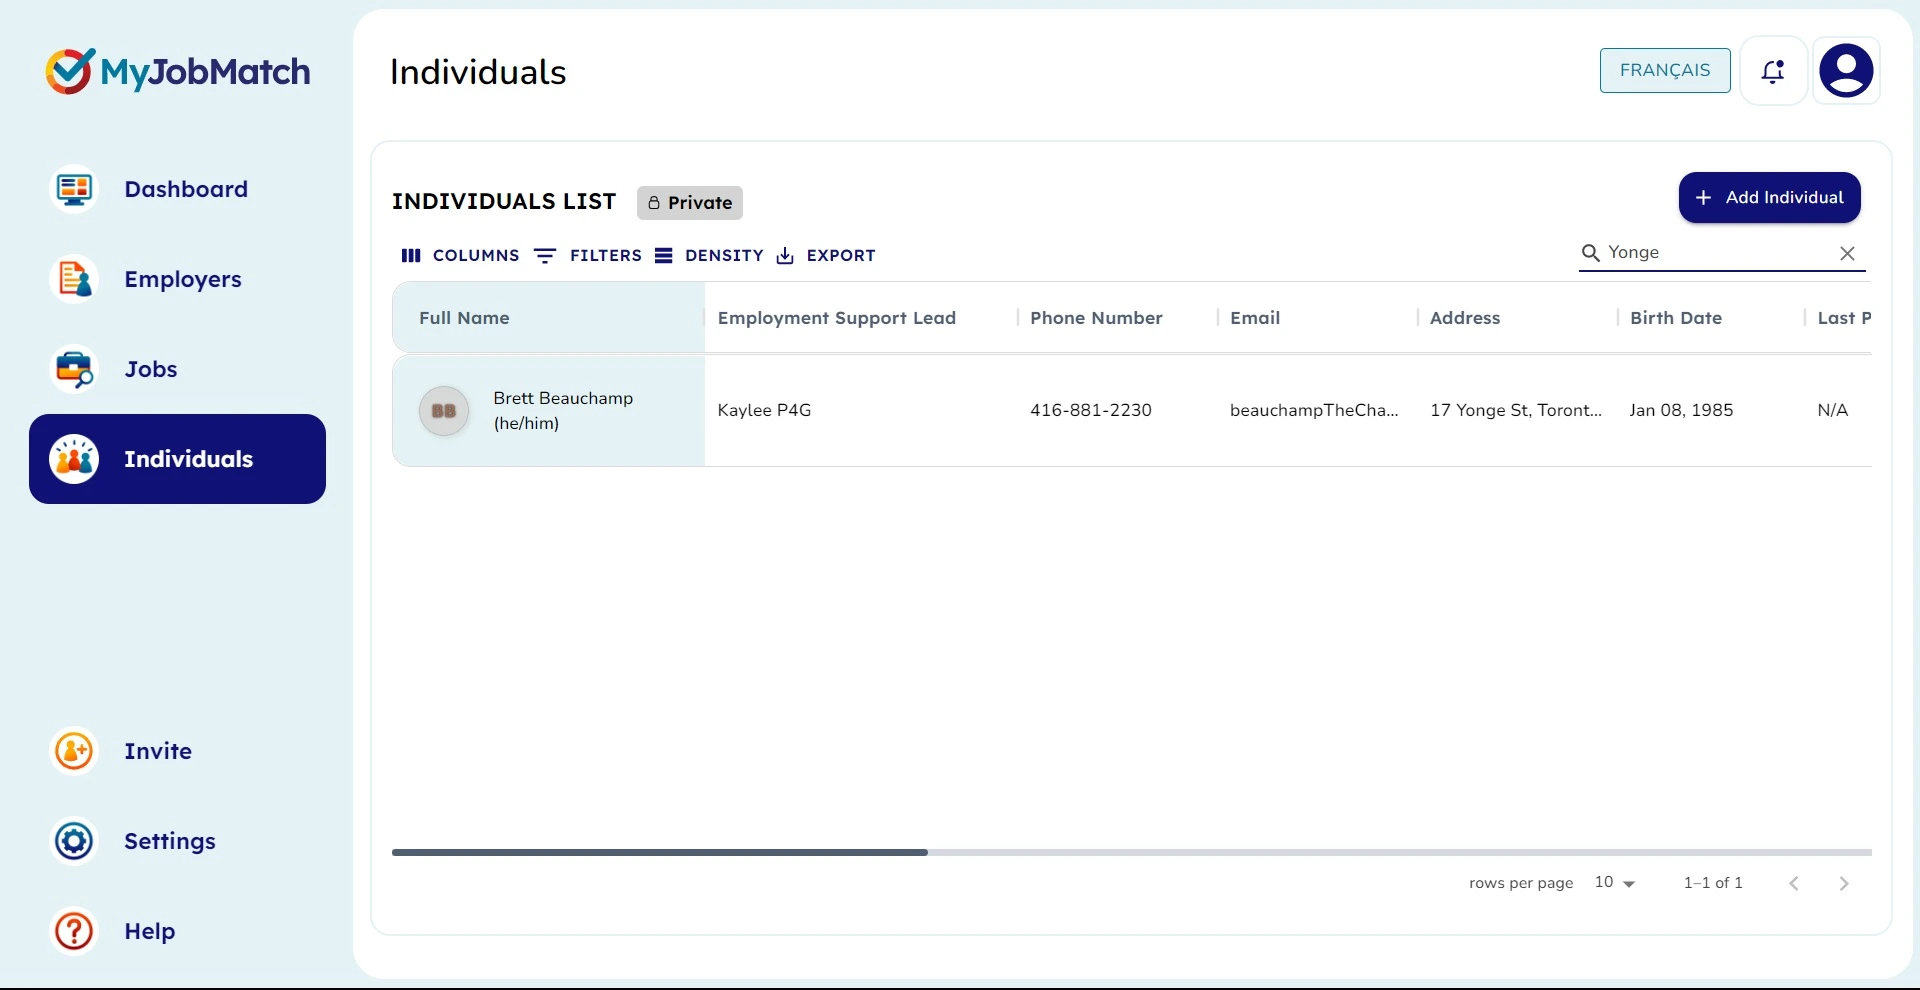
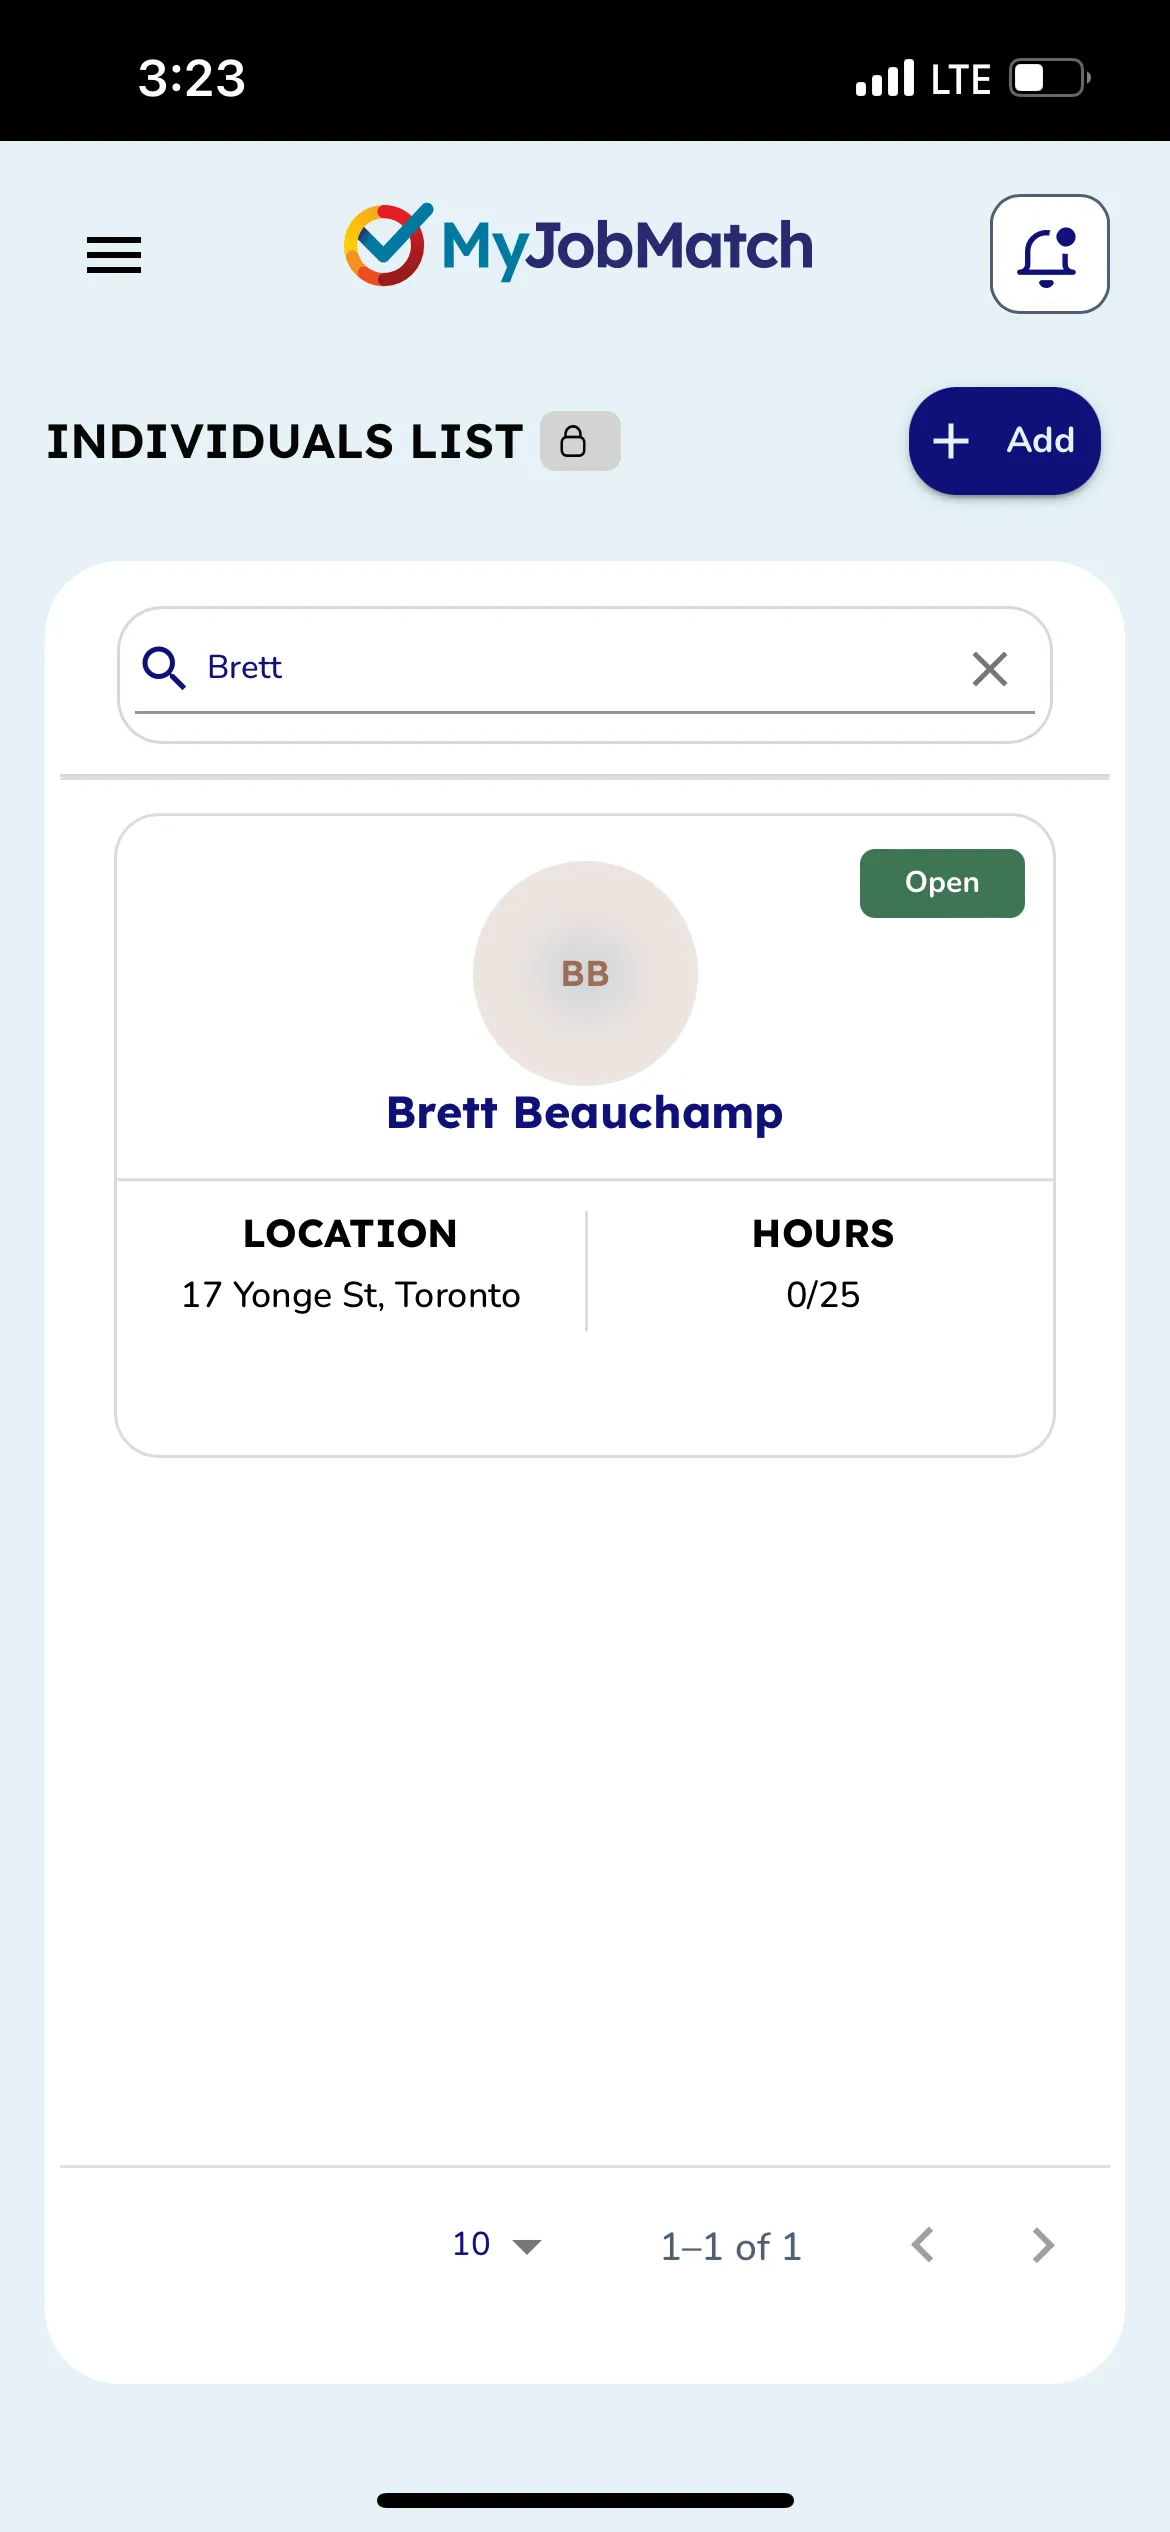
Individuals Overview
From the Individual page you can review all Individuals associated to your agency account/database.
To quickly see more information included on a specific Individual scroll left to right.
To see more Individuals adjust your rows per page.
To add a new Individual select "+Add Individual"
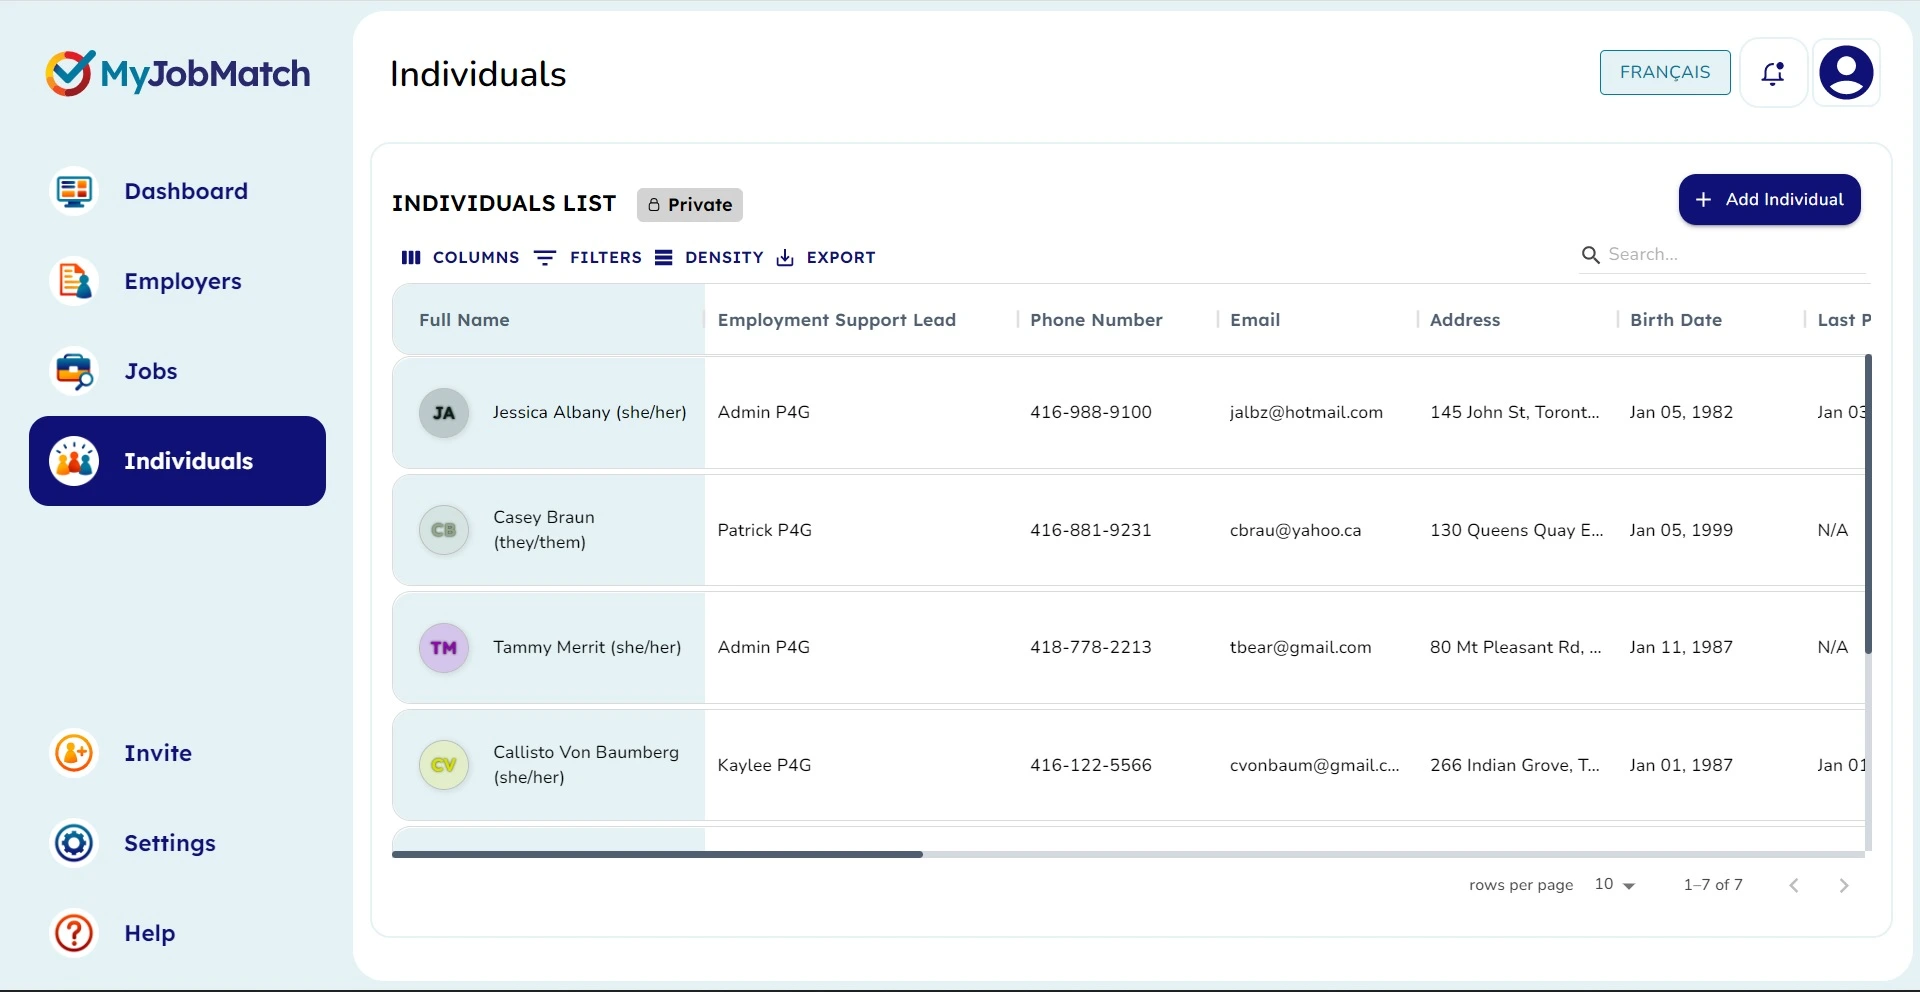
Use the search bar in the top right corner to find any information about a specific Individual or search by a certain word.
This search will review all the data associated to Individuals. Ex. If you typed 'Yonge' it would filter all Individuals with the word 'Yonge' in it.
Add a new Individual
Required information is marked with an asterisk* - you may not save until all required fields are completed.
Start by choosing the correct Employment Support Lead from the drop down list. If you do not see the correct name, contact your MyJobMatch administrator.
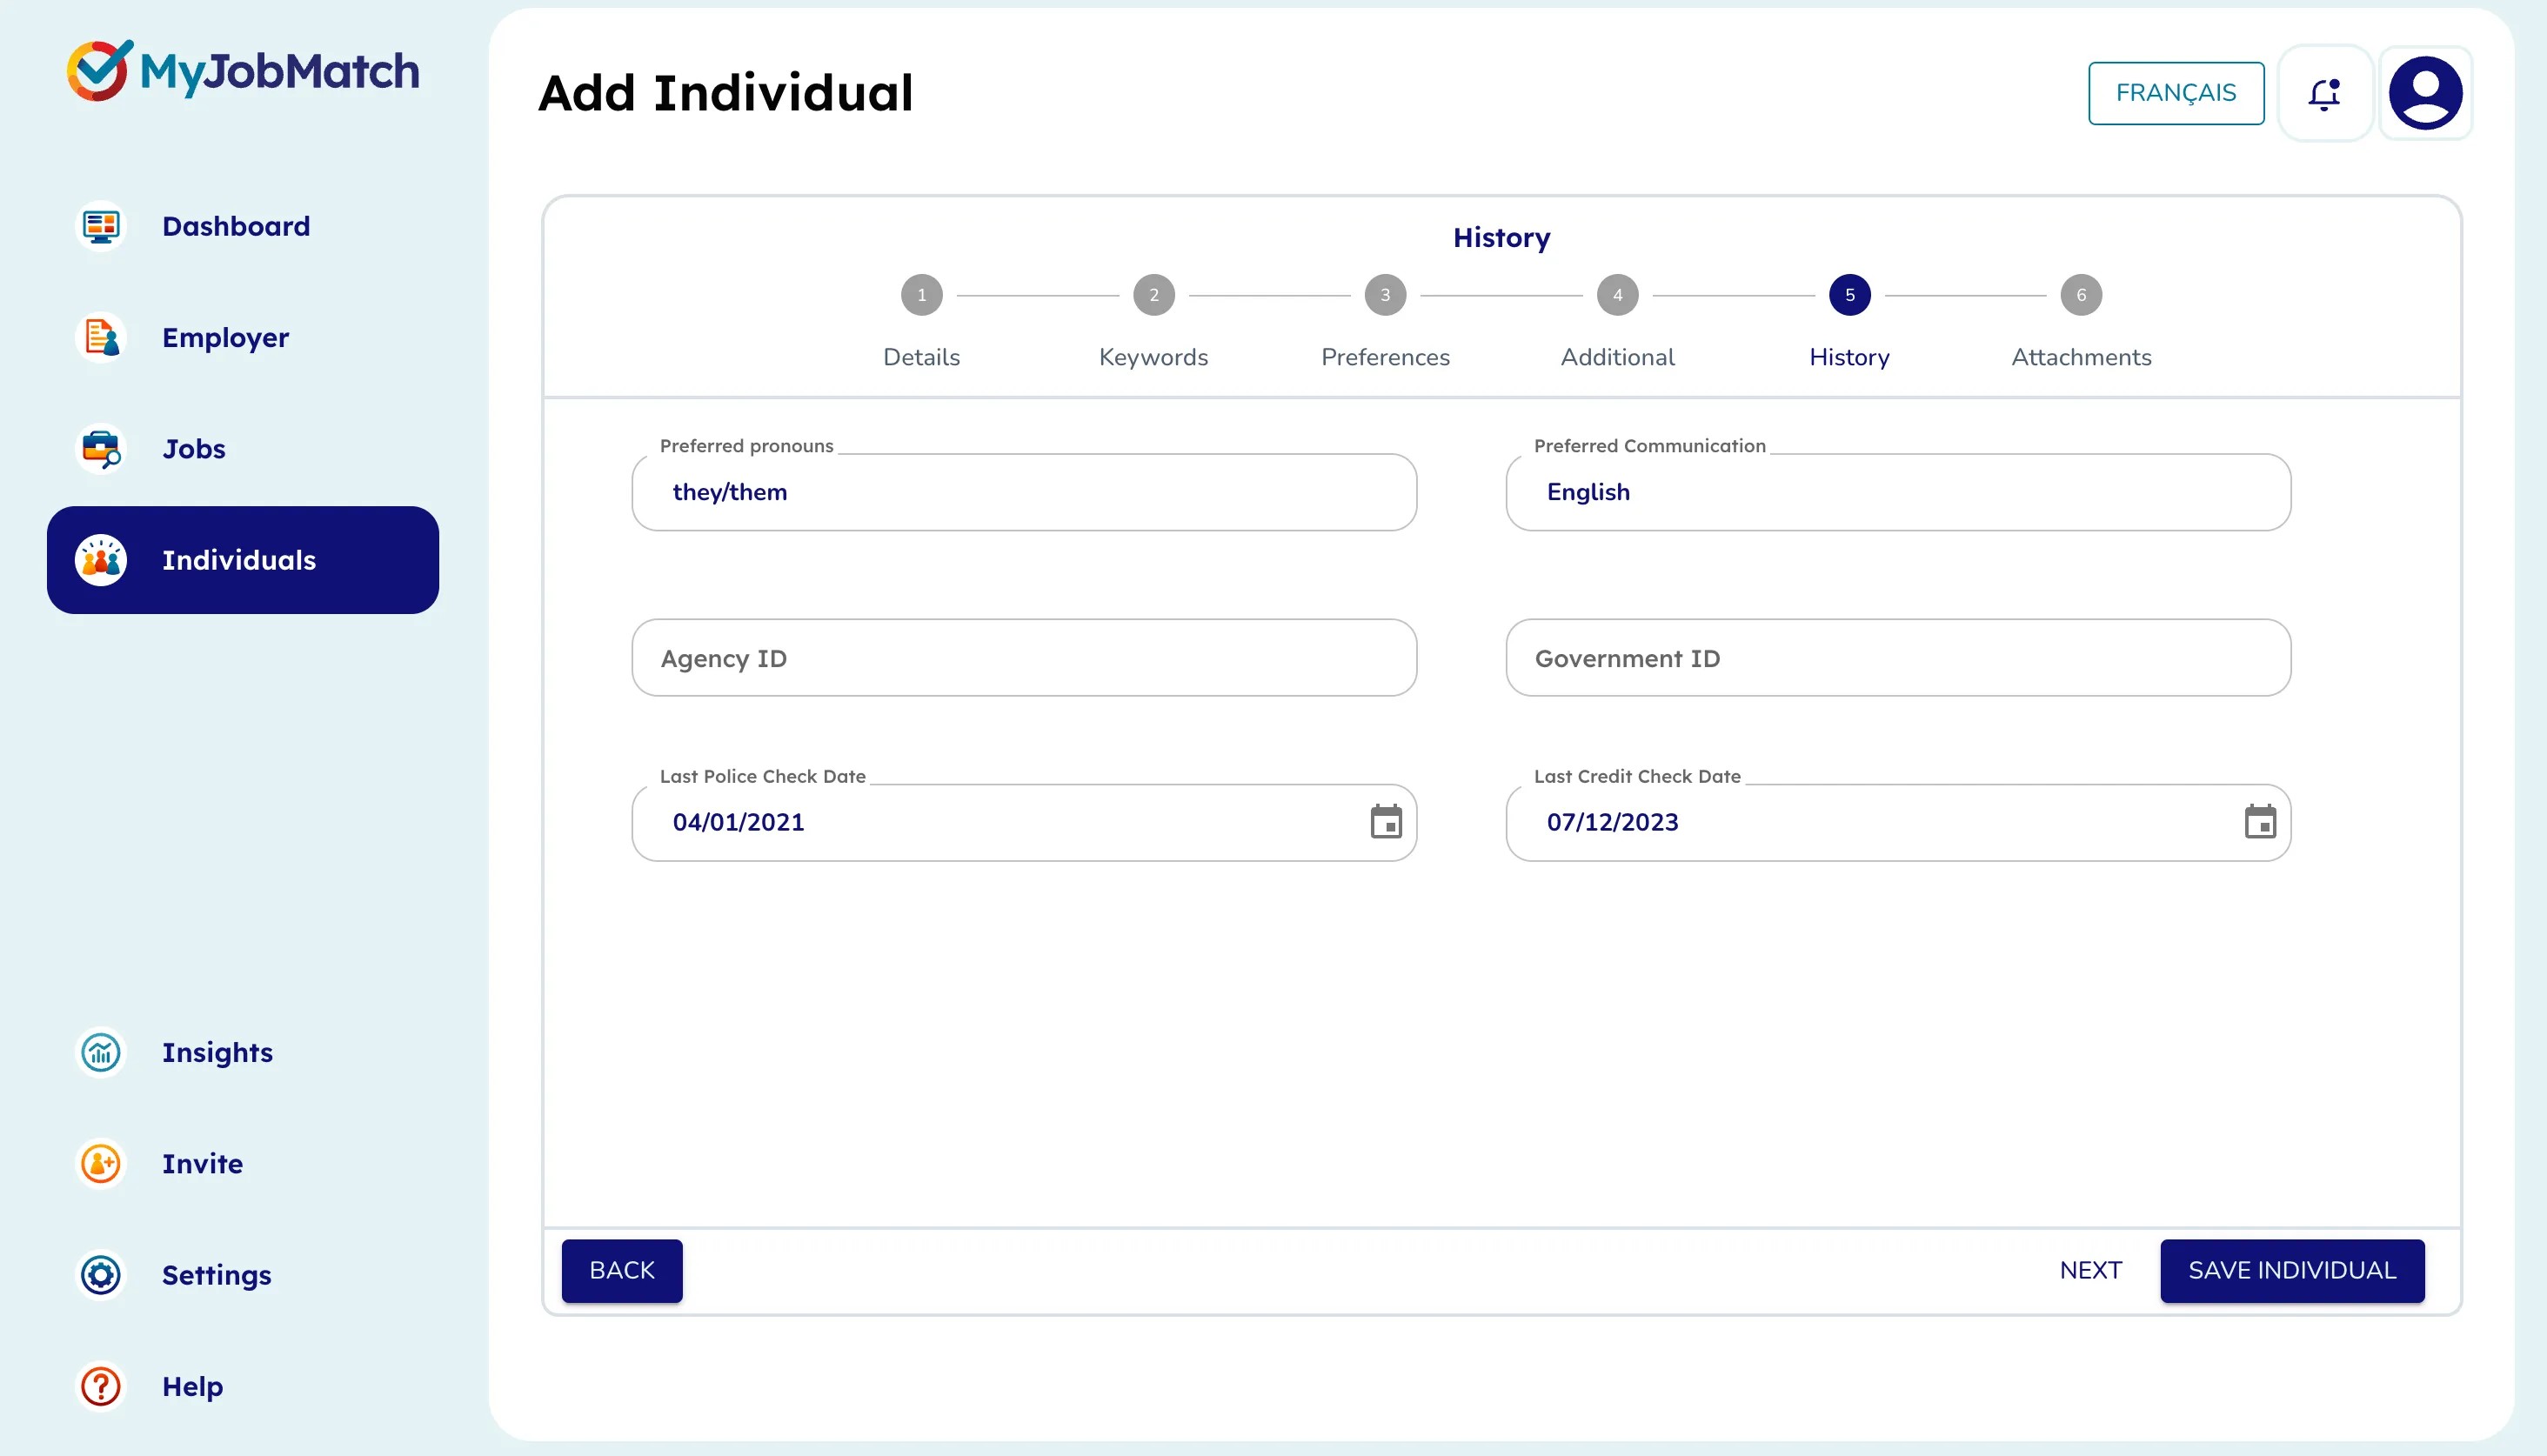
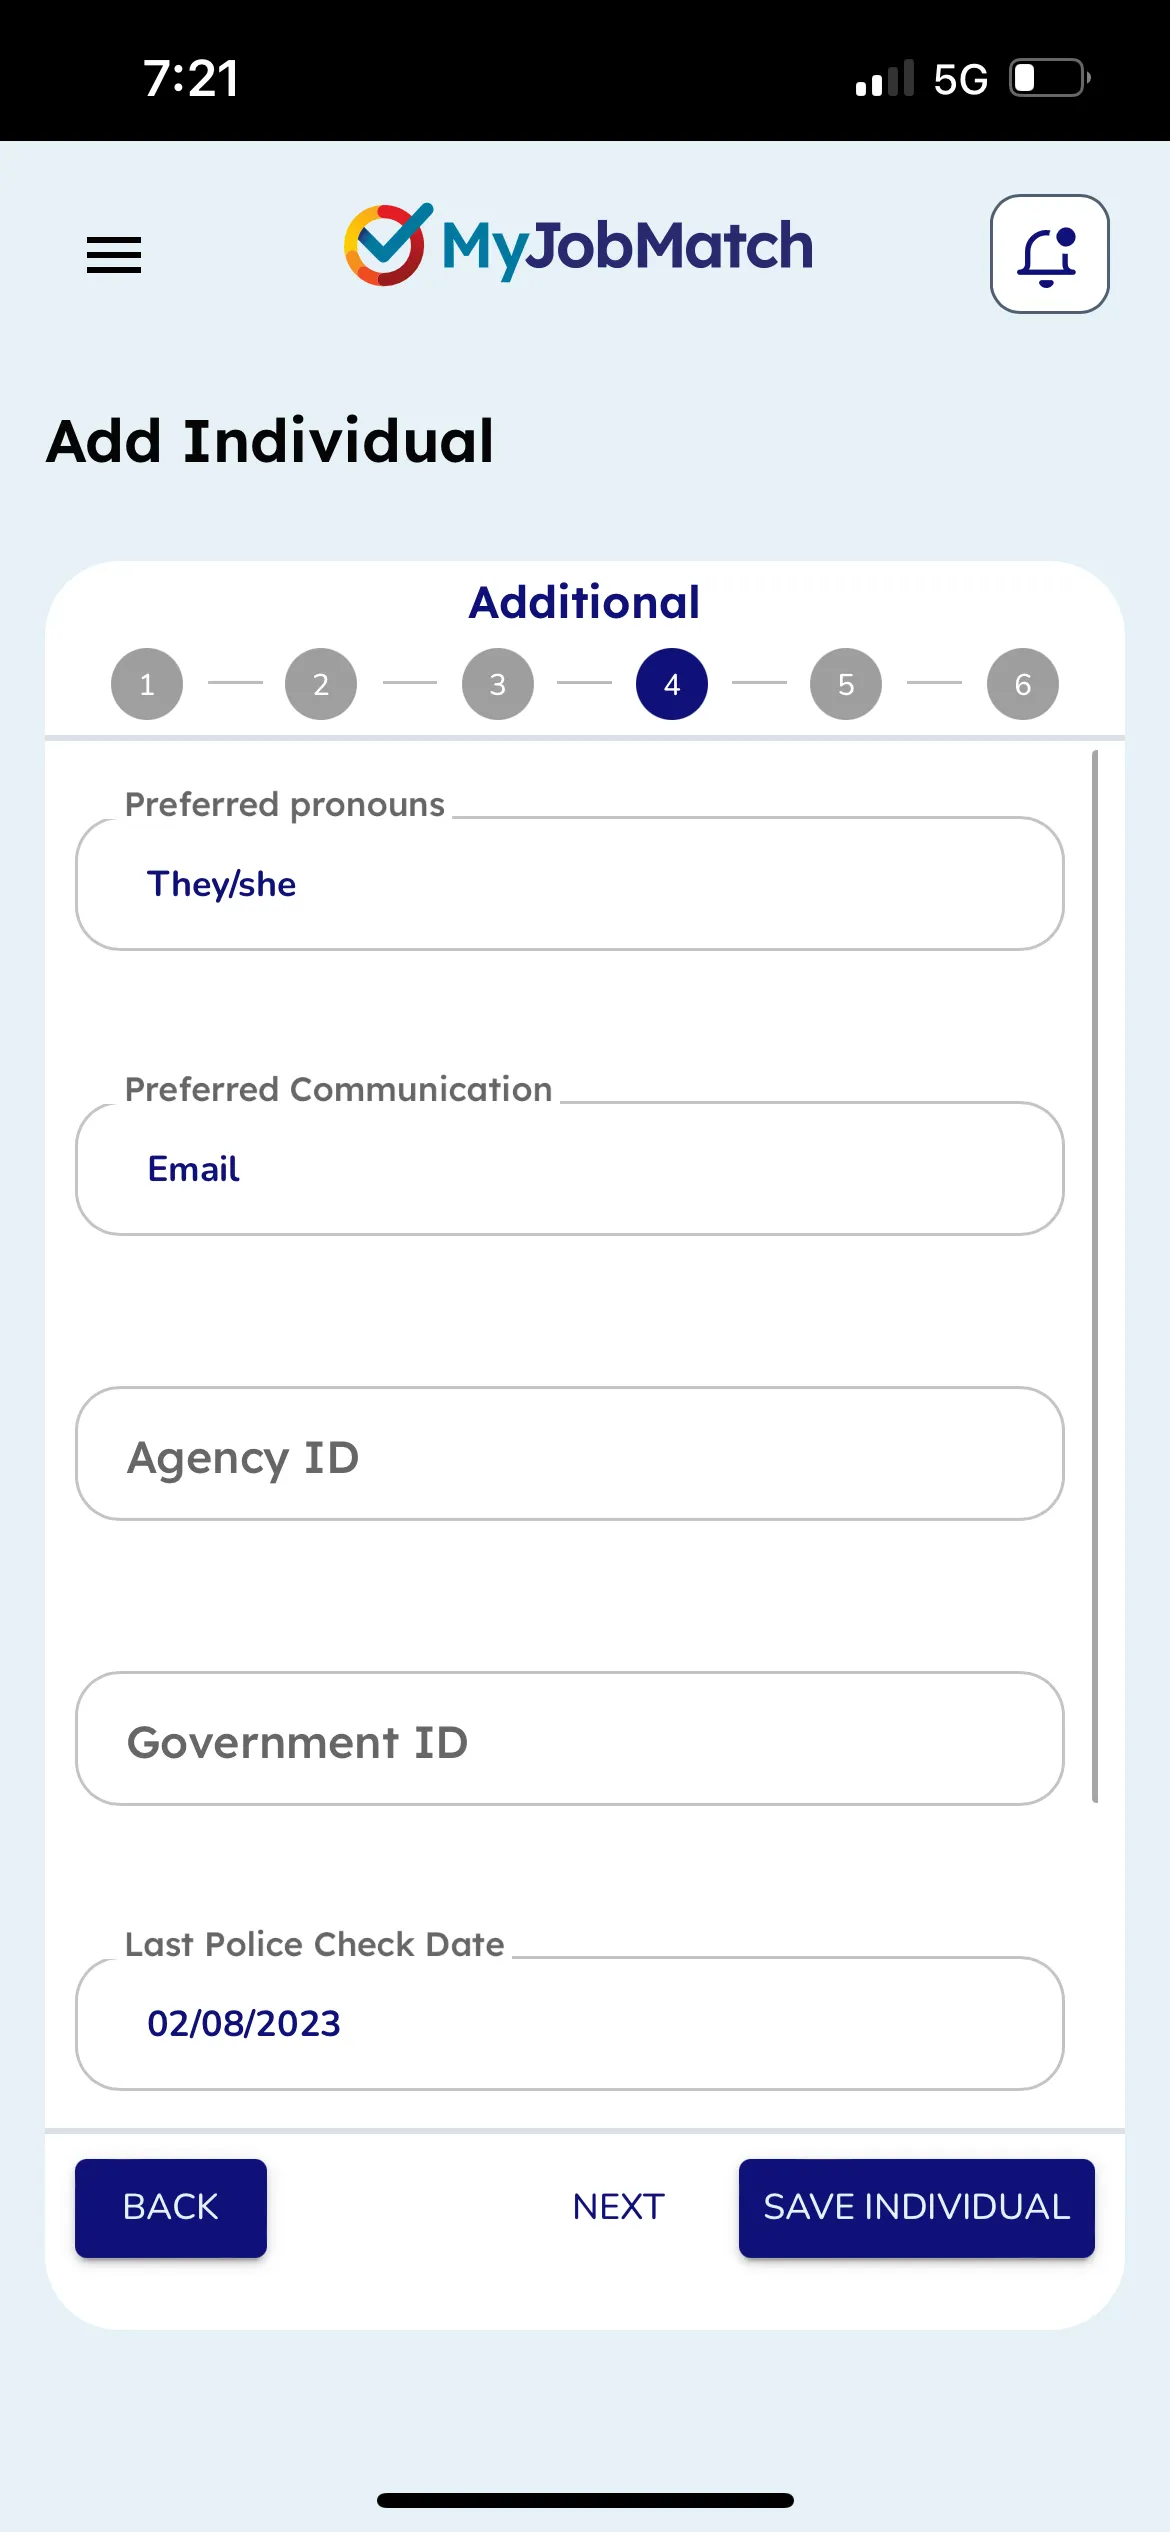
Input the individuals First Name and Last Name, Phone Number and Email. If you know the person's preferred pronouns, include them in the field.
Agency and Government ID are not required fields unless your Agency requires them. Please check with your MyJobMatch administrator.
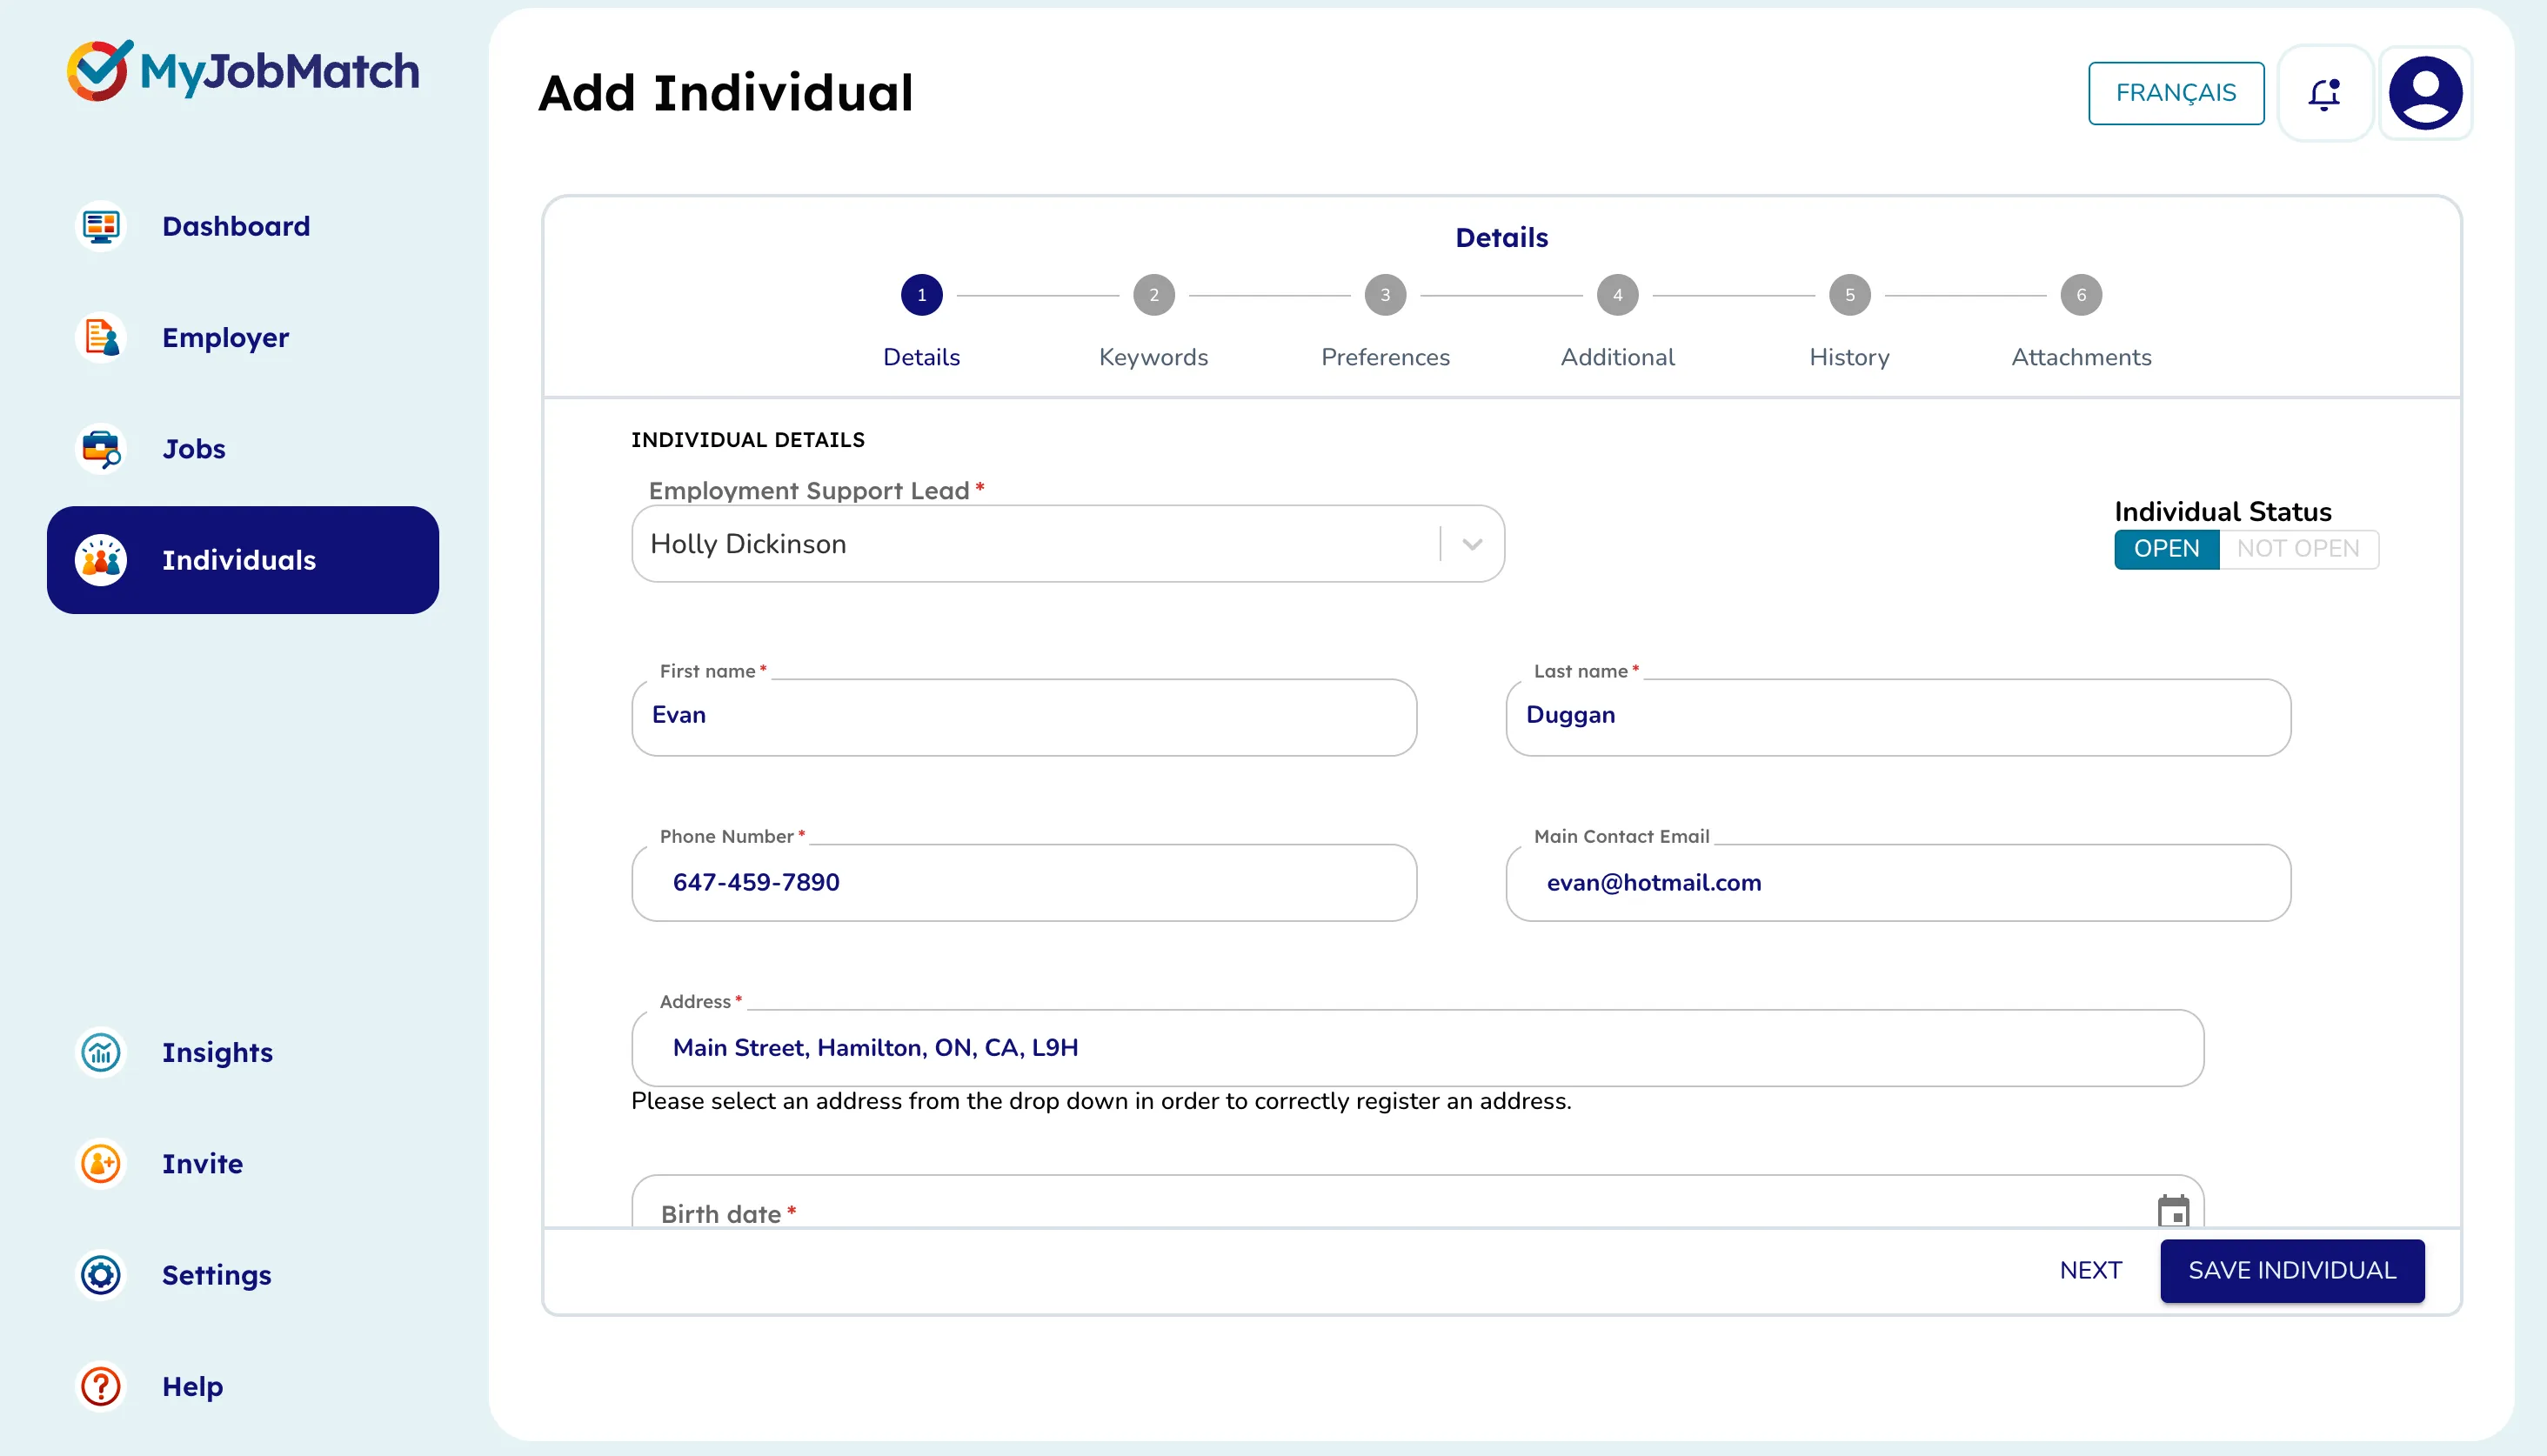
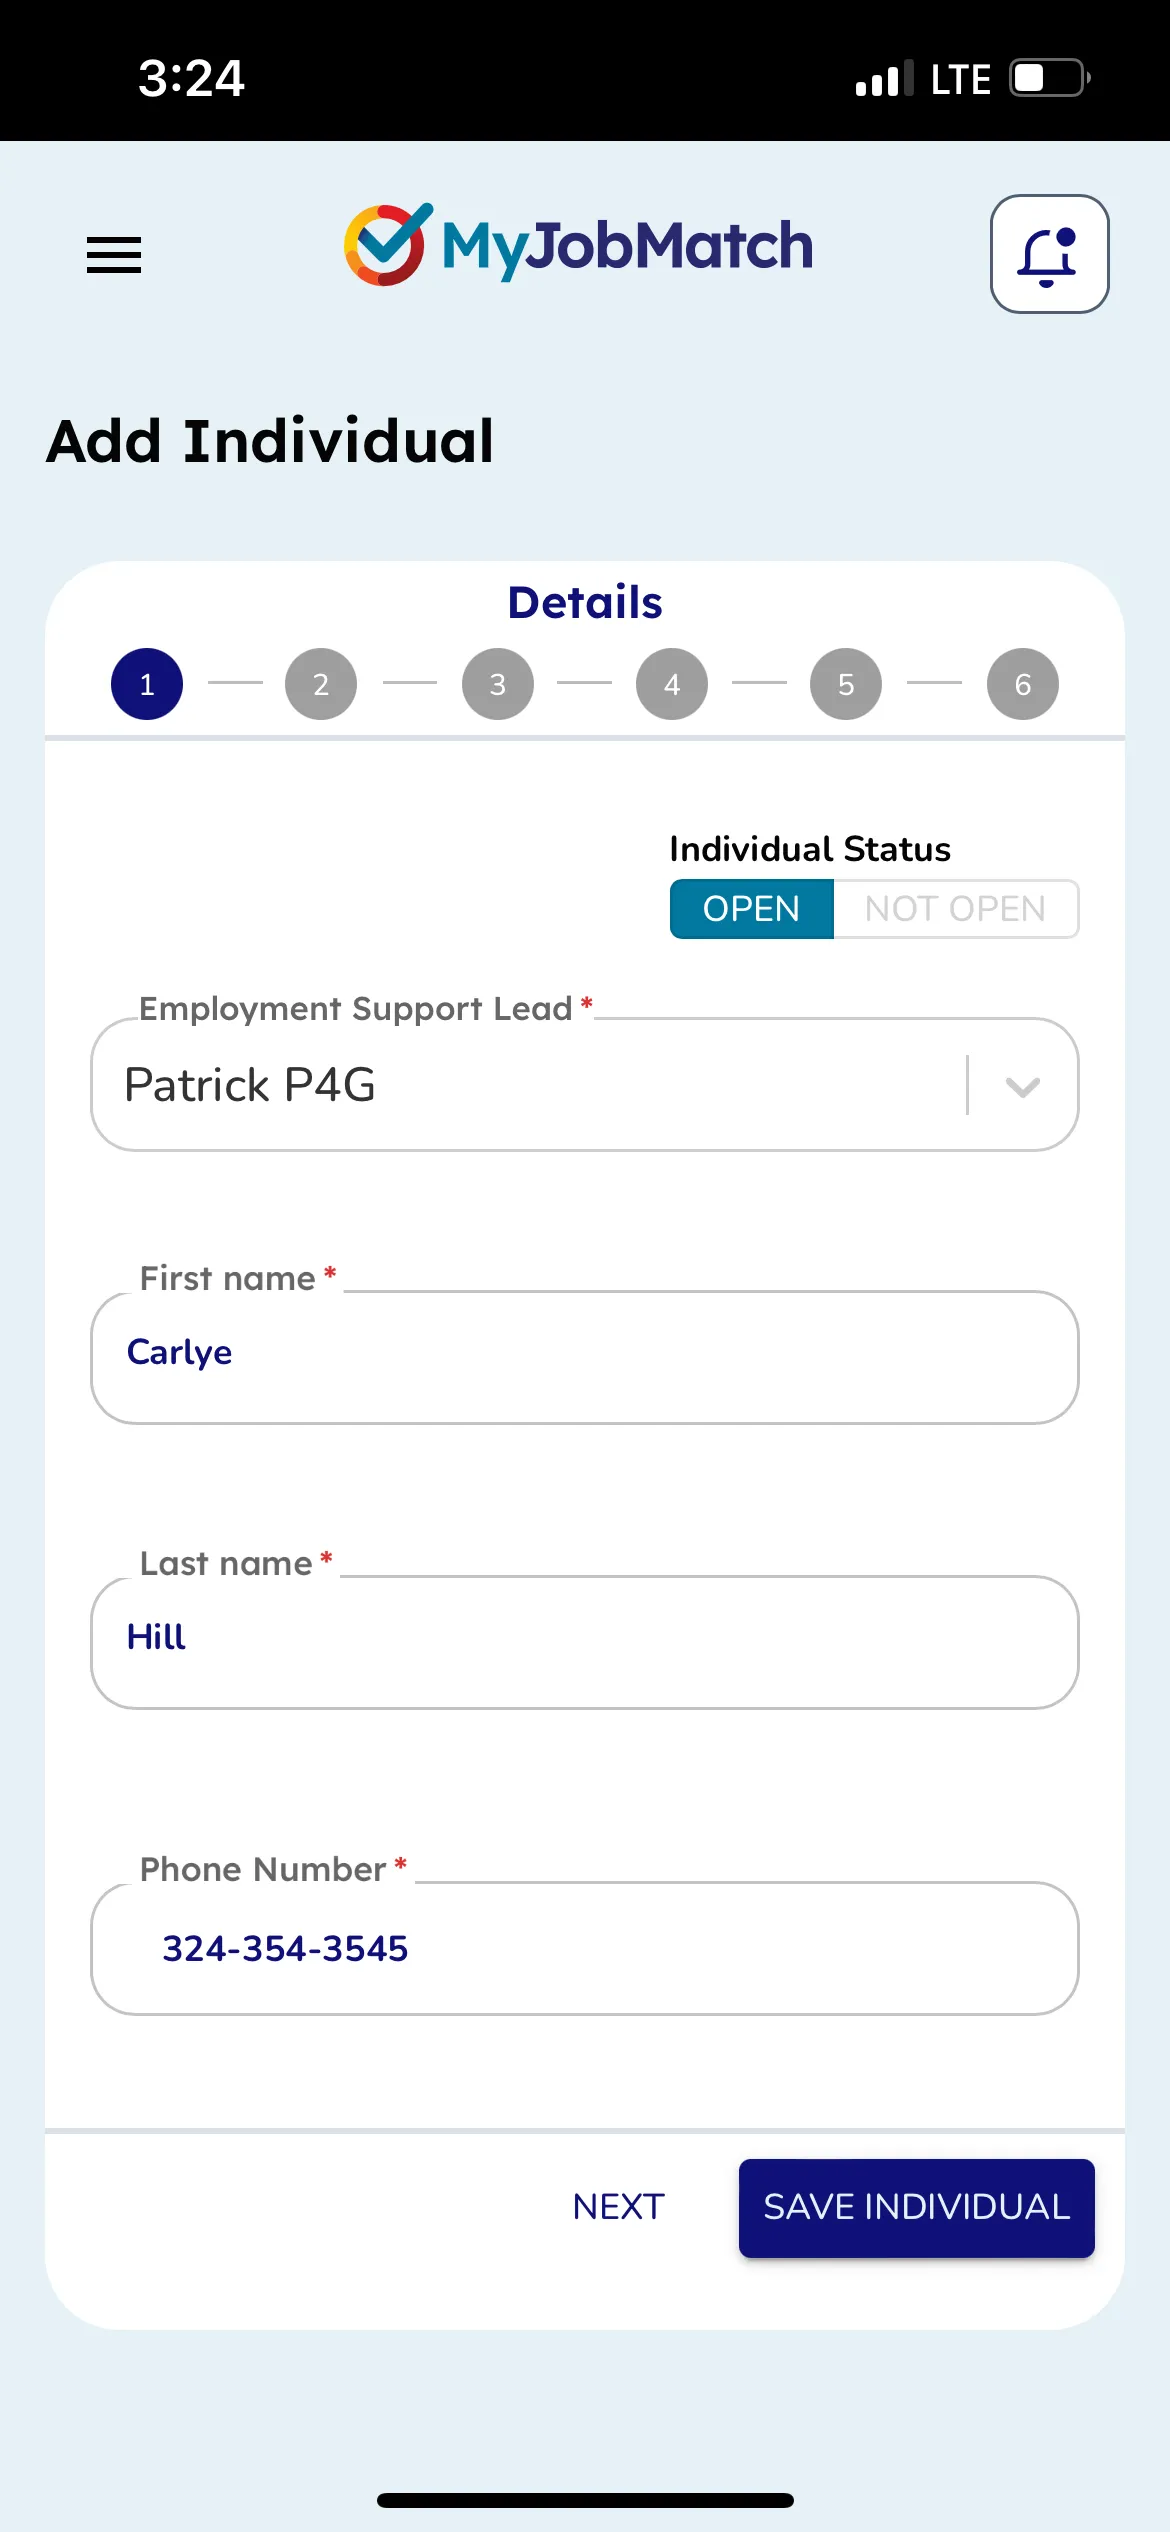
If you know how the individual prefers to communicate, add their preference.
Accommodations can be any terms, conditions or needs for the individual's employment or adjustments to the workplace environment that are required.
Input the individuals Address, Birth date and Intake Date (Intake always default to the current date).
If relevant, identify the Individuals last known Police Check Date.
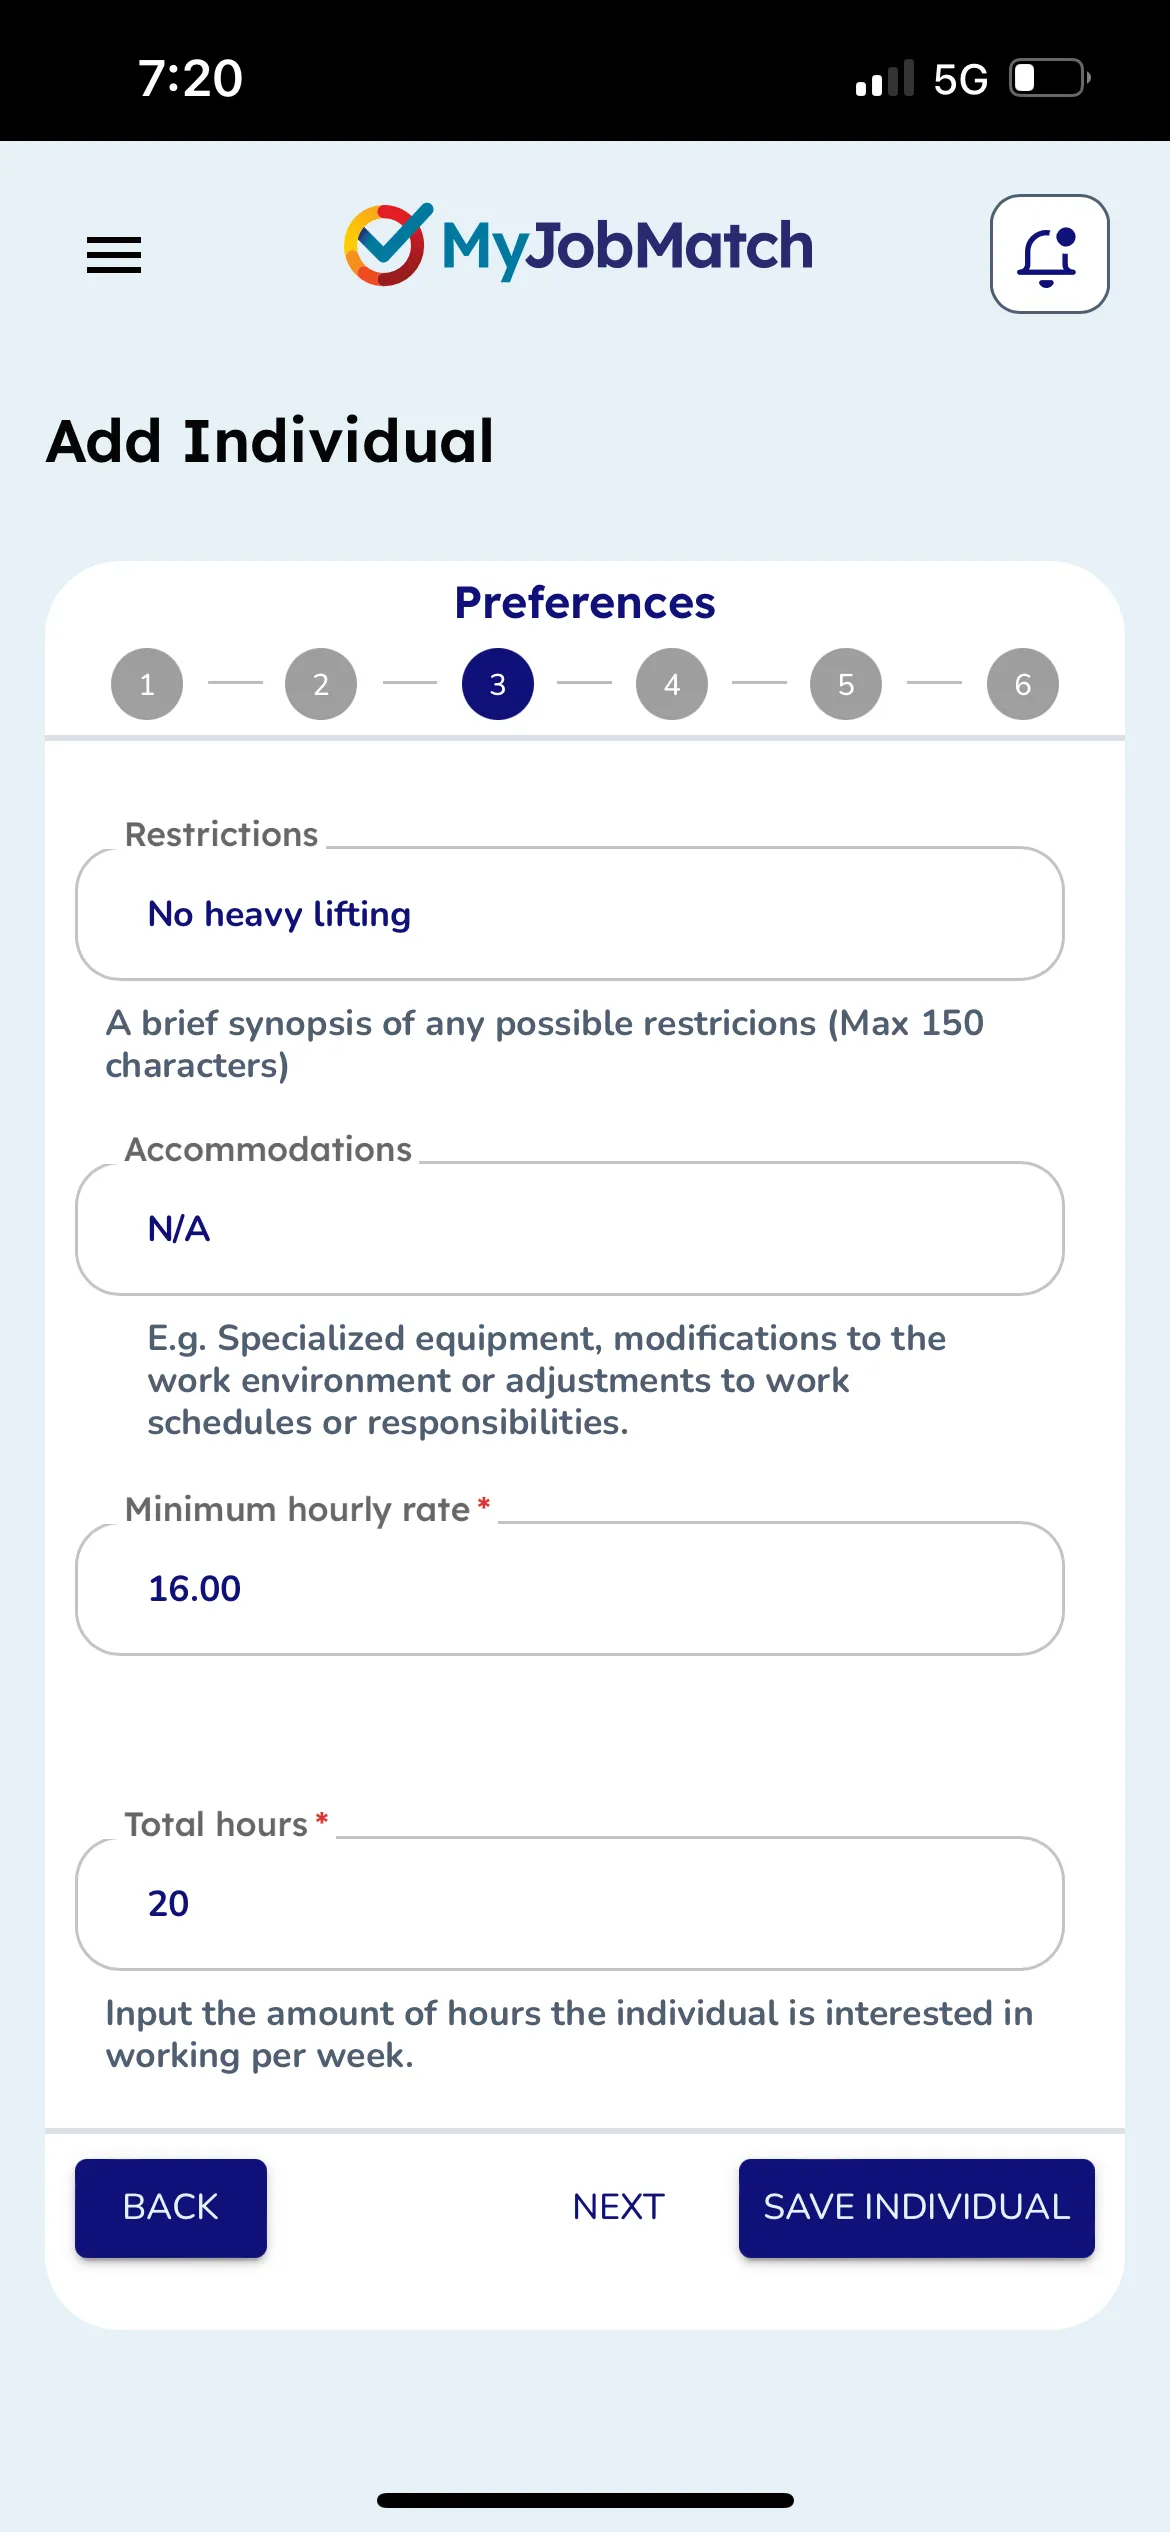
Input the Individual's Preferred Roles and the Minimum Hourly Rate they are interested in working for.
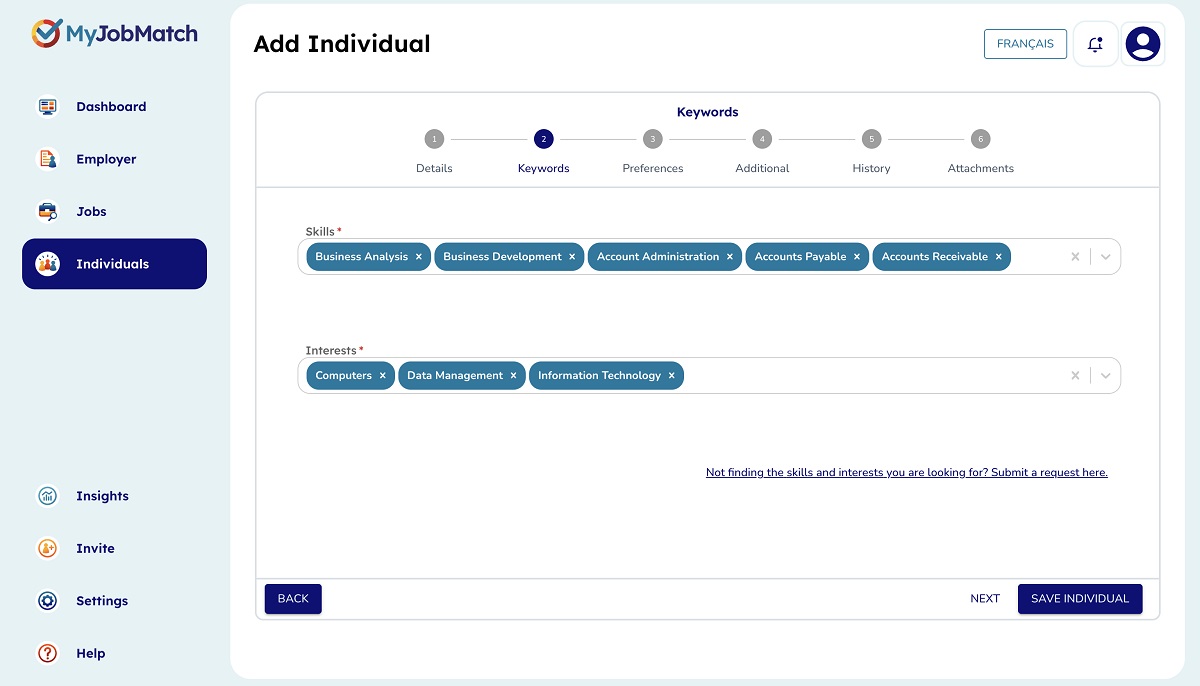
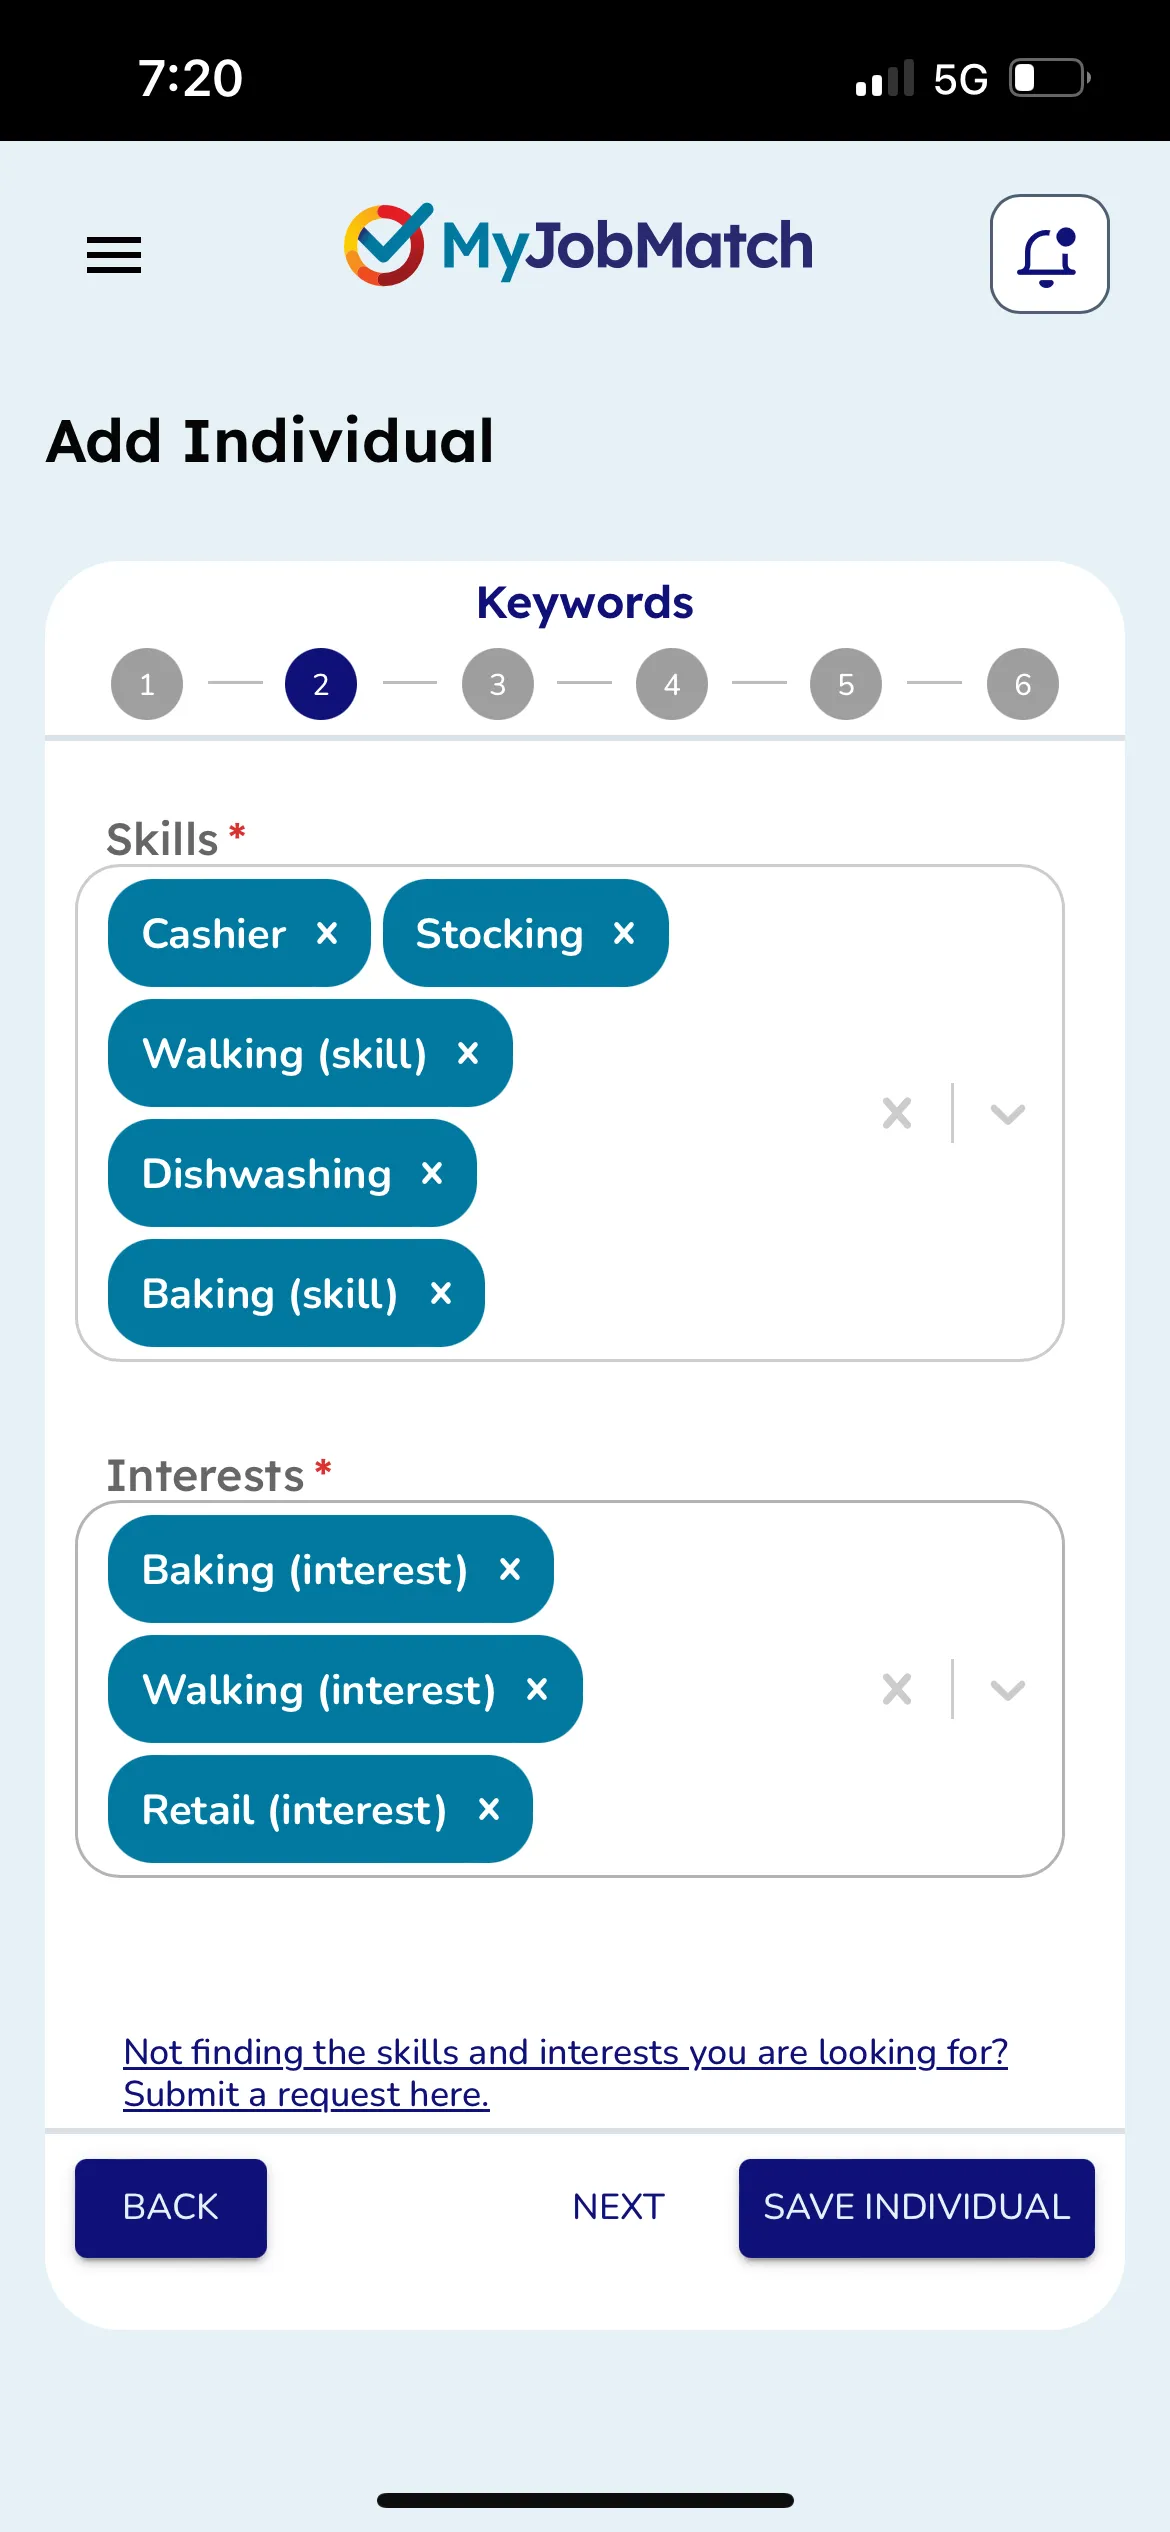
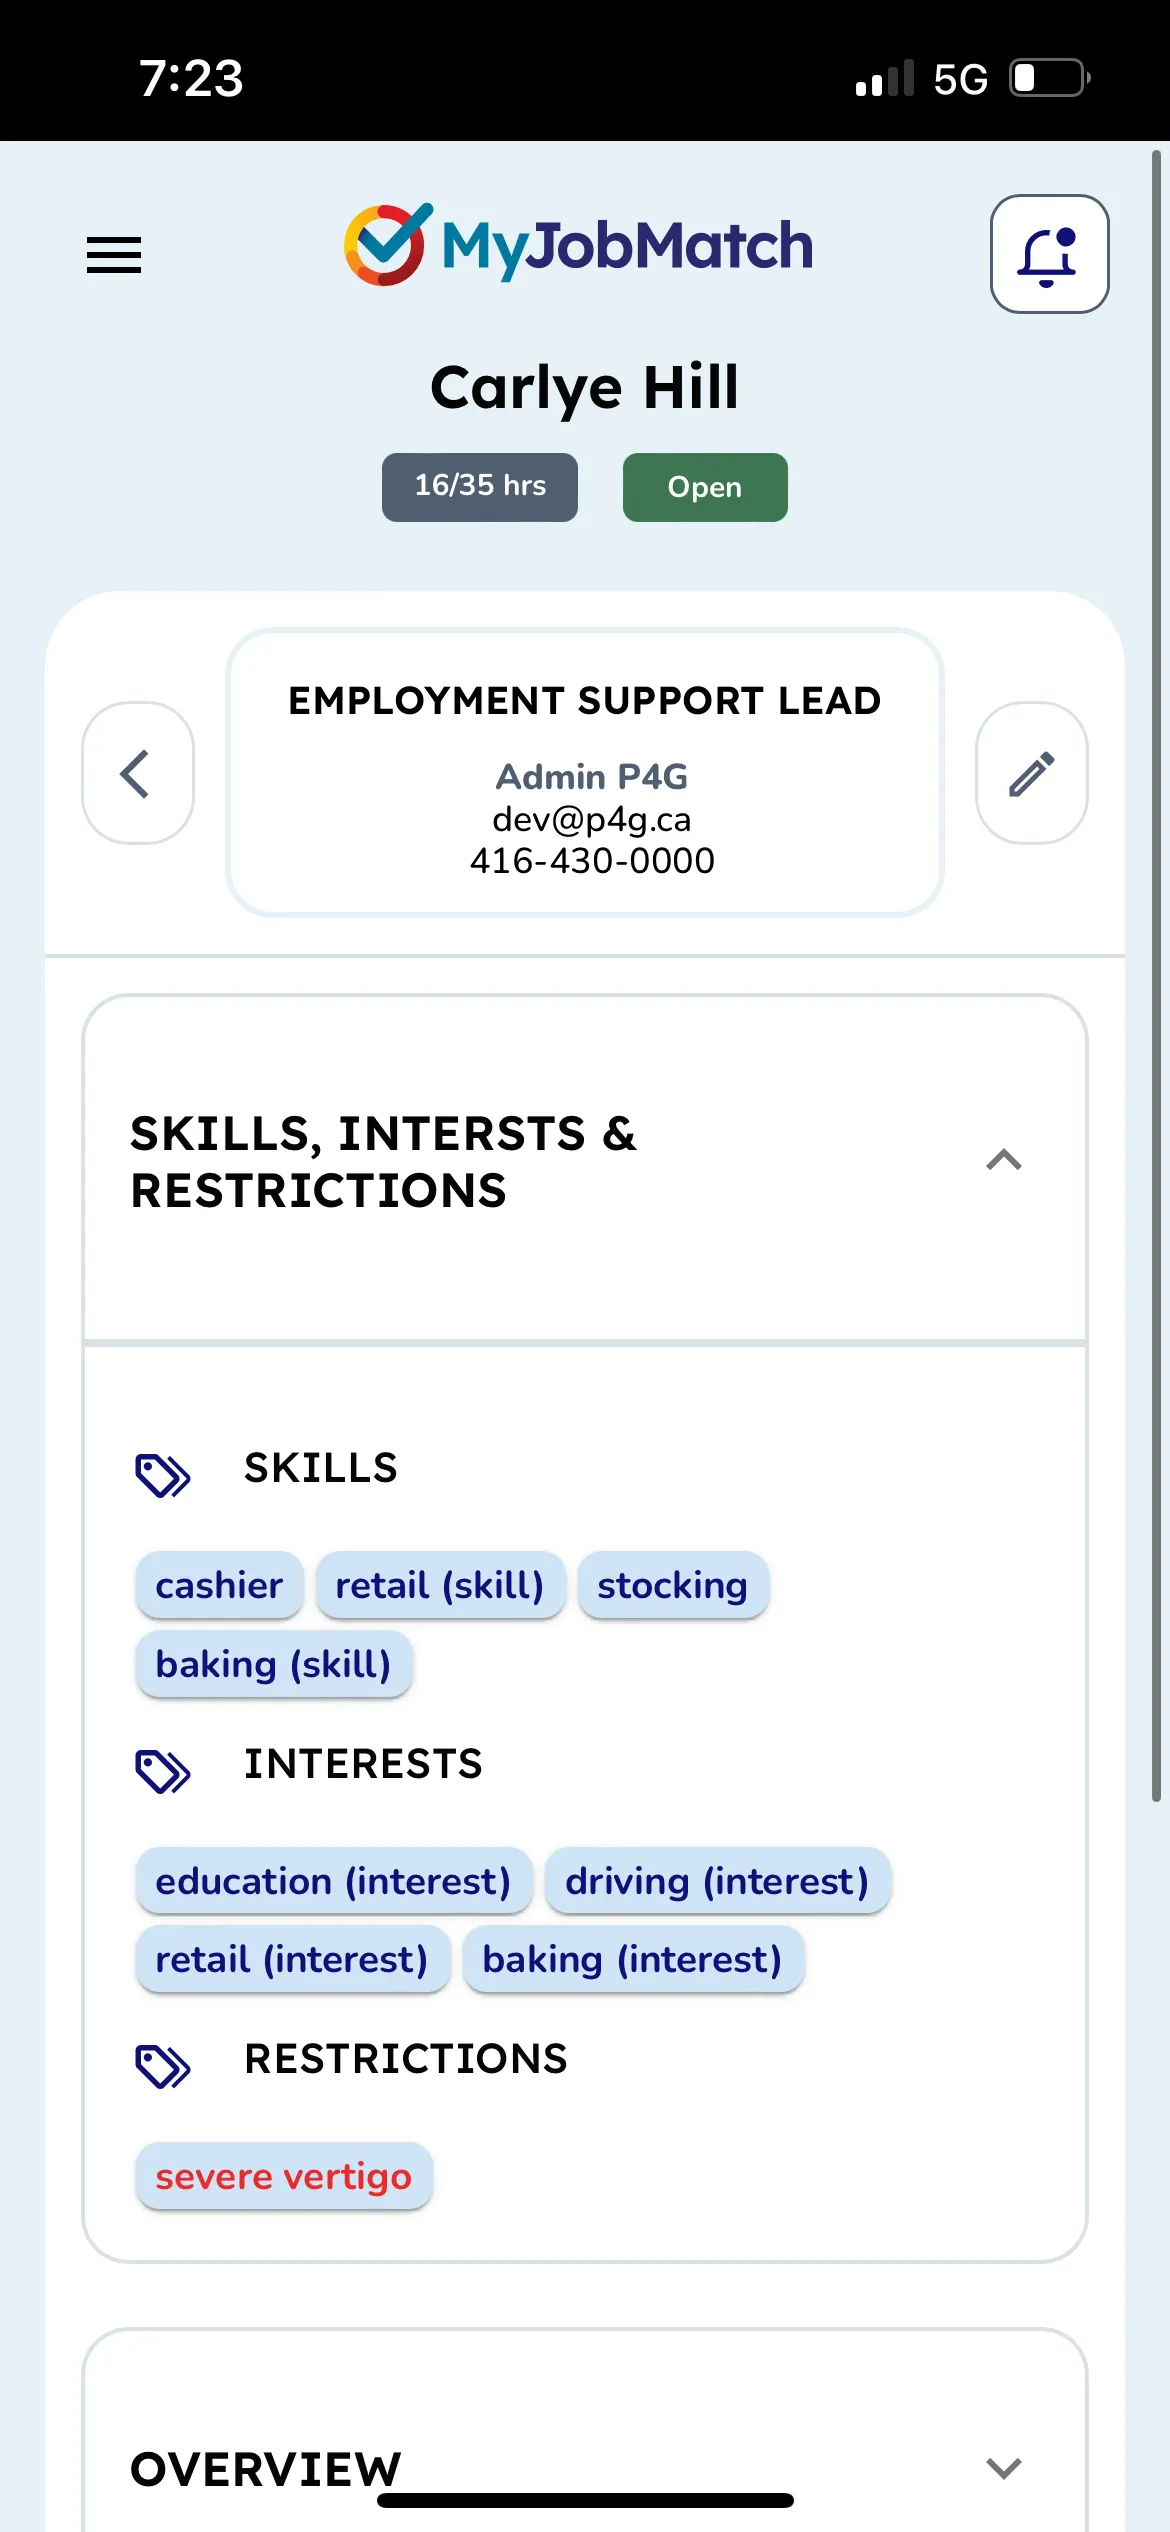
Identify their Skills and Interests by typing into the field. Remember the more skills and interests you add, the more matches we can create!
Restrictions will show up in the individuals profile as red. They do not factor into matches.
Identify if the Individual is open to work or not, by toggling the status bar. People who are not open to work will still be included in matches but their status will be highlighted to reflect this as a reminder.
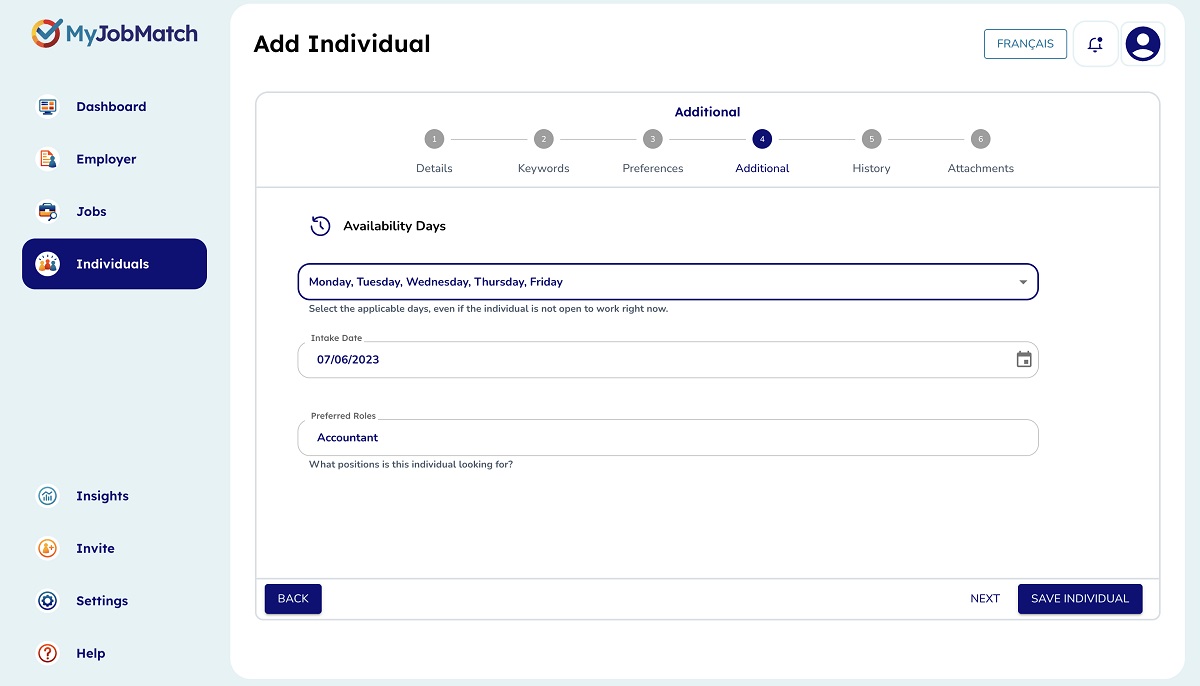
Identify the Individuals Available Days or the ideal days they would like to work. Along with the Total Hours the individual would like to work per week.
If the individual gave you a range, ex. 15-20 hours, input the highest amount given.
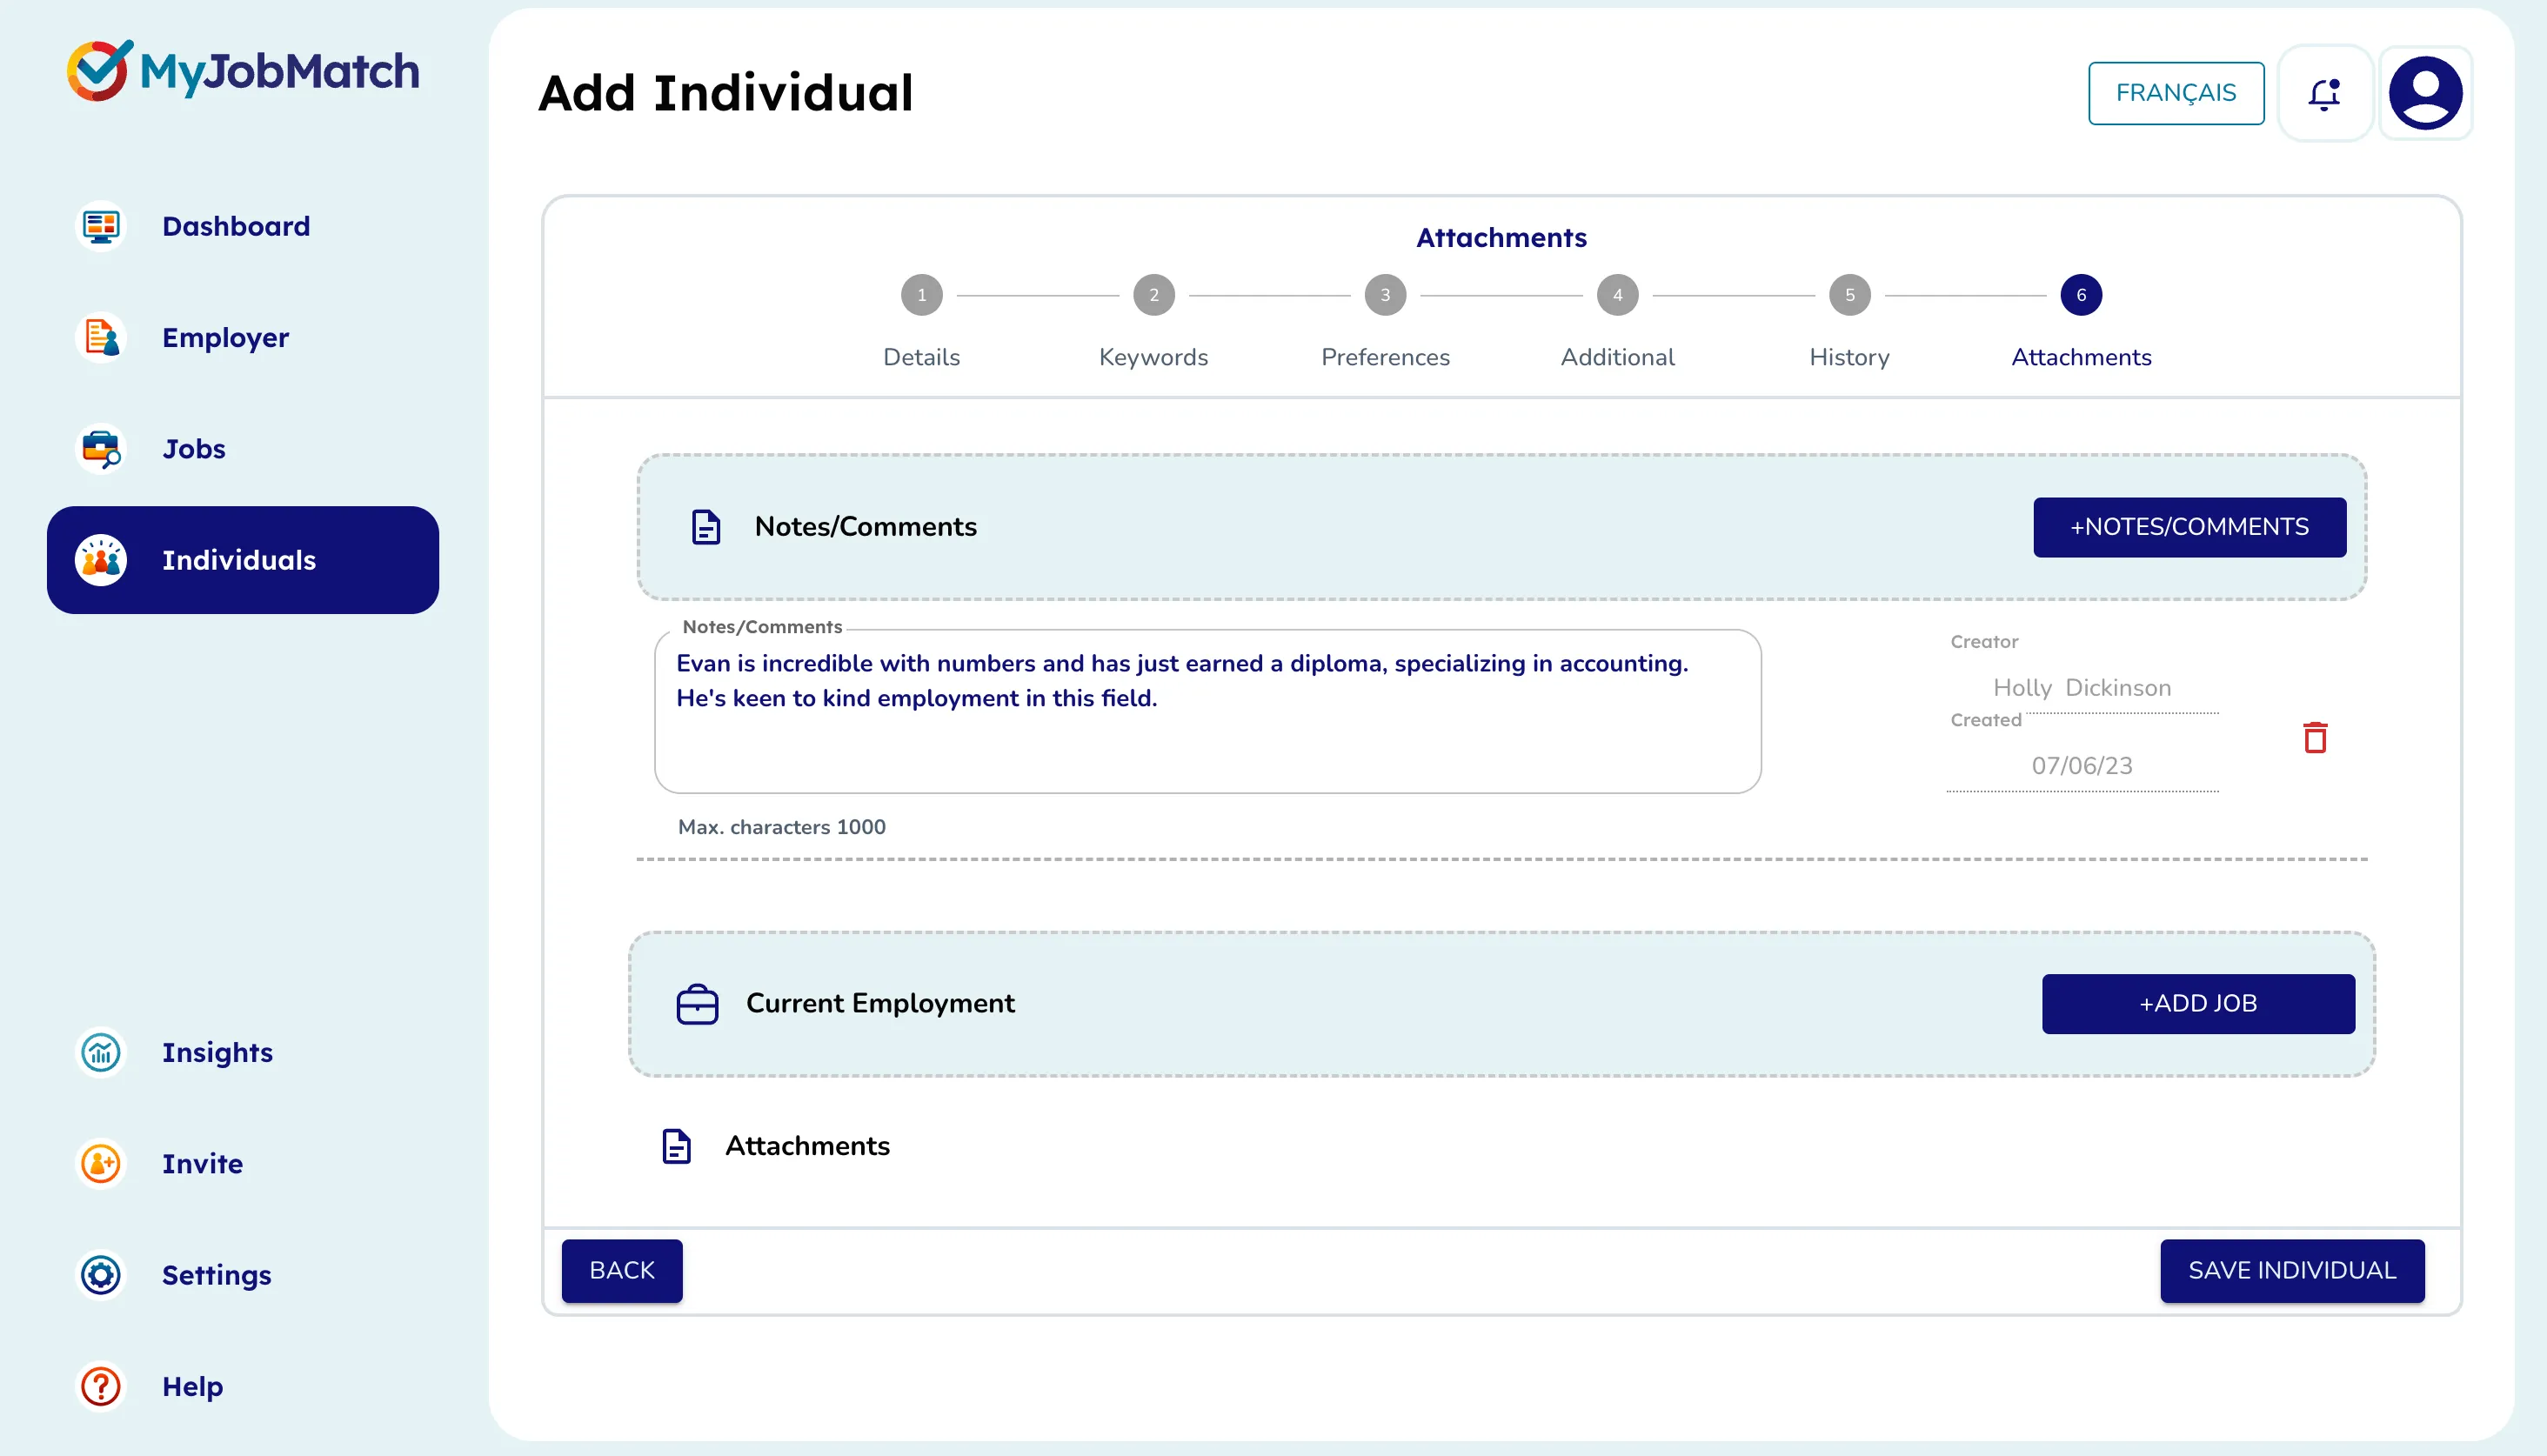
+Comment/Note to add a note to the Individuals file.
+AddAJob to update the individual's current employment record (see more on this later in this section).
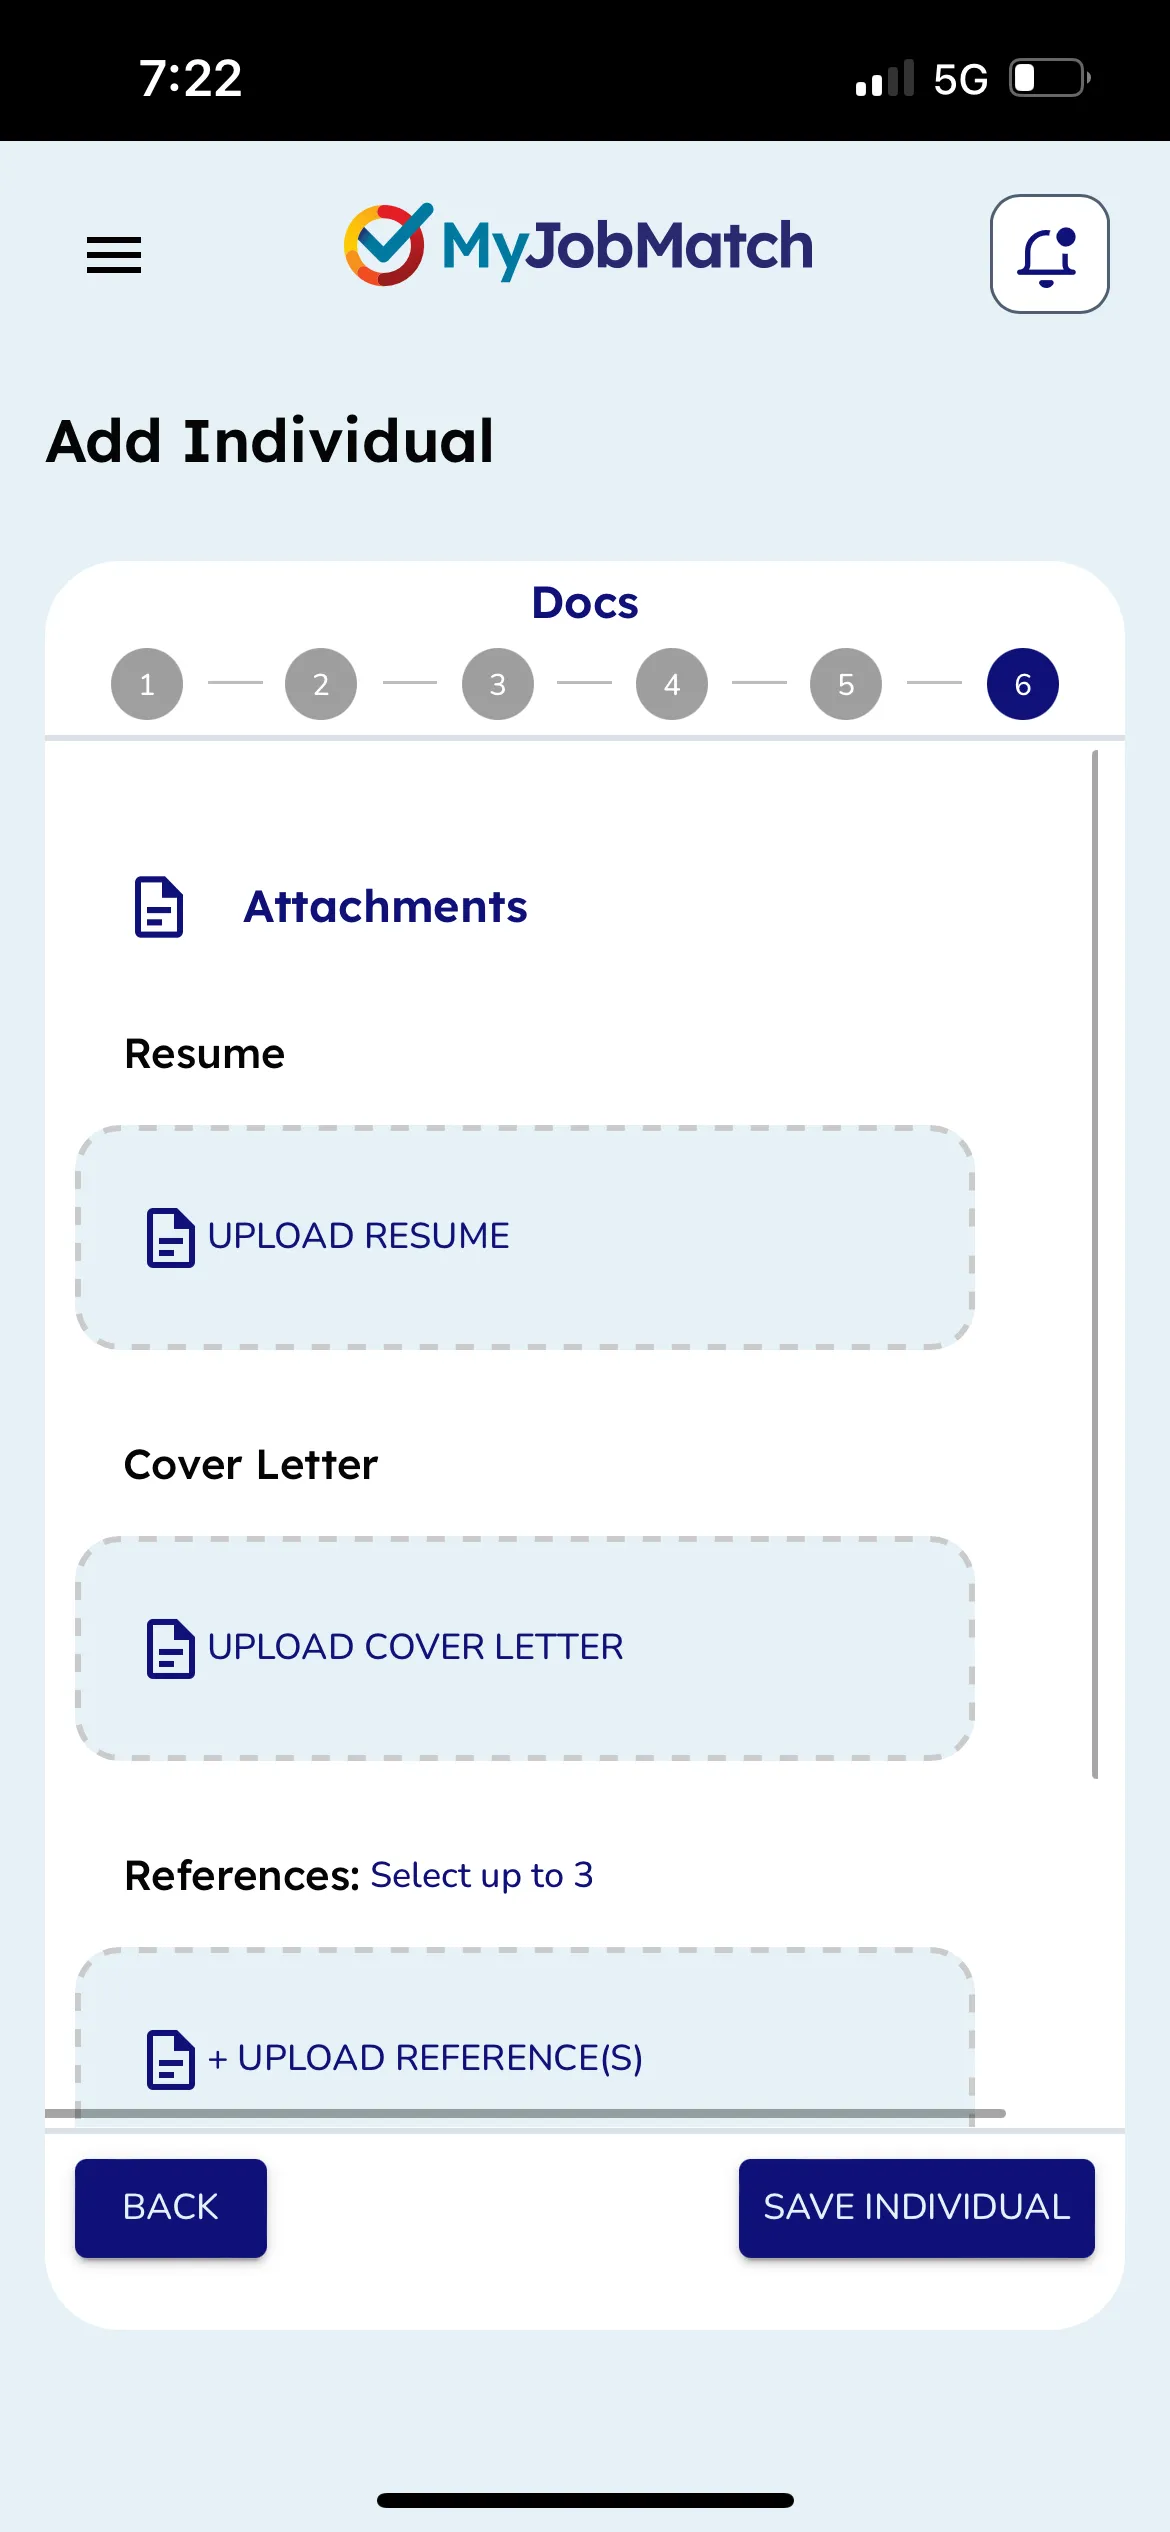
Attachments use these areas to upload: Resume, Cover Letter, References or Certifications.
Once all required fields are complete, select Save Individual.
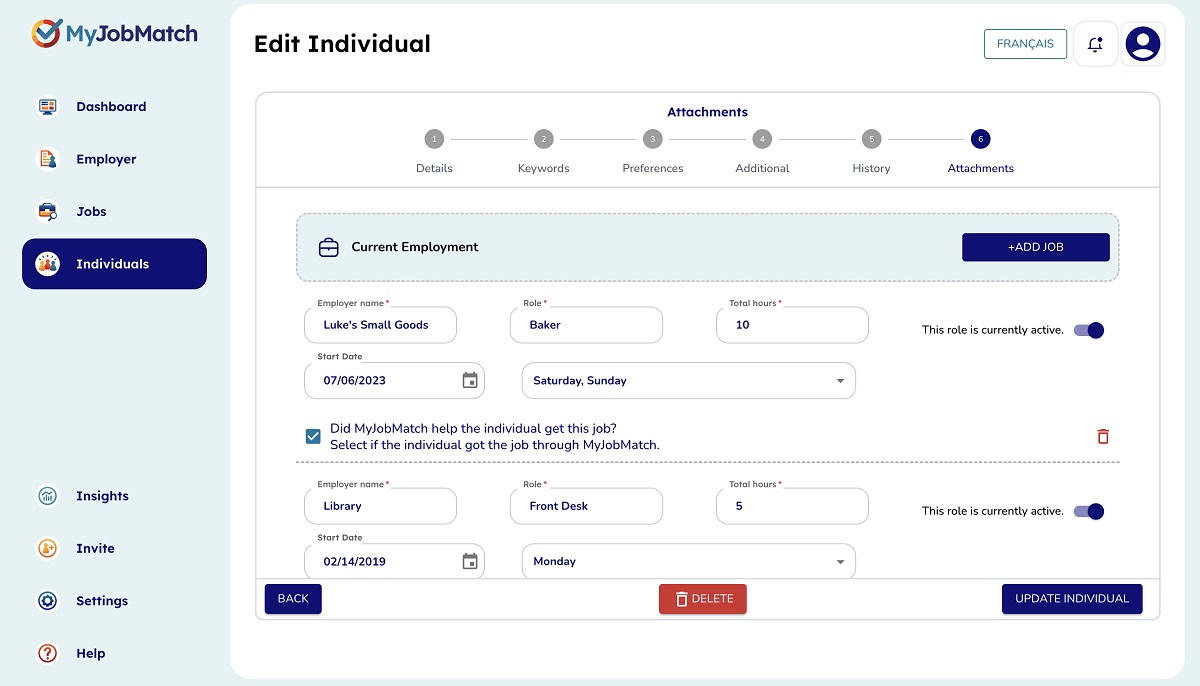
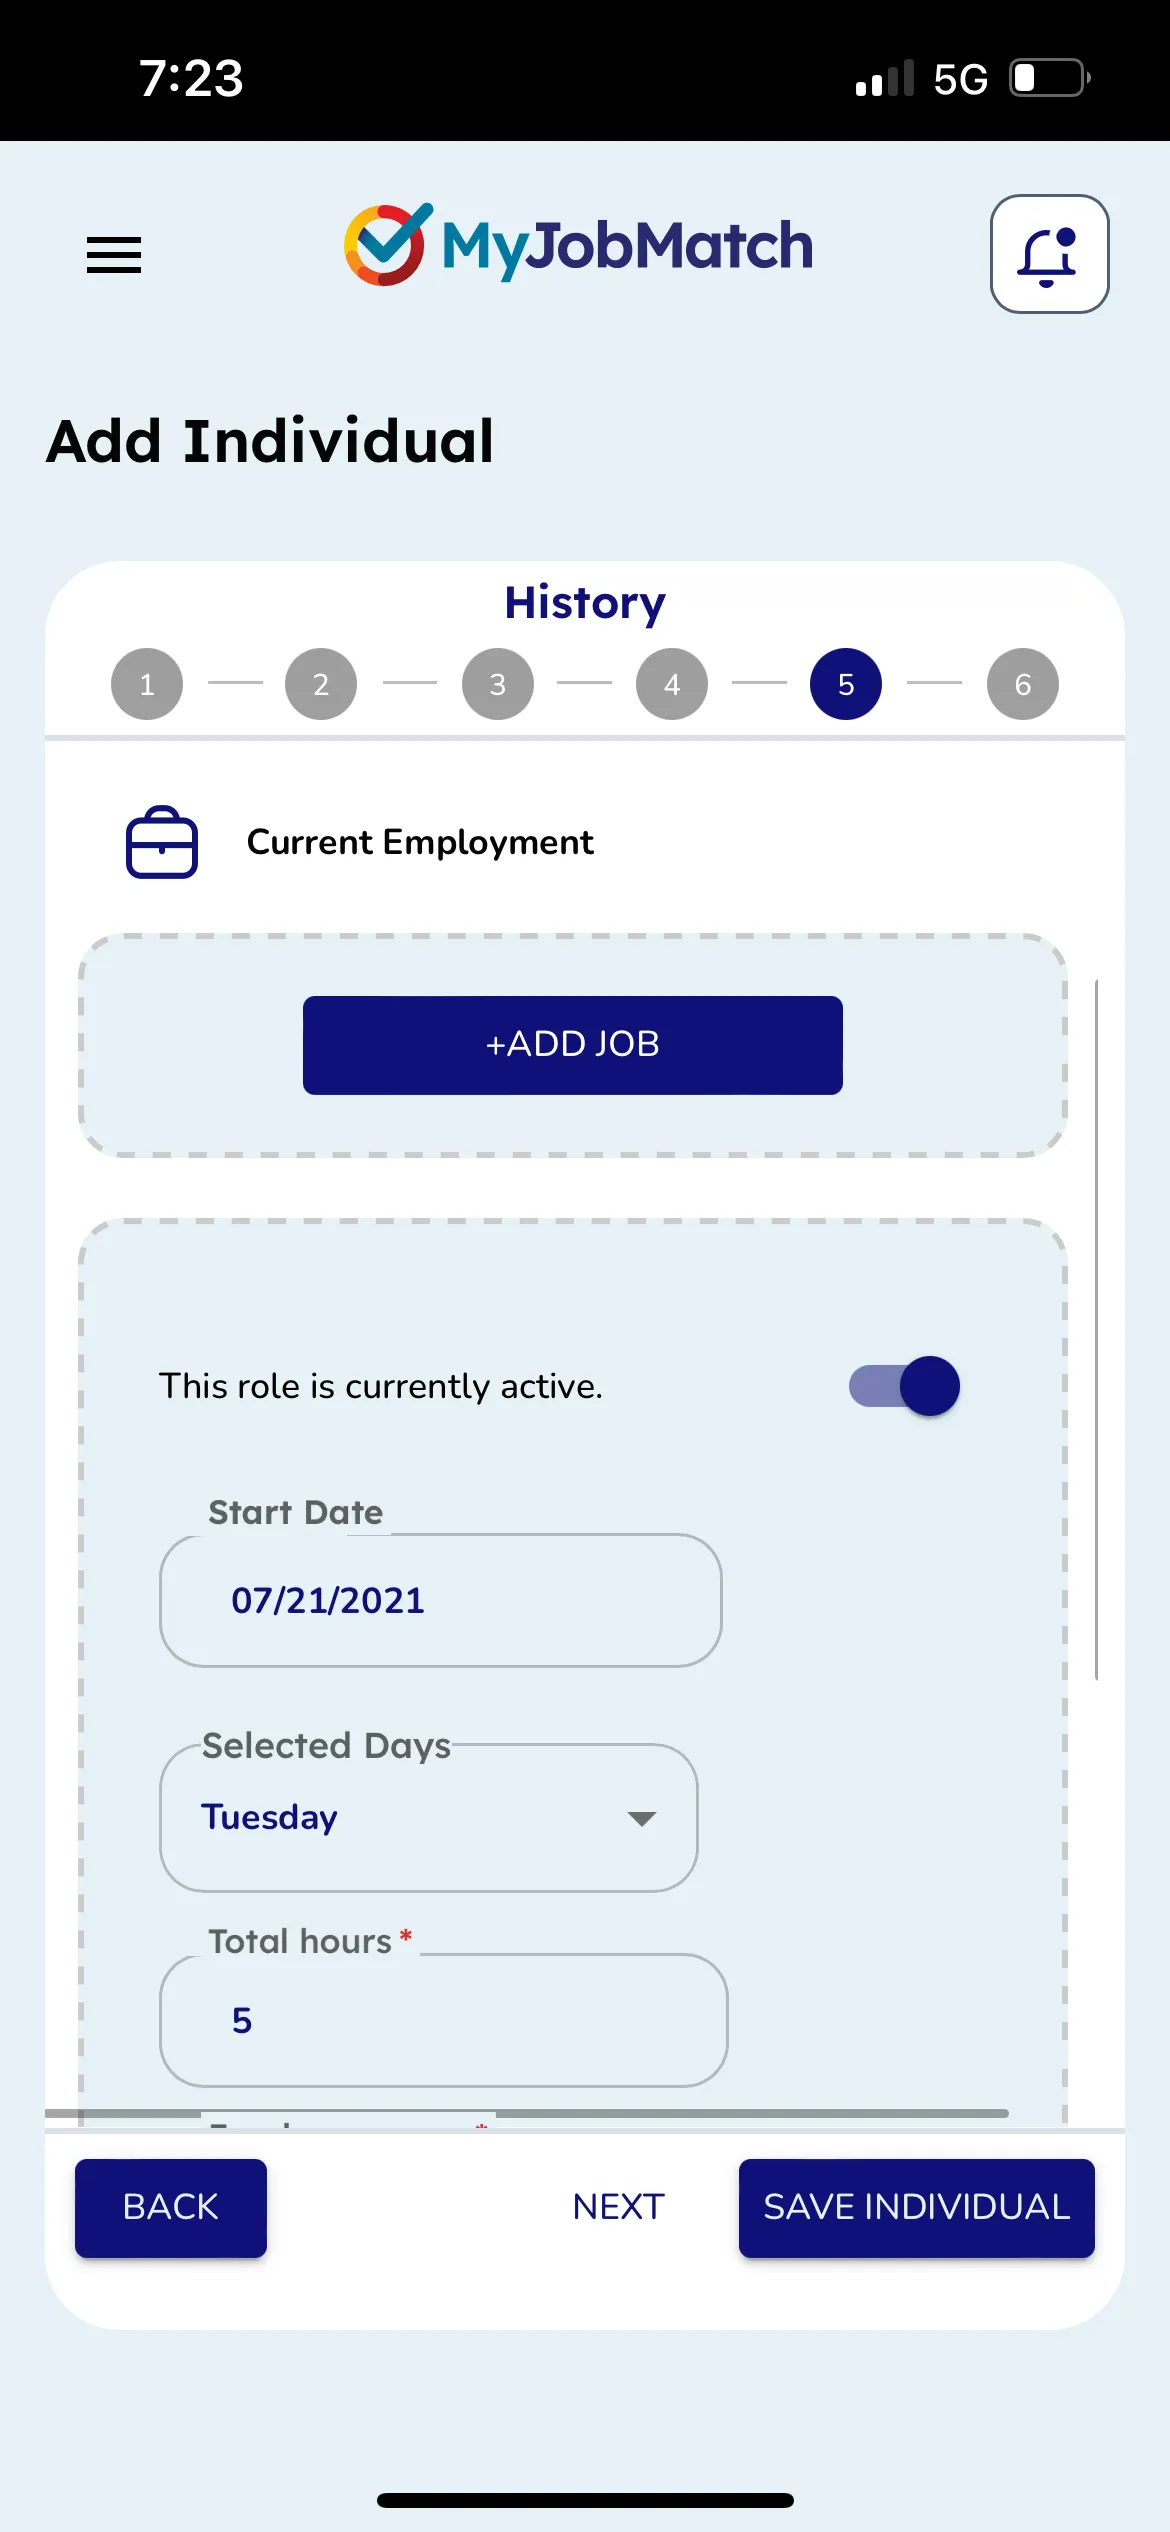
Adding Employment
To add current employment to the Individuals profile, click on +AddAJob (1). A new line of fields will appear below for you to complete (2). For each day of the week the person is employed, add a new job and complete the required fields.
If that person is no longer working in that role, toggle, 'This role is currently active' to 'Individual no longer works here' (3). Depending on that status of that job, it will appear in "Current Employment" or move to "Employment History" on the individual's profile page.
If the Individual found this job through MyJobMatch be sure to select that option (4)!
Add a new Individual Continued
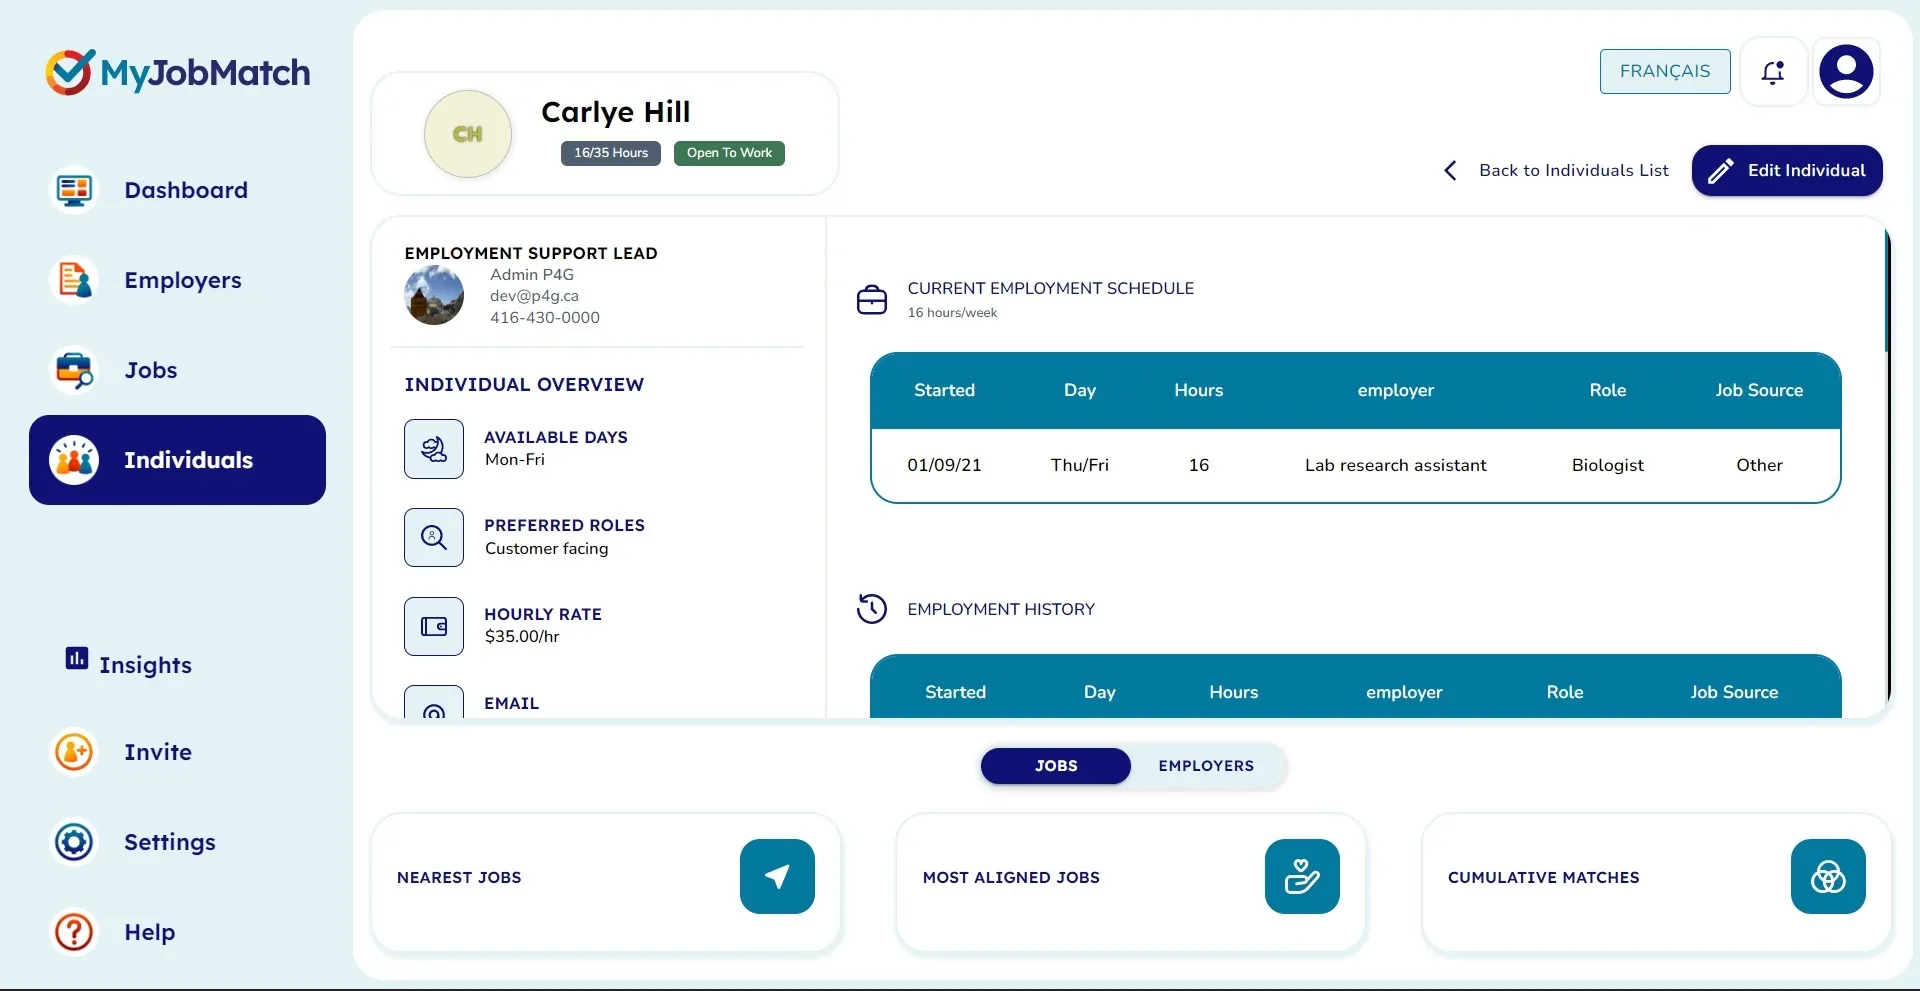
Now that you have saved the Individual click View Individual to see their full profile.
From this view, you can Edit Individual details information or check out the Matches for this individual.
- Edit Individual will allow you to go back to the previous view to edit/update information.
- Matches will be covered further in the Recommender section of this document. Please note, when you choose matches from the Individual view, it will give you the option to choose Jobs or Employers.
Individual Matches
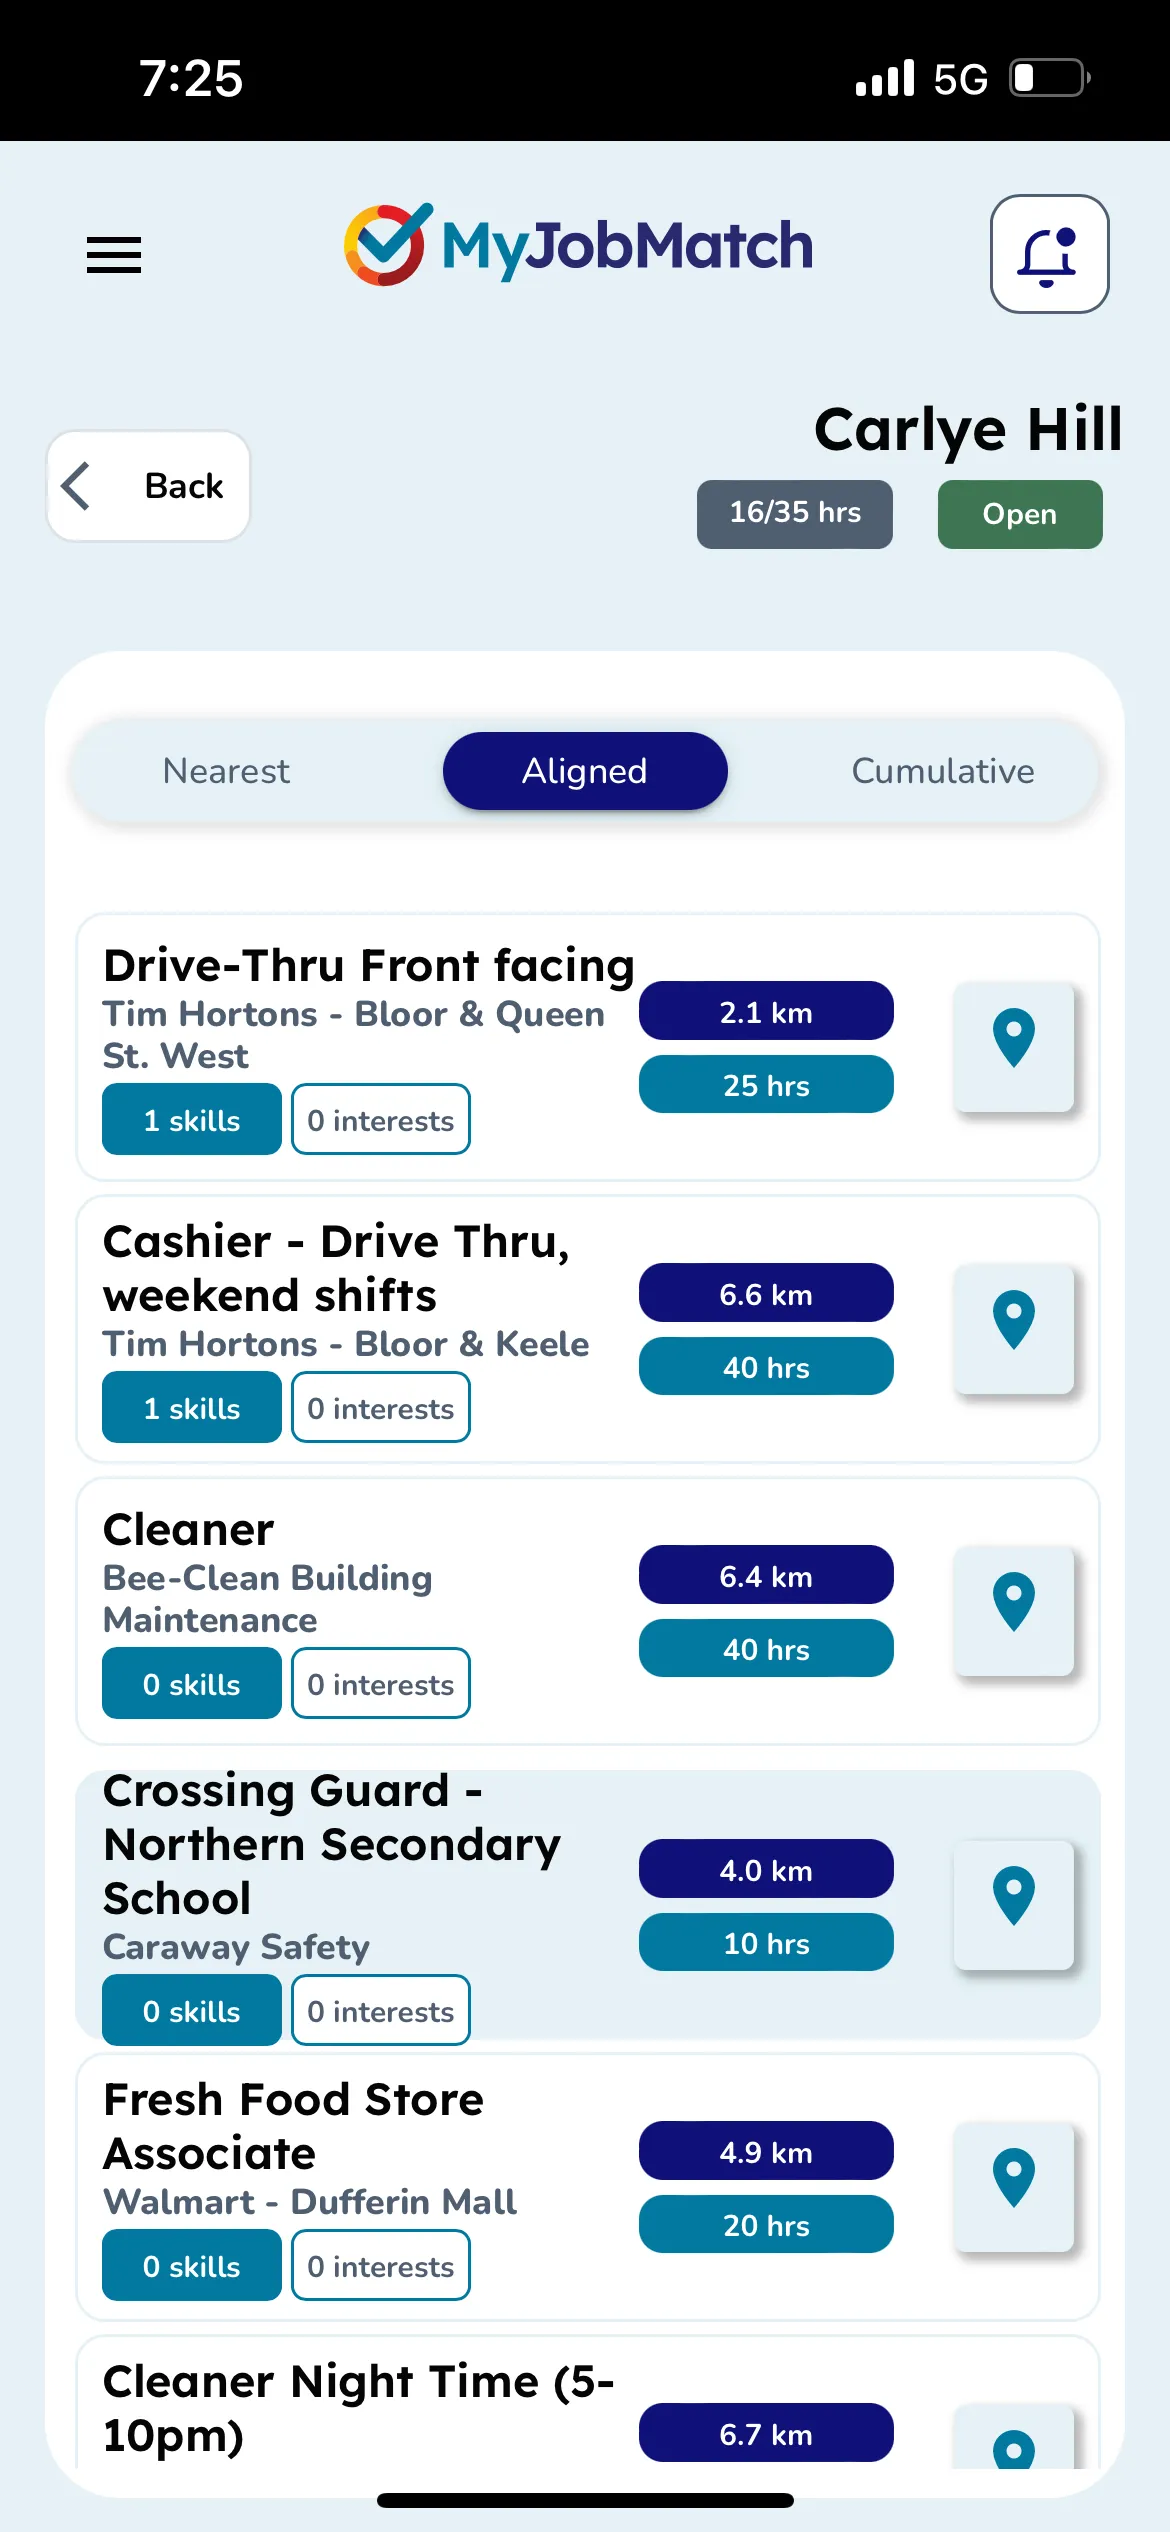
From the Individual's Profile you can choose to see Matches for Employers or for Jobs.
In this example, we chose Employers so it will only show us employers for the the database associated with my Agency.
When you choose Jobs, it will show you what is publicly available across the network.

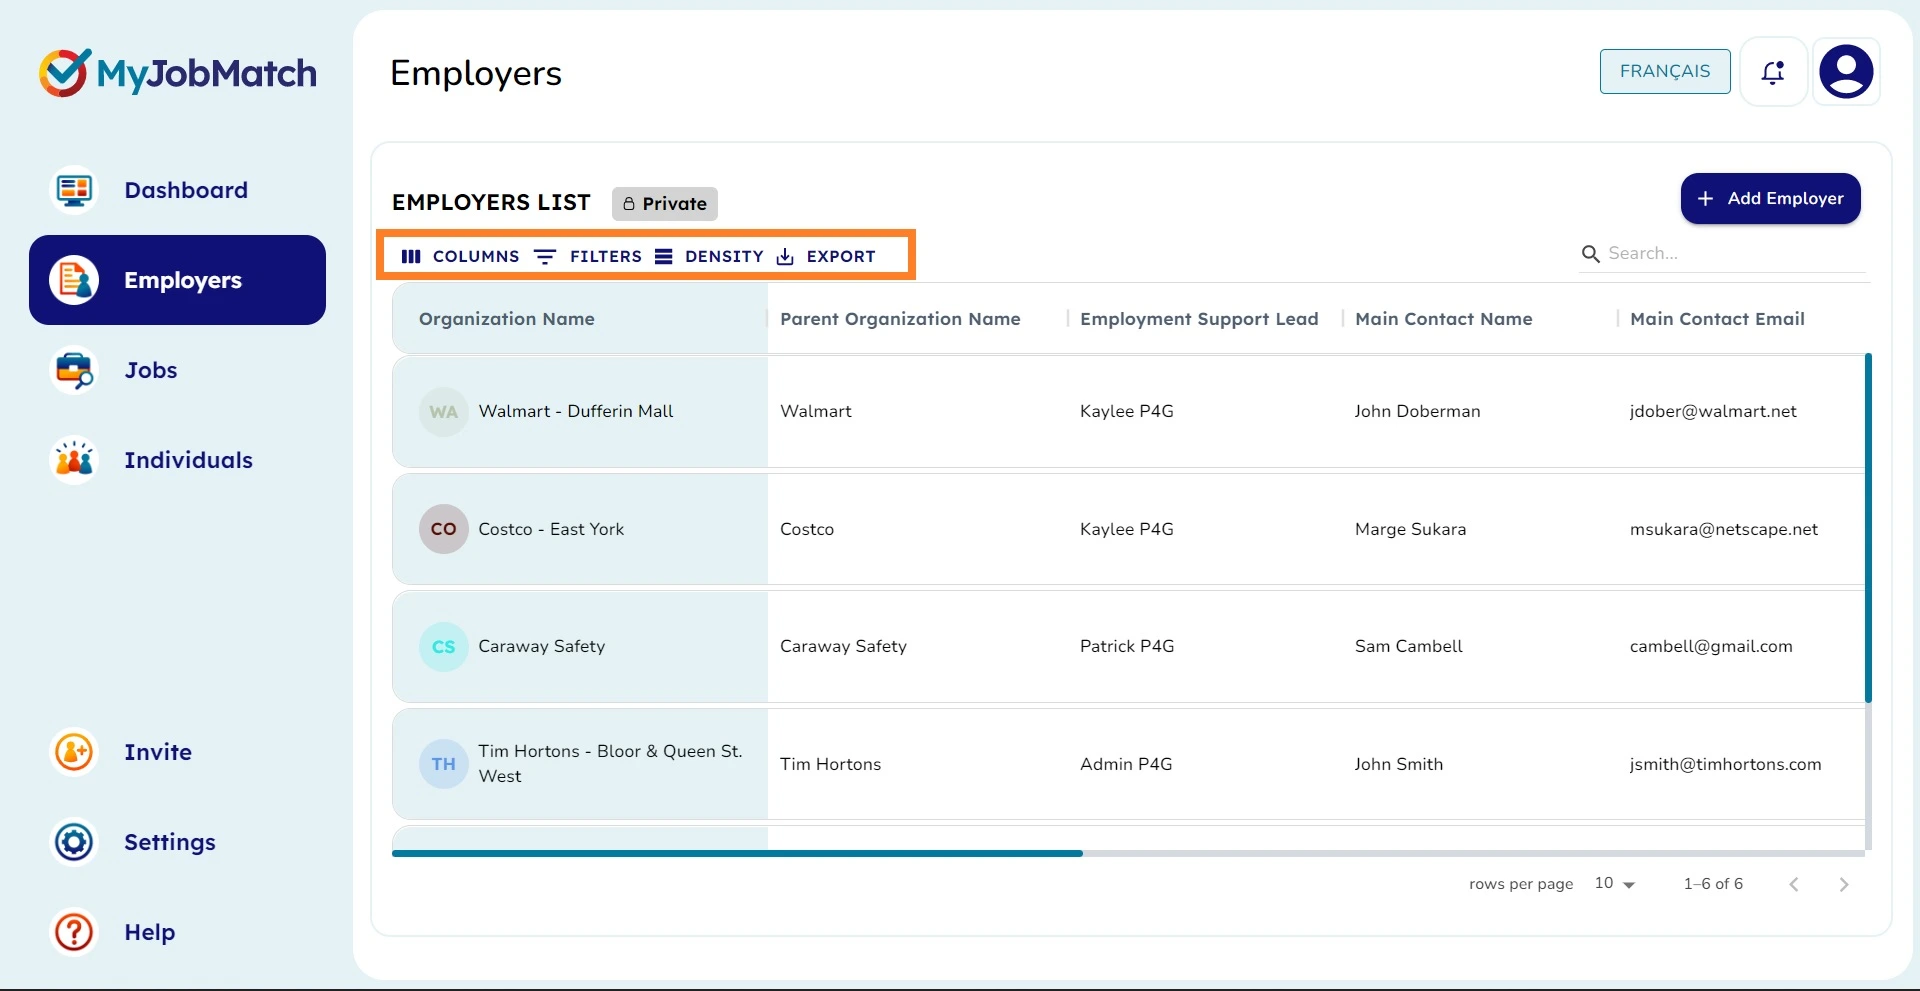
The Toolbar
Toolbar Explained
Columns: This tool enables you to hide or show specific fields on the table e.g. you could use this tool to remove the parent org name or main contact name.
Filters: With this tool you can filter the table to show only rows that match you want. E.g. you could filter the table to the right to only show rows that have 'Kaylee Hake' as the Employment Support Lead.
Density: The density tool enables you to choose the size of the rows in the table. E.g. with this tool you could increase the size of the rows to improve readability.
Export: The export tool gives you the ability to either print the entire table, or download it as a CSV file on Microsoft Excel or Google Sheets.
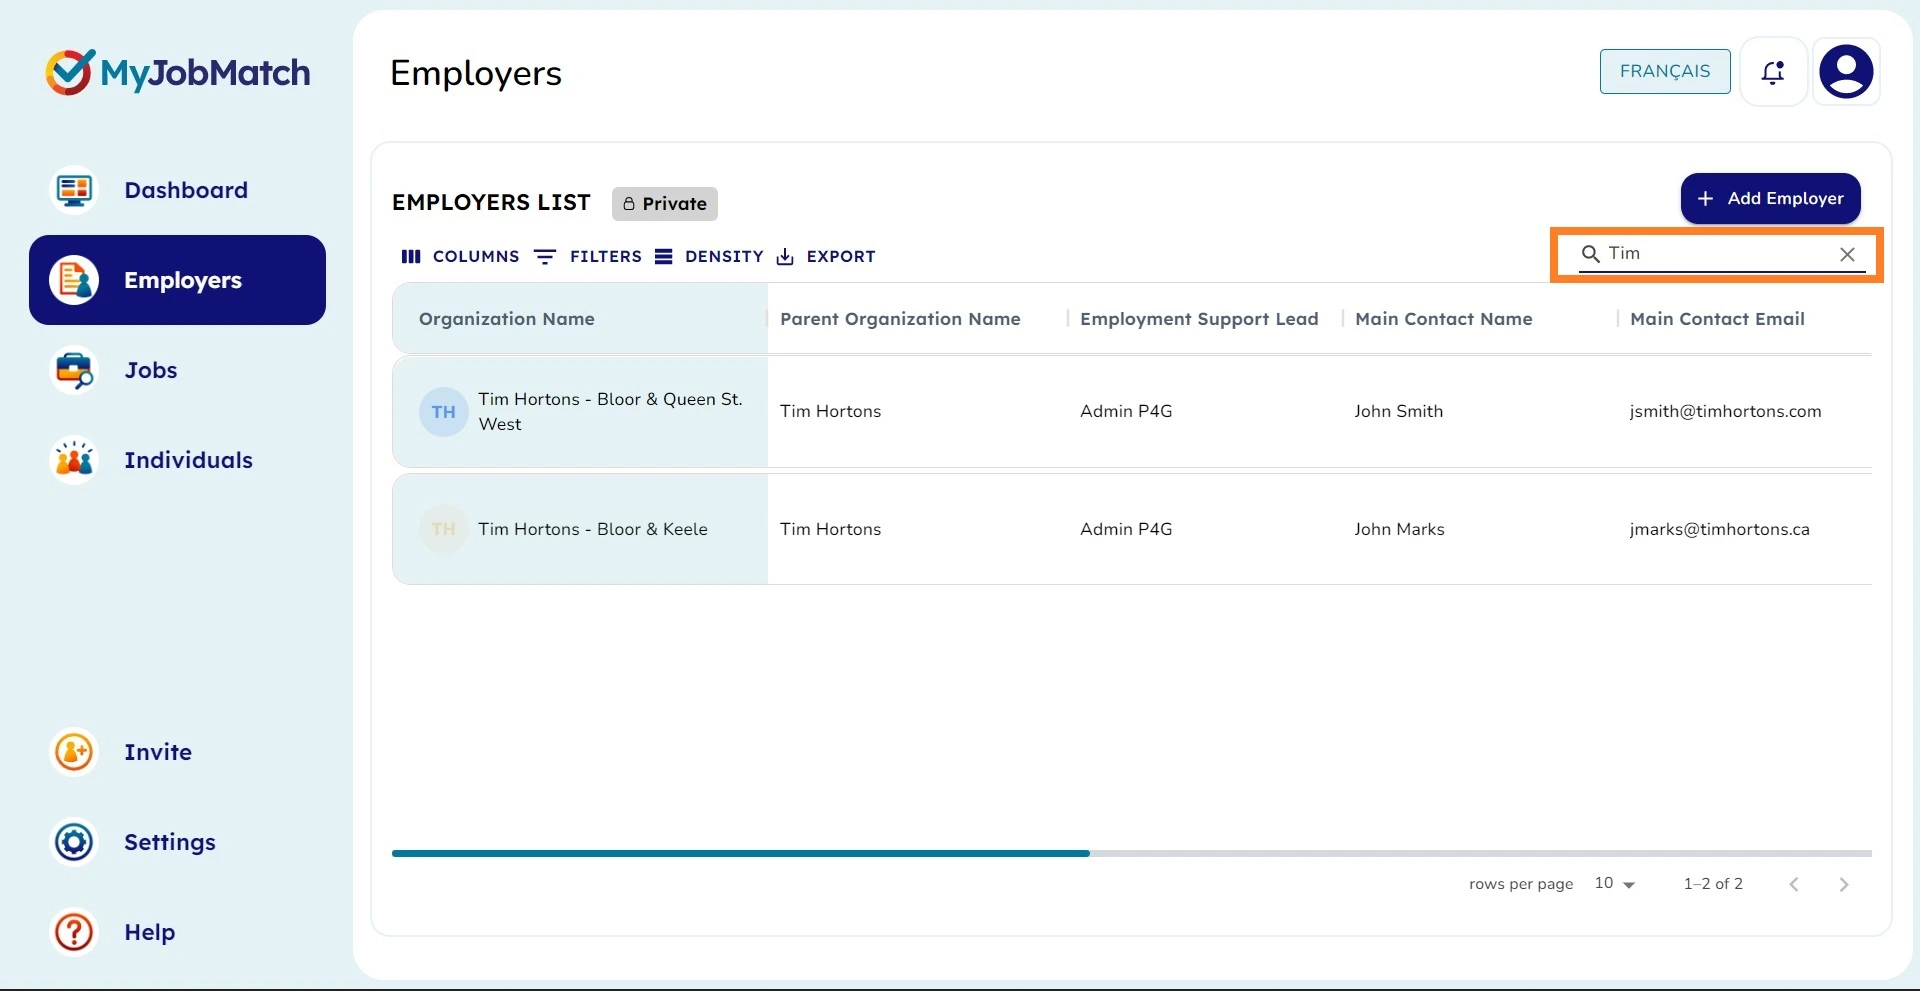
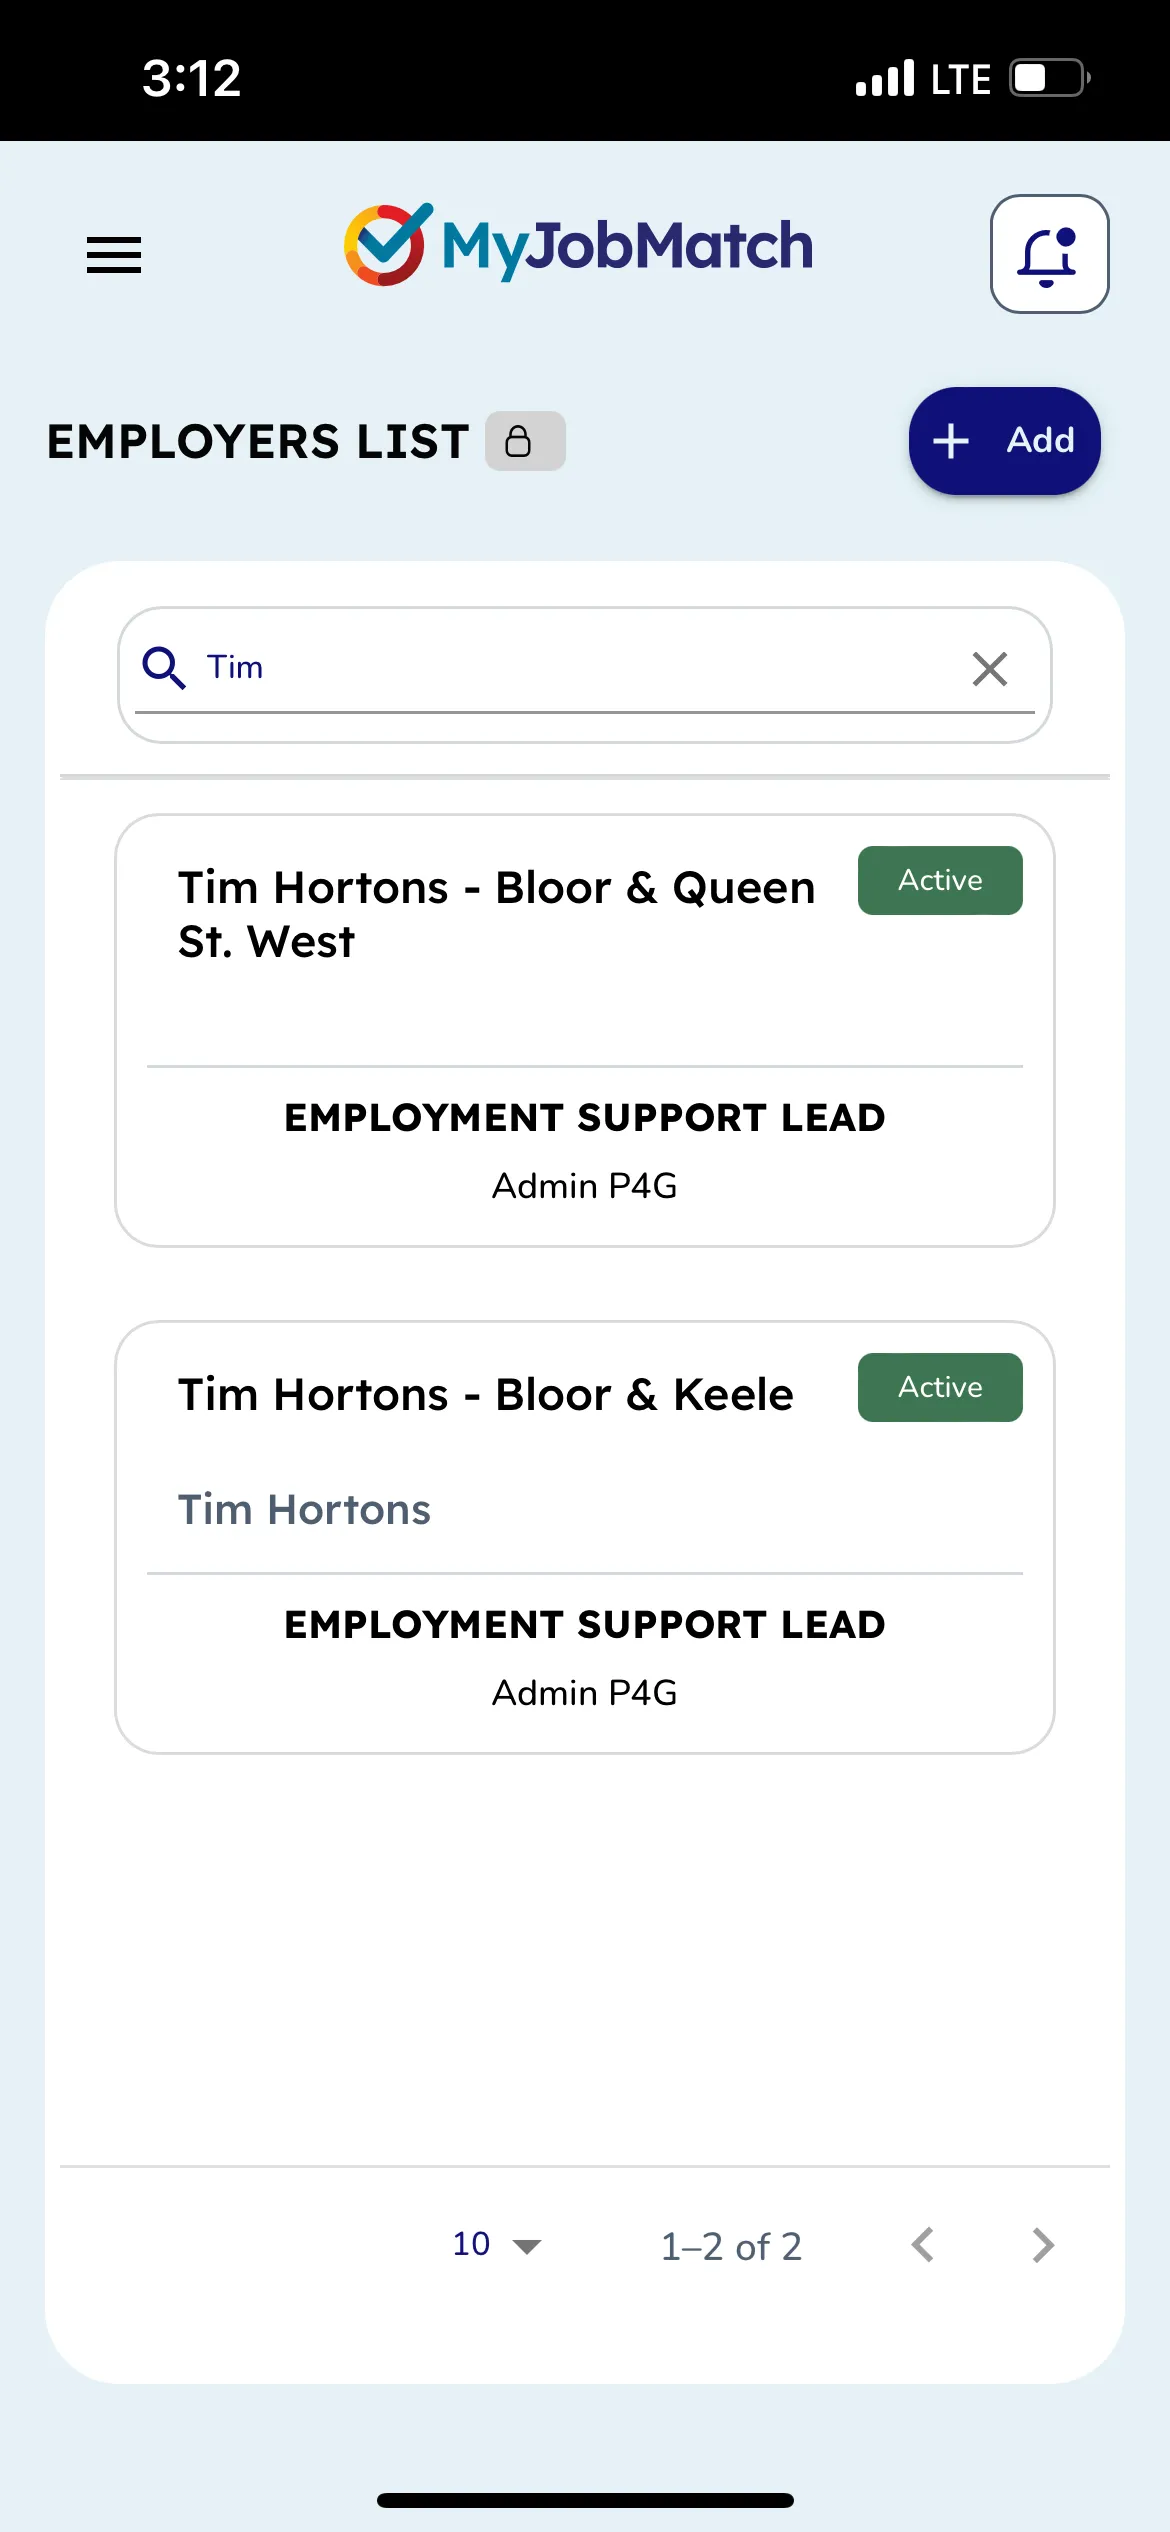
Search Bar
Use the search bar in the top right corner to search anything in the Employers, Jobs or Individuals database.
Matches
Use this section to identify alignment between an Individual and all available Jobs (public) or an Individual and Employers (that are private to your agency).
Or
To identify alignment between a Job and the Individuals (private to your agency) or an Employer and Individuals (both of which are private to your agency).
Remember, the Matches section isn't meant to provide you with 'perfect' matches, it's there to help give you ideas! For example, if someone hasn't given you many ideas for skills and interests, talk to them about the kinds of employers who are near them to give them some ideas.
Important: Before moving forward with any of the matches be sure to check out the notes section to see how the Employment Support Lead for that Employer or Job wants to you proceed. This information can be found in the bottom right corner of every match.
How Do Matches Work?
For Individuals matches are based on Skills, Interests and location.
For Employers matches are based on keywords andlocation.
For Jobs matches are based on keywords andlocation.
Keywordsare matched toSkills and Interests to identify alignment (most aligned).
Locationfor bothEmployers or Jobs, and Individuals are compared to identify Nearest.
Cumulative matches between either Employers or Jobs, and Individuals are calculated using Keywords, Skills and Interests, and Location.
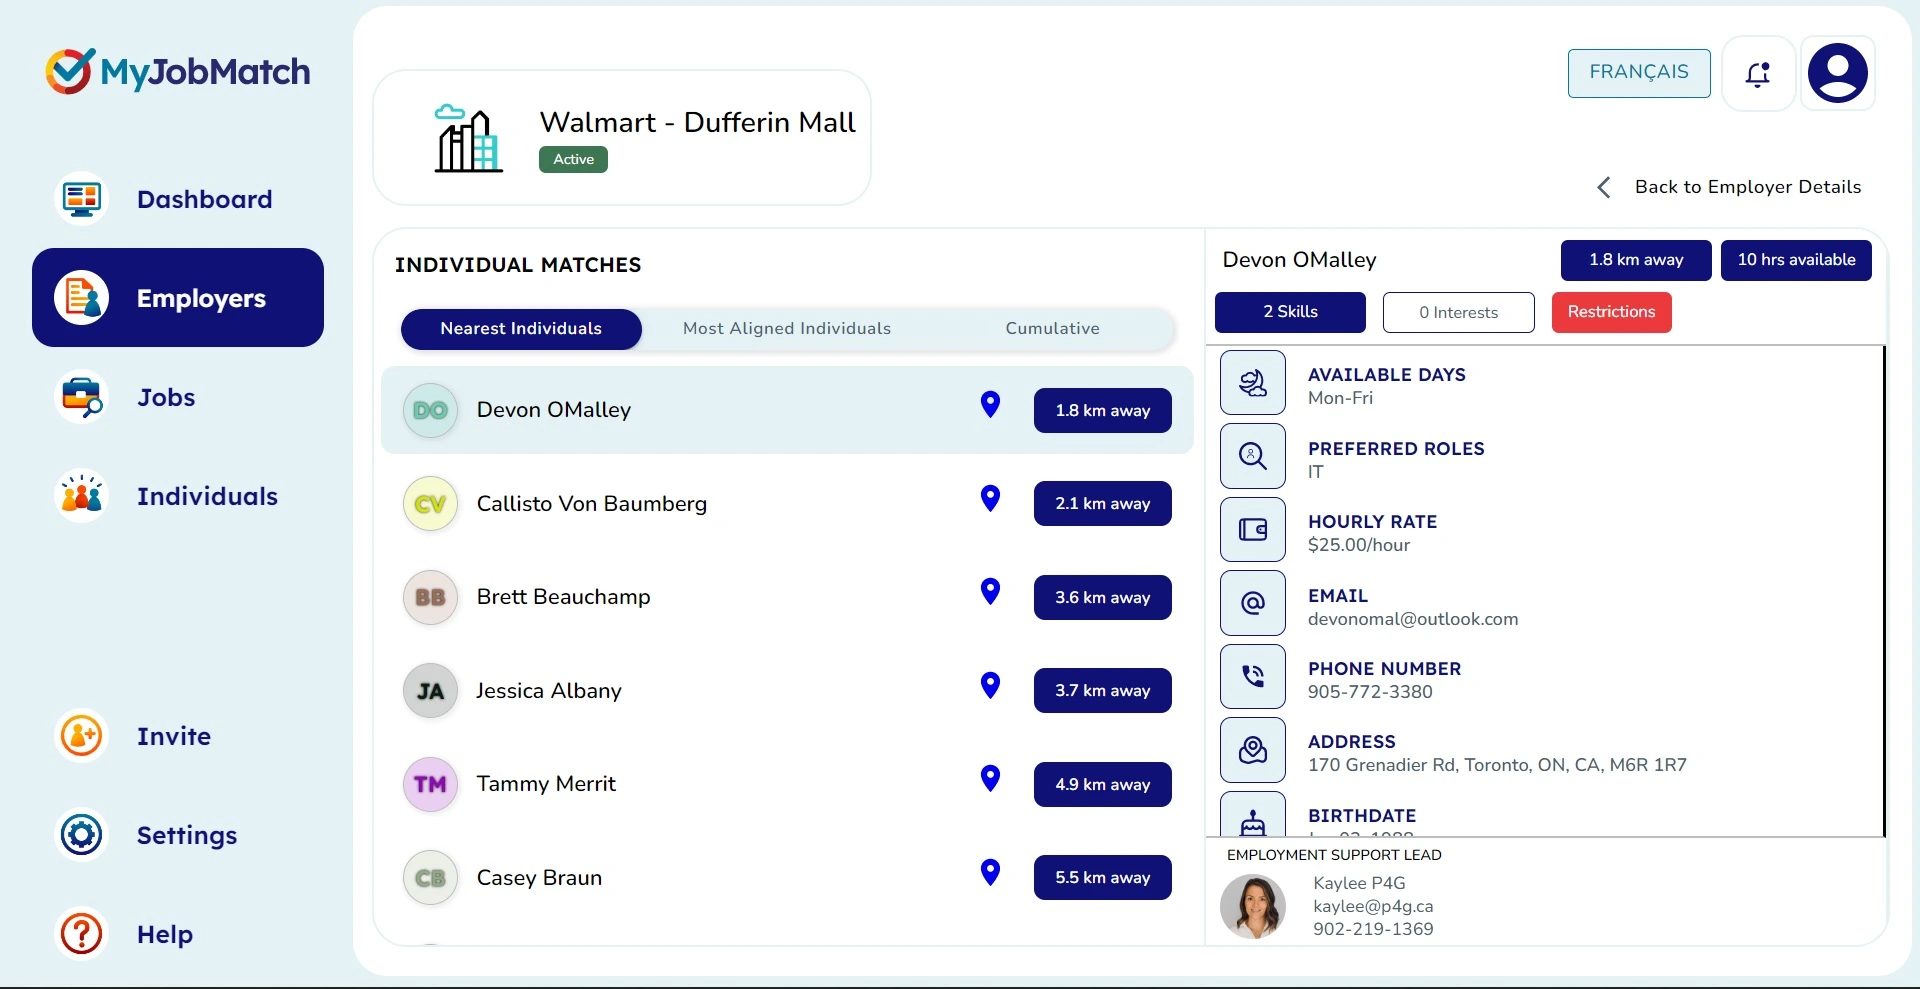
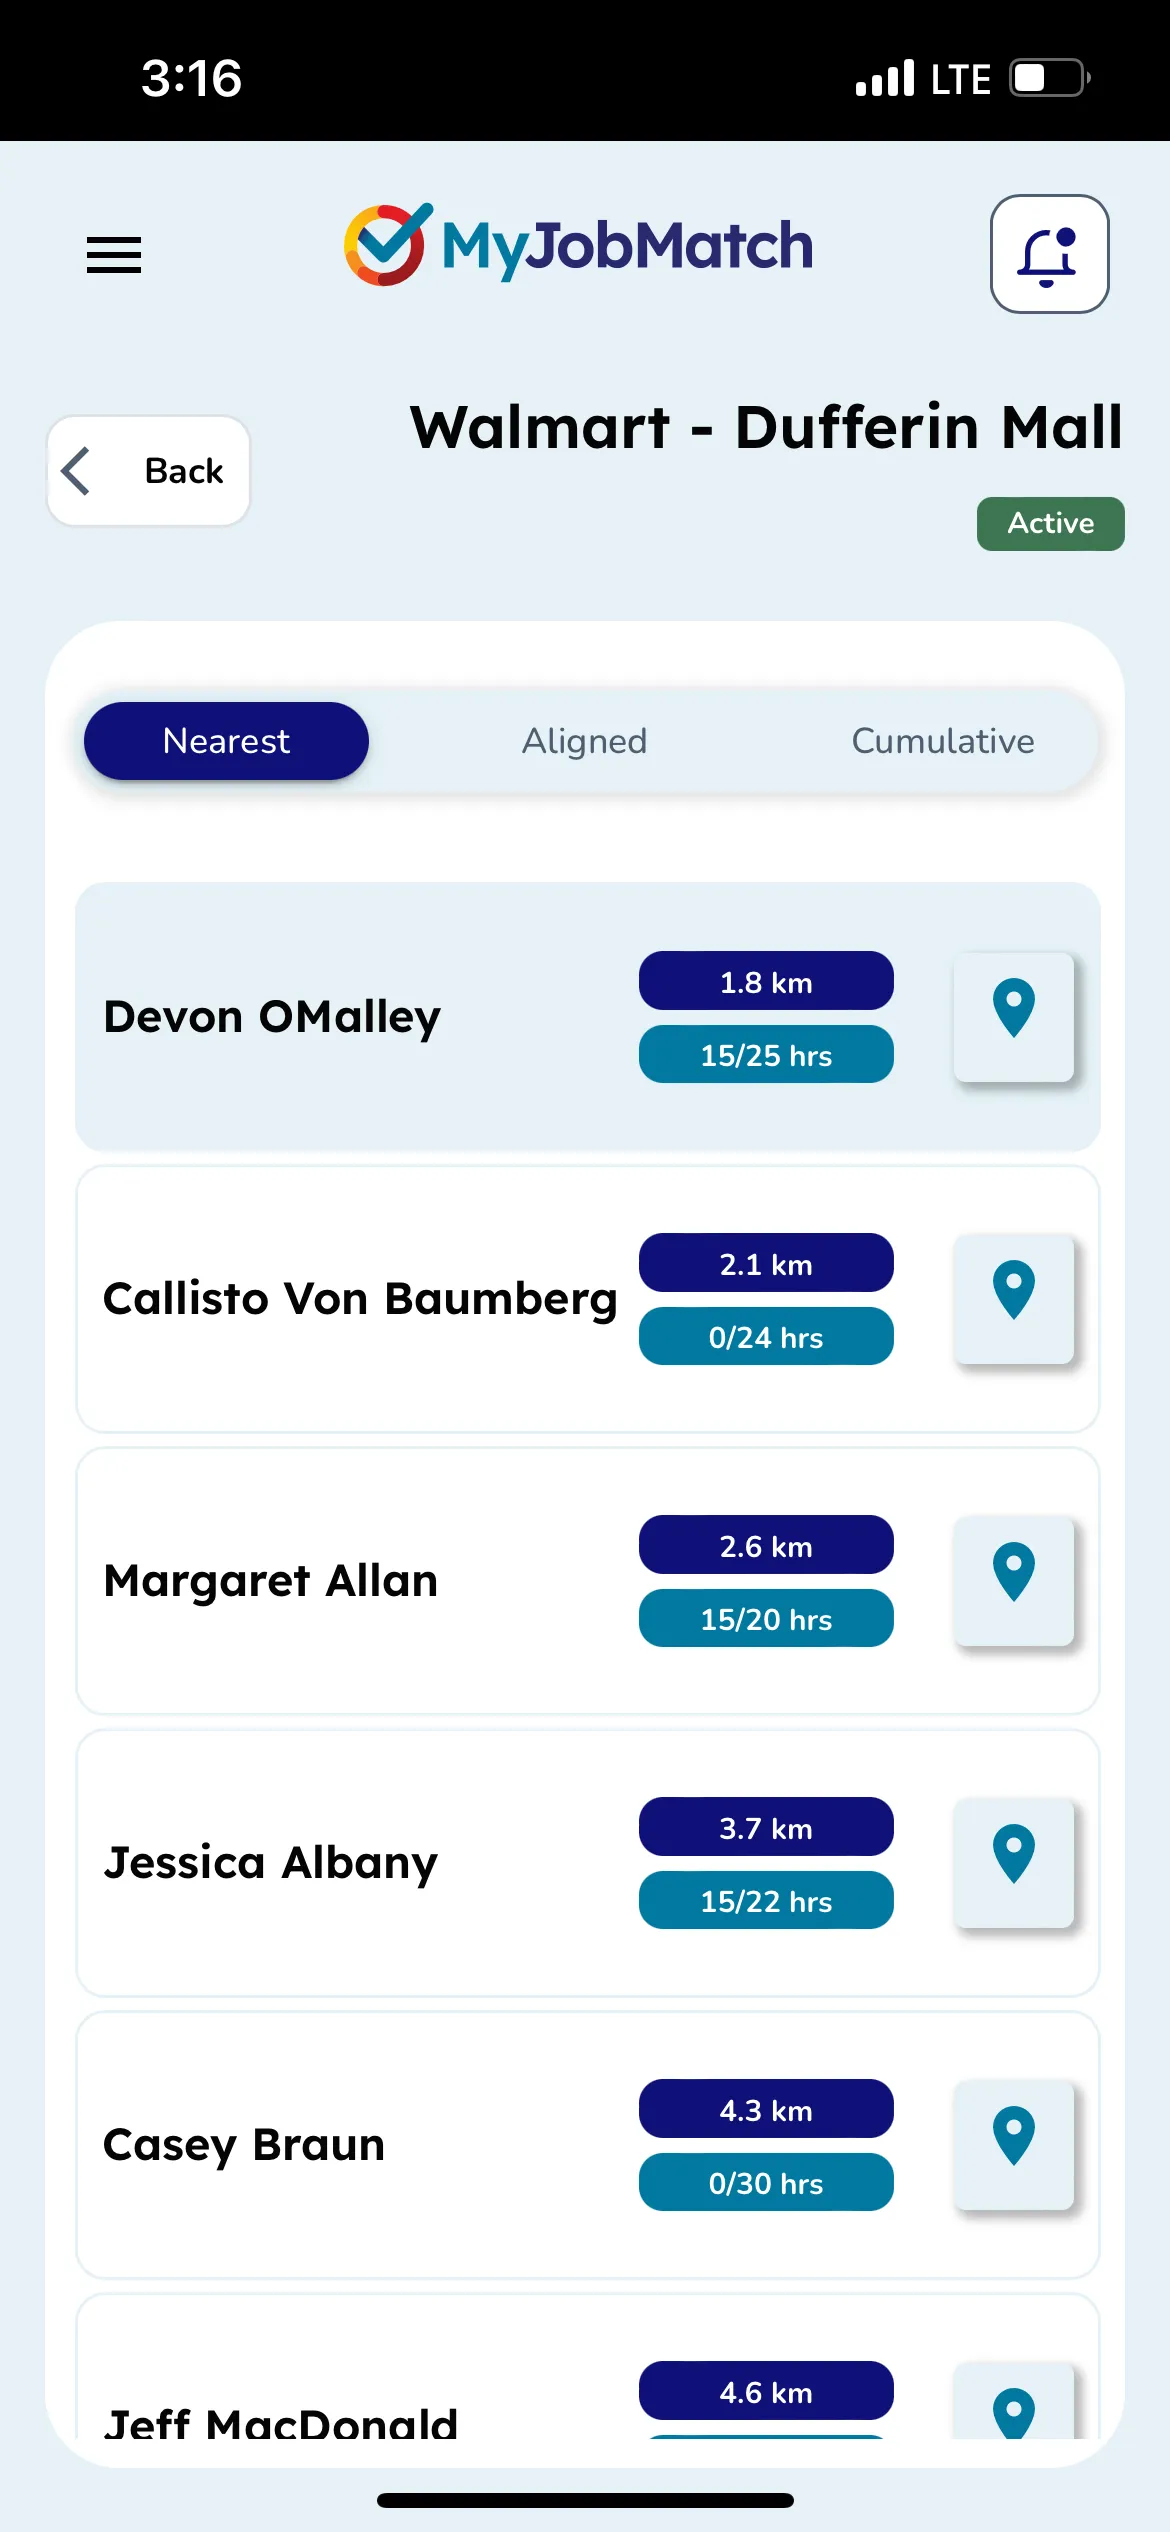
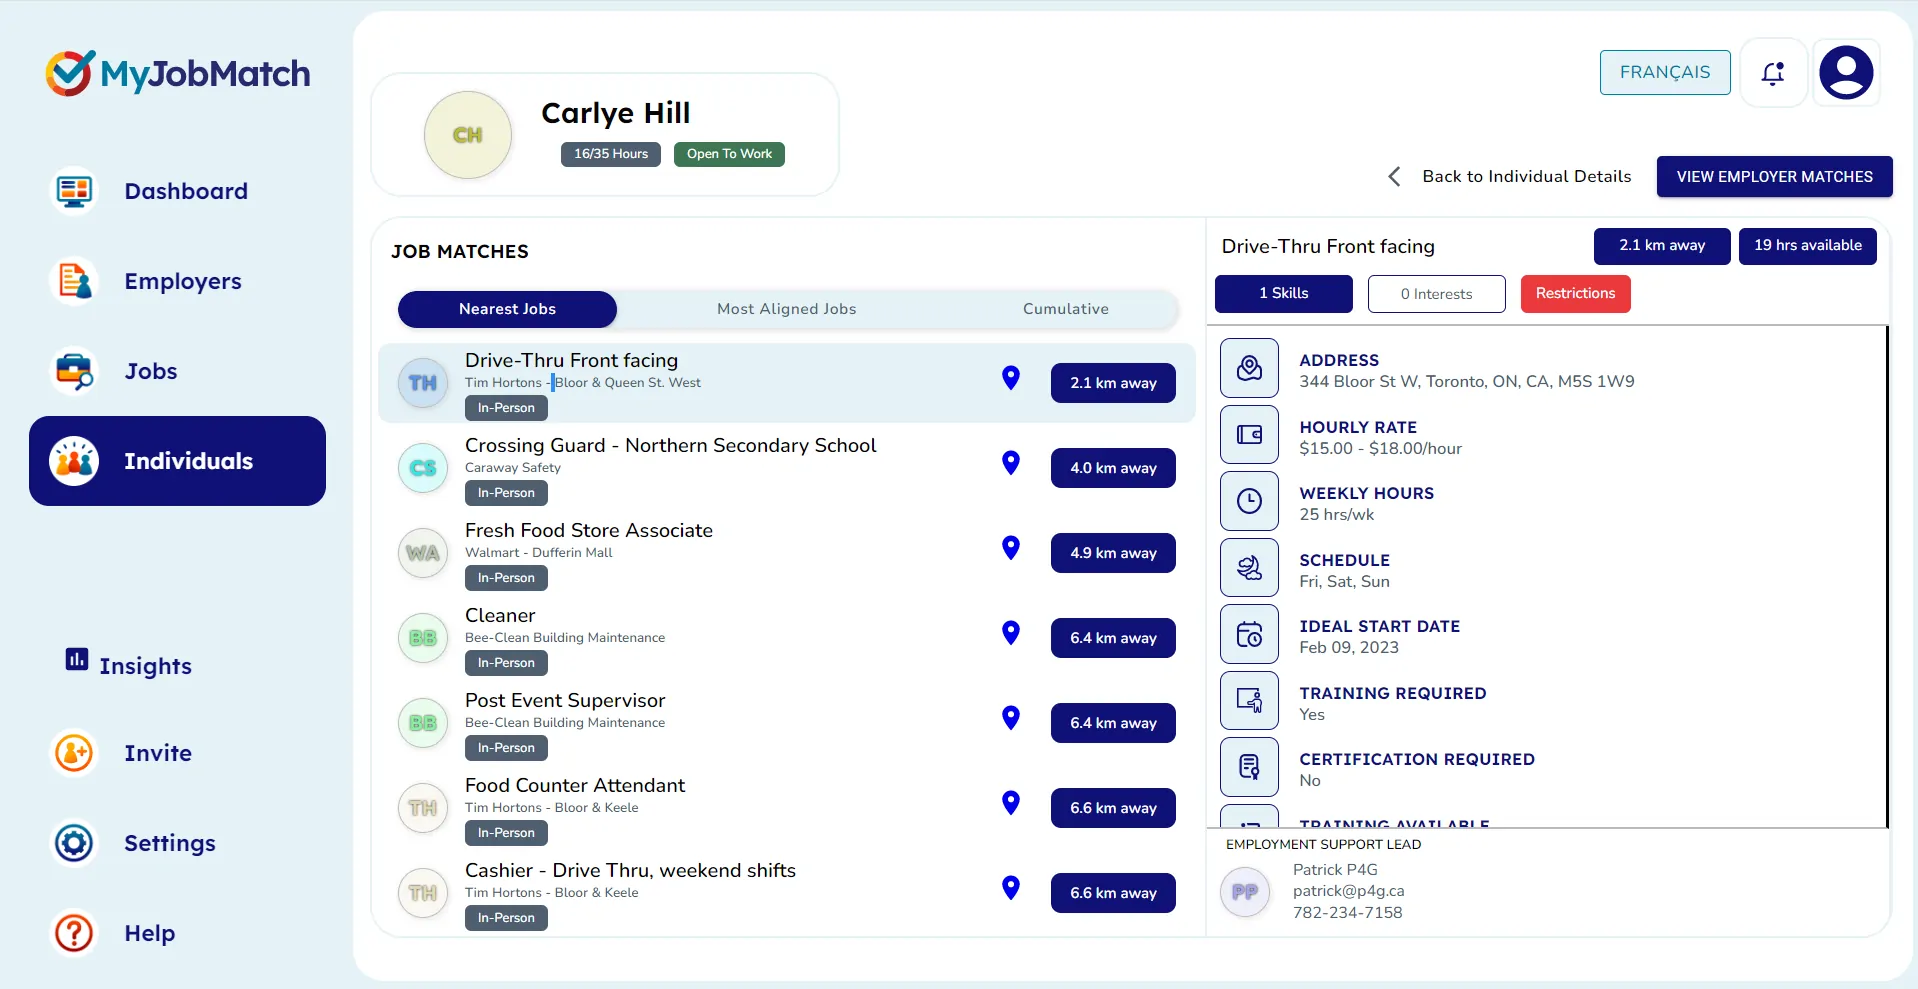
Nearest Matches
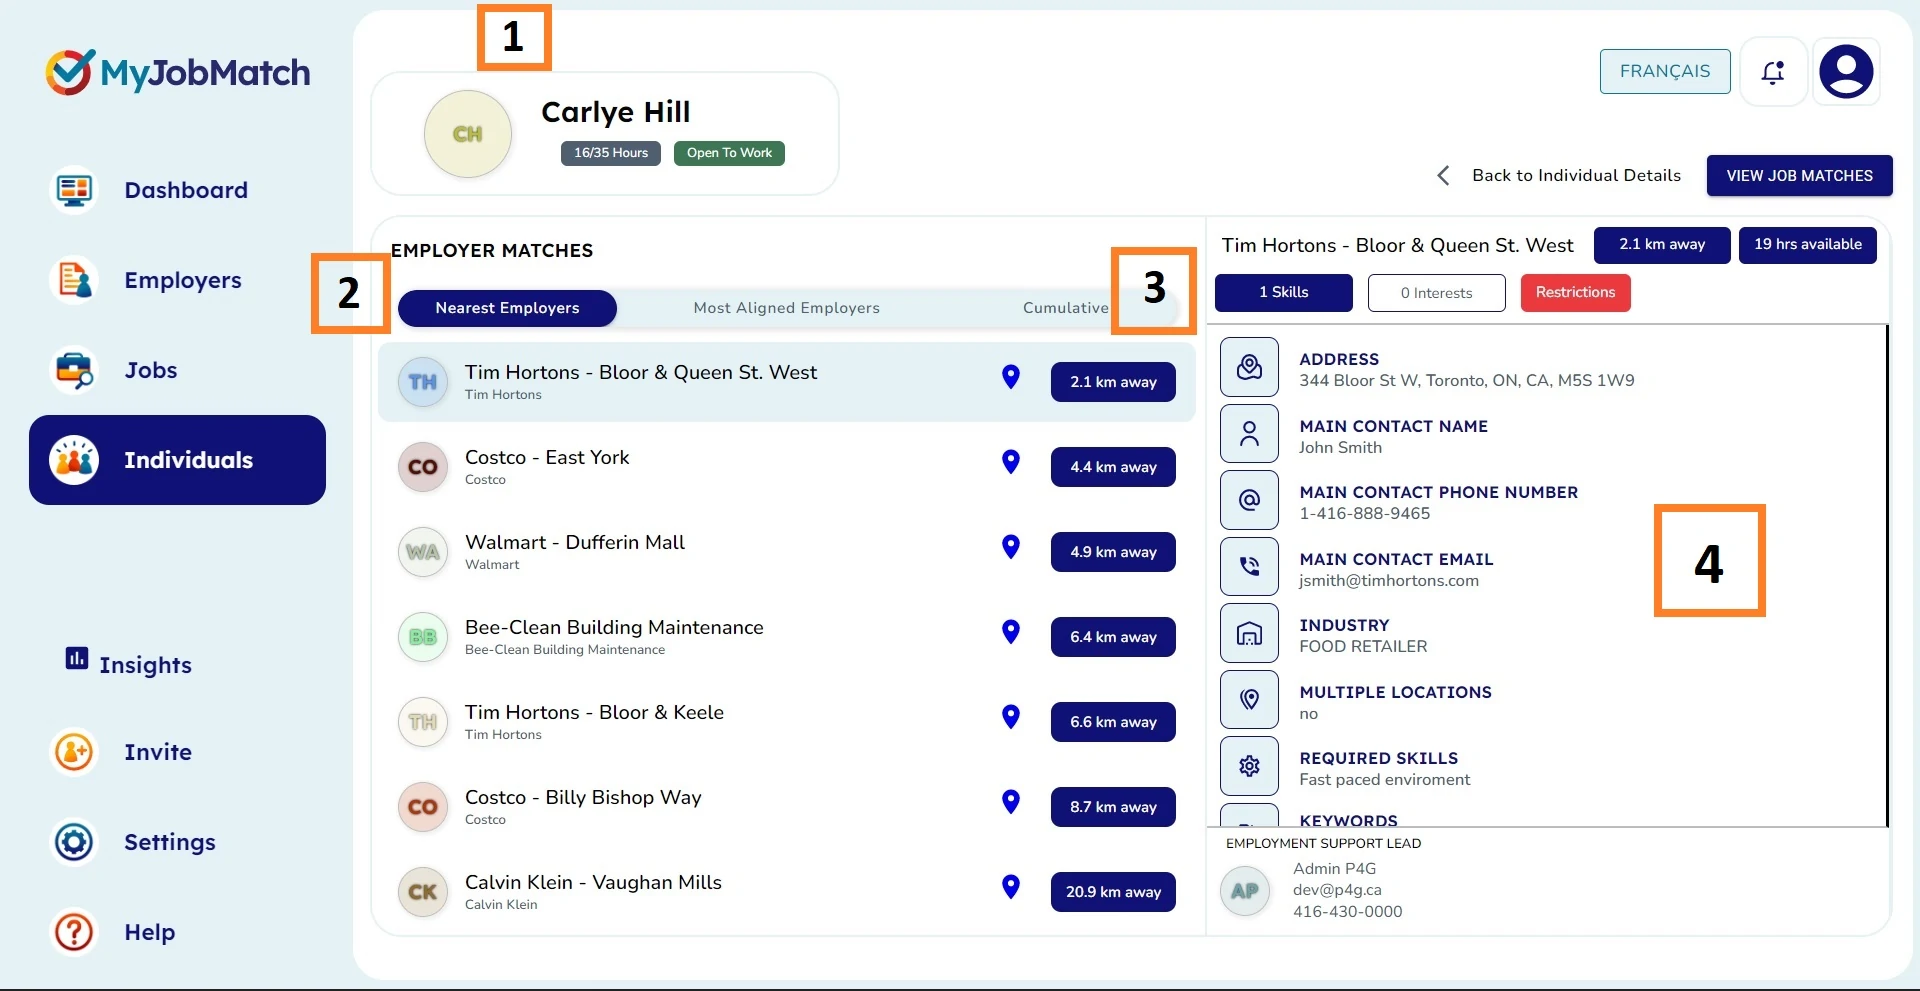
In this example, we are looking for Employer Matches for an Individual named, Carlye Hill (1).
Nearest Employers (2): Tells you the point-to-point distance between the Individual and the address on file for the Employer (2).
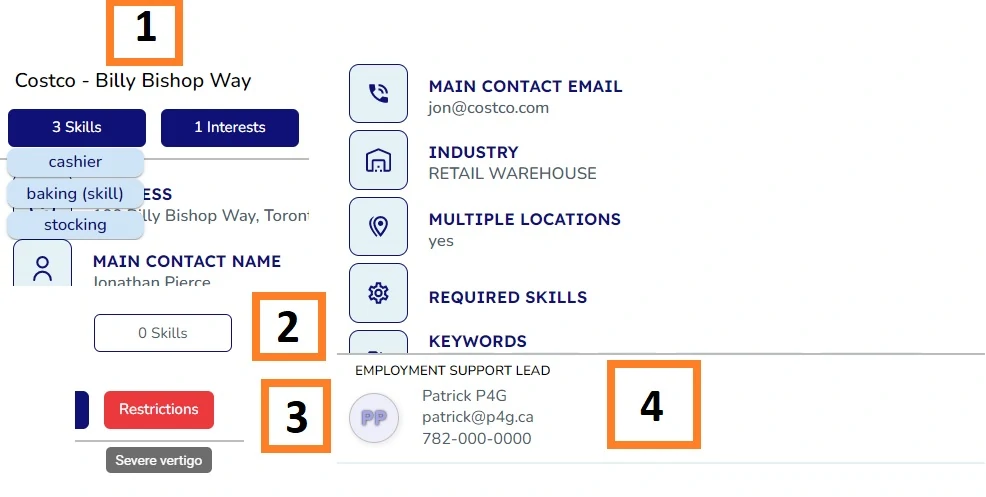
When you click on the Employer, the bottom right panel displays information relevant to that Employer (4). The top part of the right panel holds the skills/interests/restrictions badges relative to the individual.
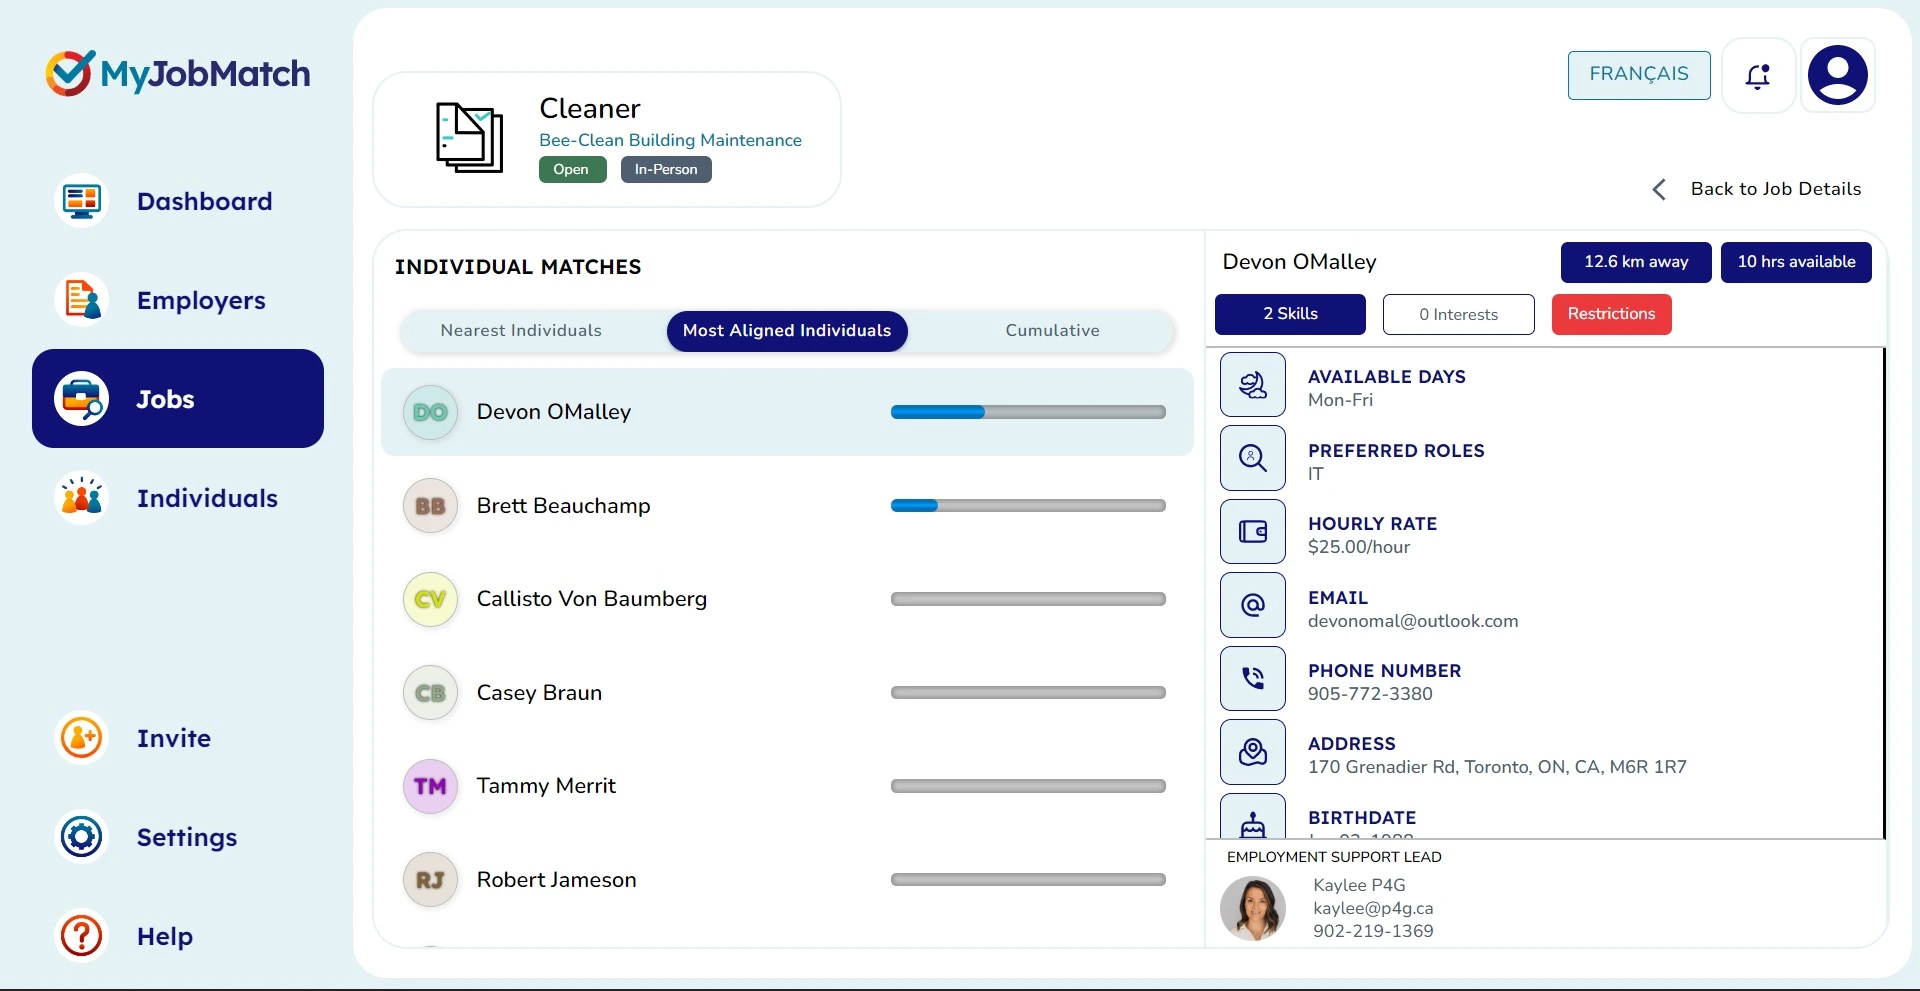
Most Aligned Matches
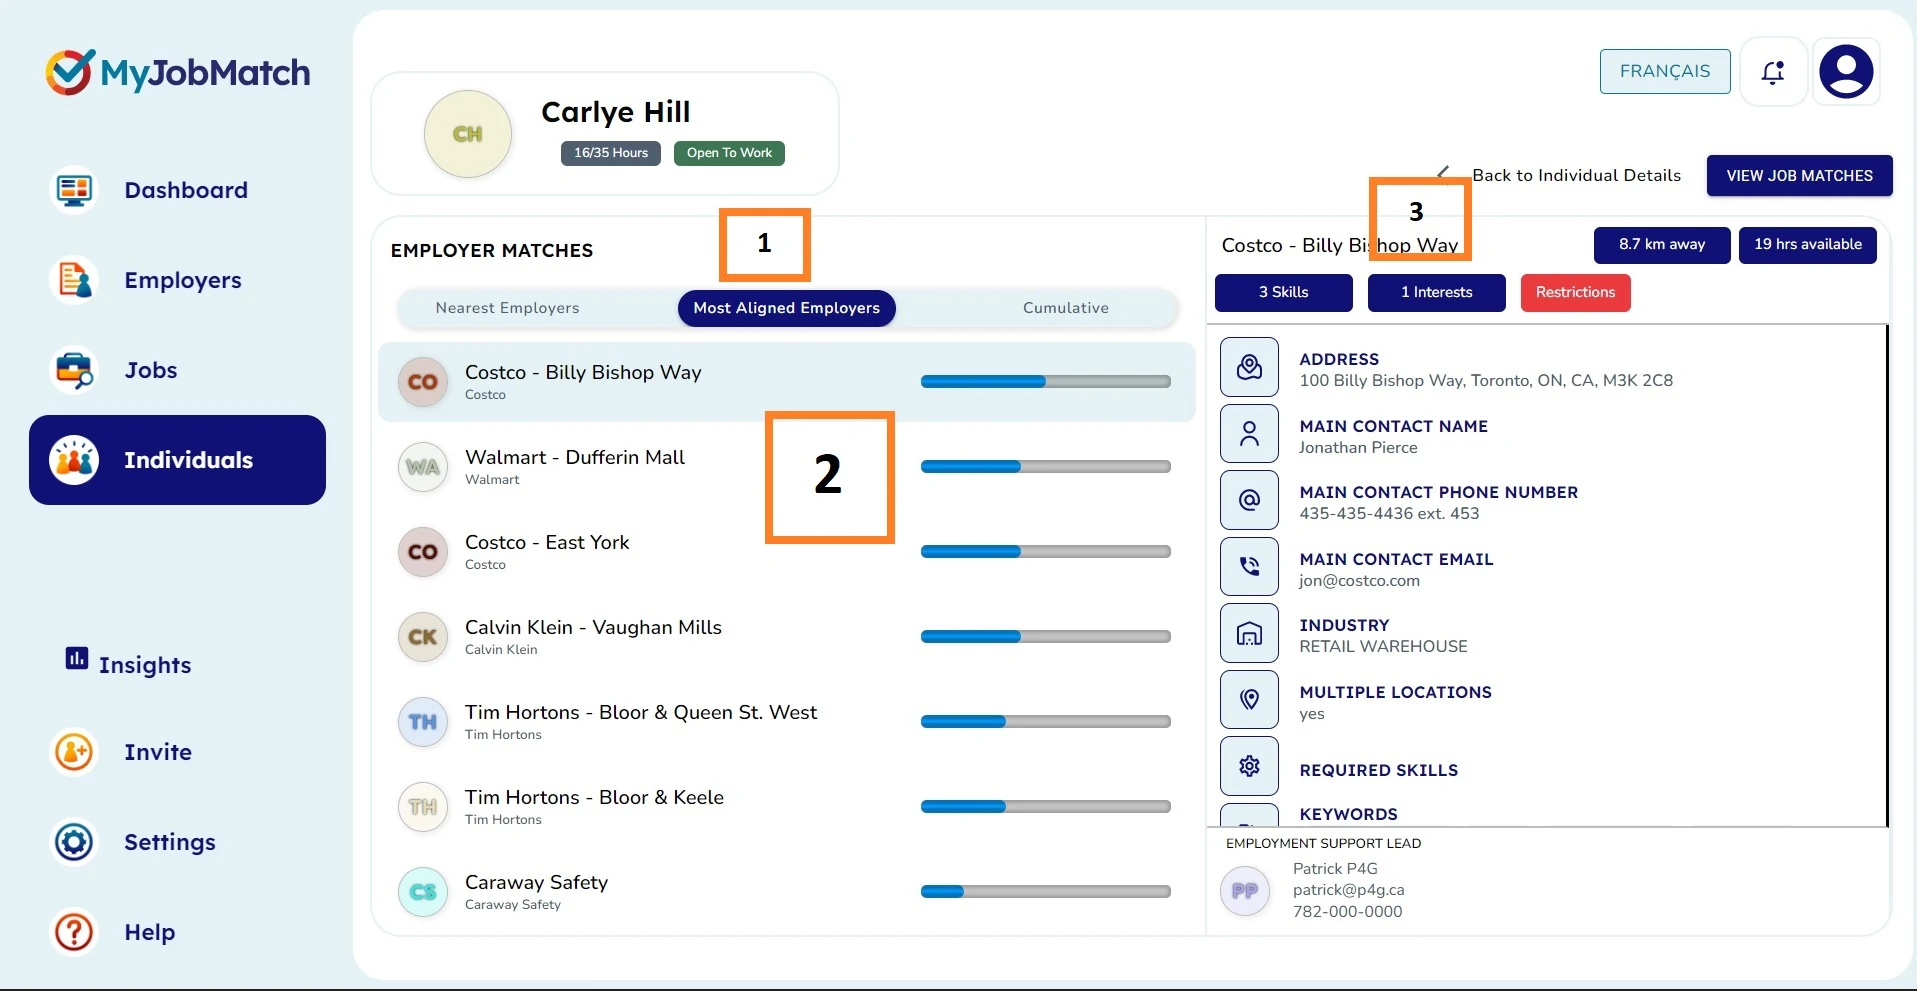
Most Aligned (1) identifies the shared skills and interests of an Individual to the keywords of an Employer or Job.
In this example, it's telling us there are three employers with matching skills and interests to Carlye (displayed by the blue bar - (2)). When you click one of the matched Employers the shared skills and interests of Carlye and the Employer are being displayed in the right panel (3). To identify those skills and interests hover over the blue tags.
IMPORTANT: While most aligned matches are calculated by taking into account aligned skills and interests from the individual, to aligned keywords from the employer or job, they are ranked slightly differently.
The ranking system takes into account the total number of matching keywords and the total number of keywords.
For example, in (2), Carlye has 4 matching keywords out of a possible 8 (50%) with Costco - Billy Bishop Way, and 4 matching keywords out of a possible 10 (40%) with Calvin Klein - Vaughan Mills. So even though they have the same number of matching keywords, Costco is a ranked as a higher match.
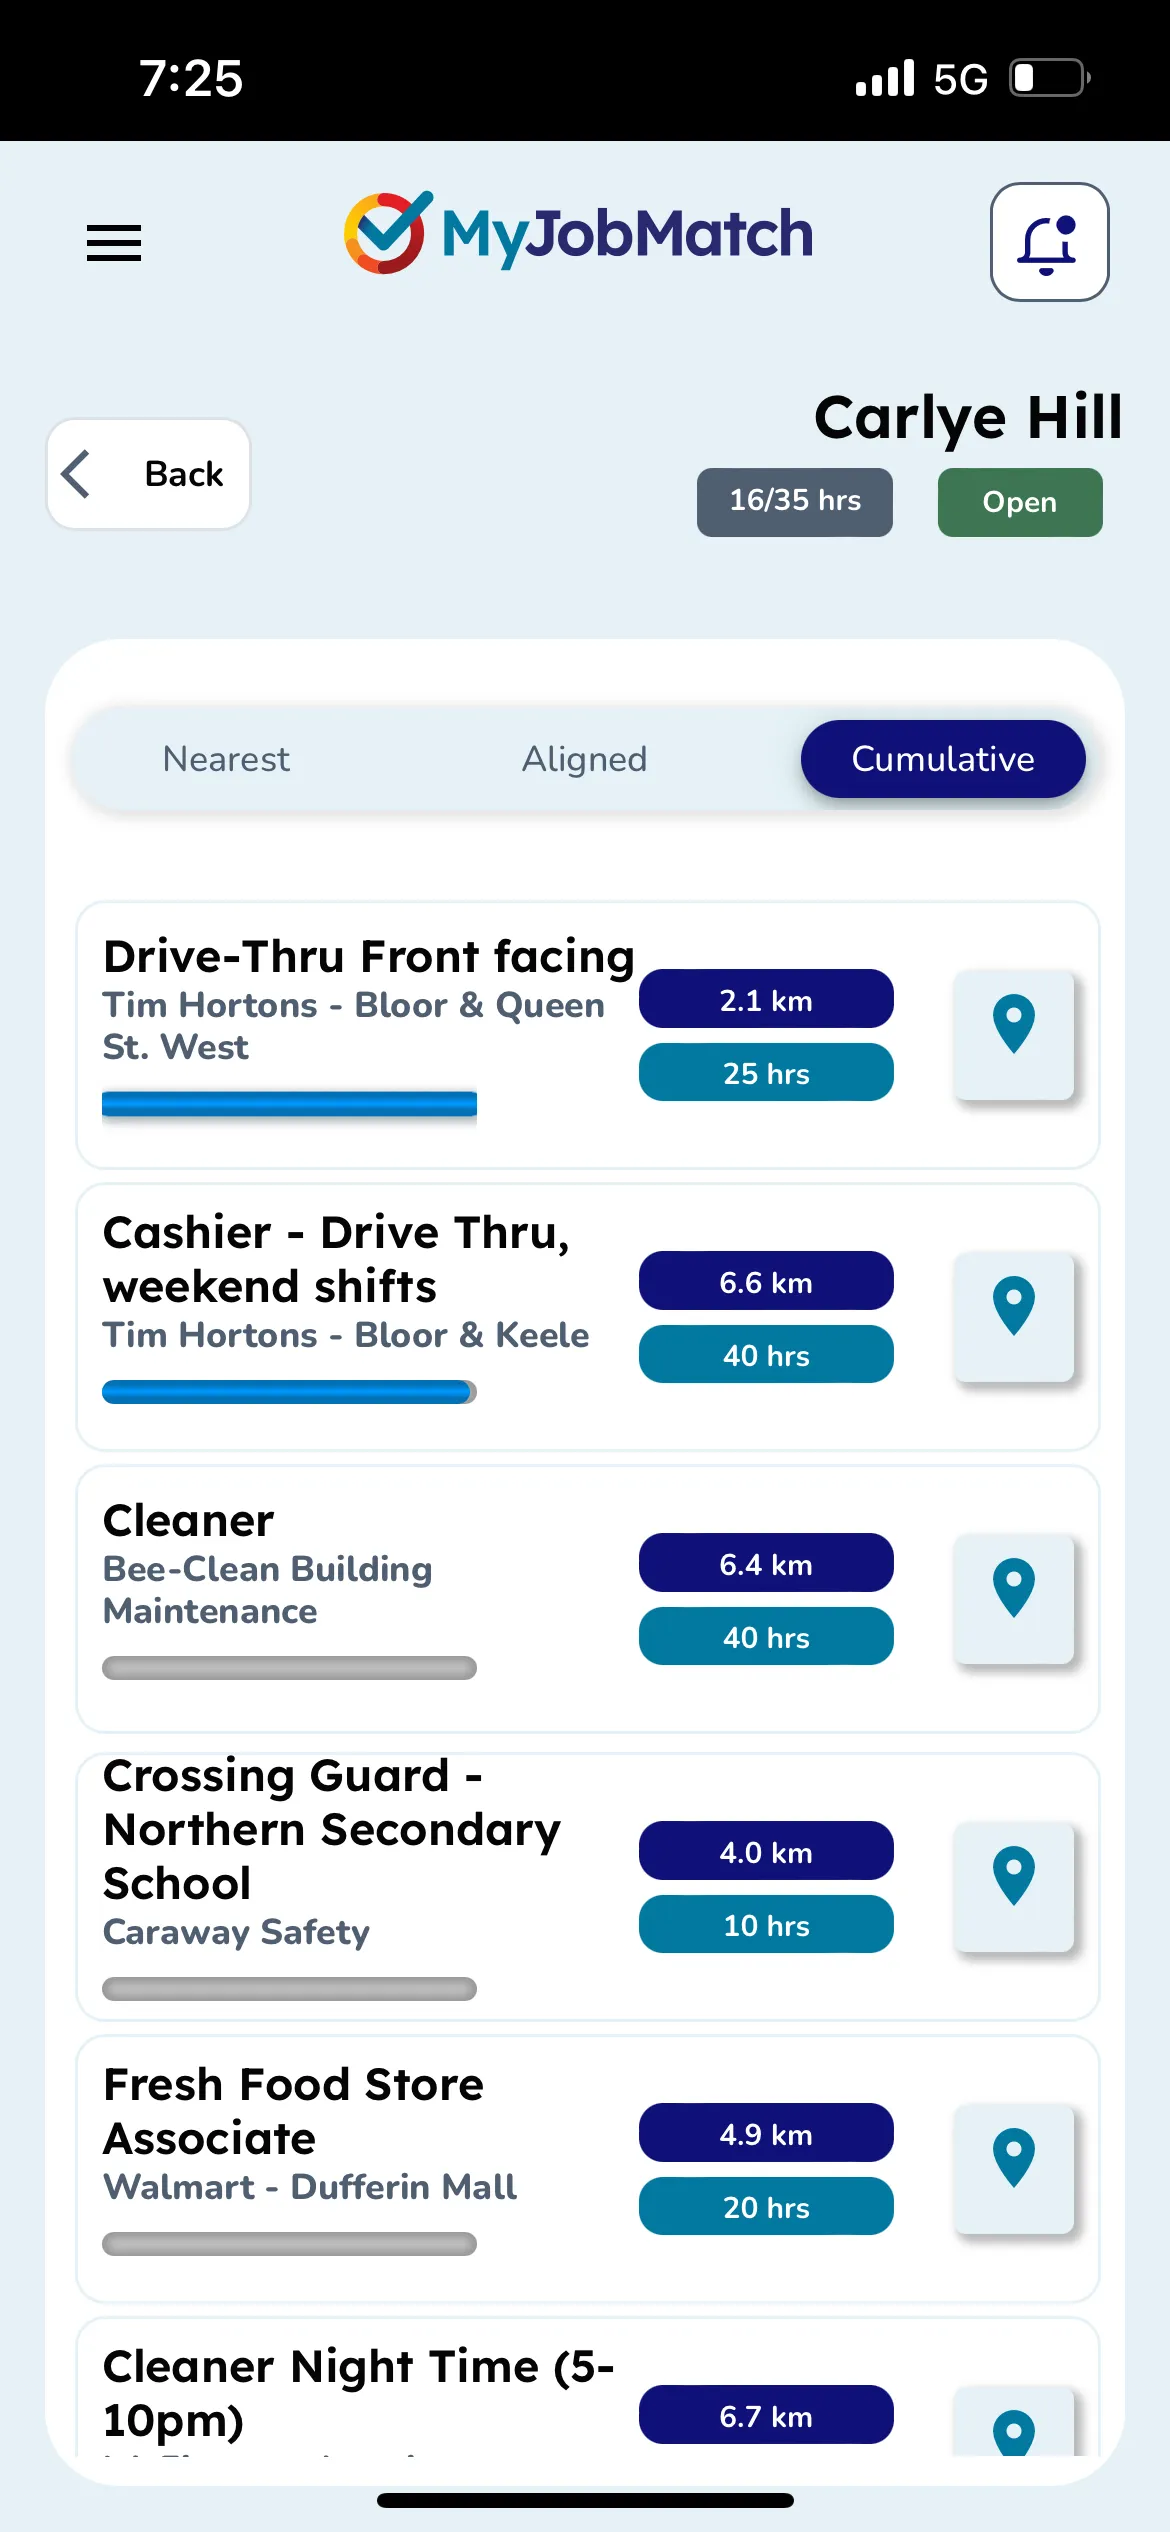
Cumulative Matches
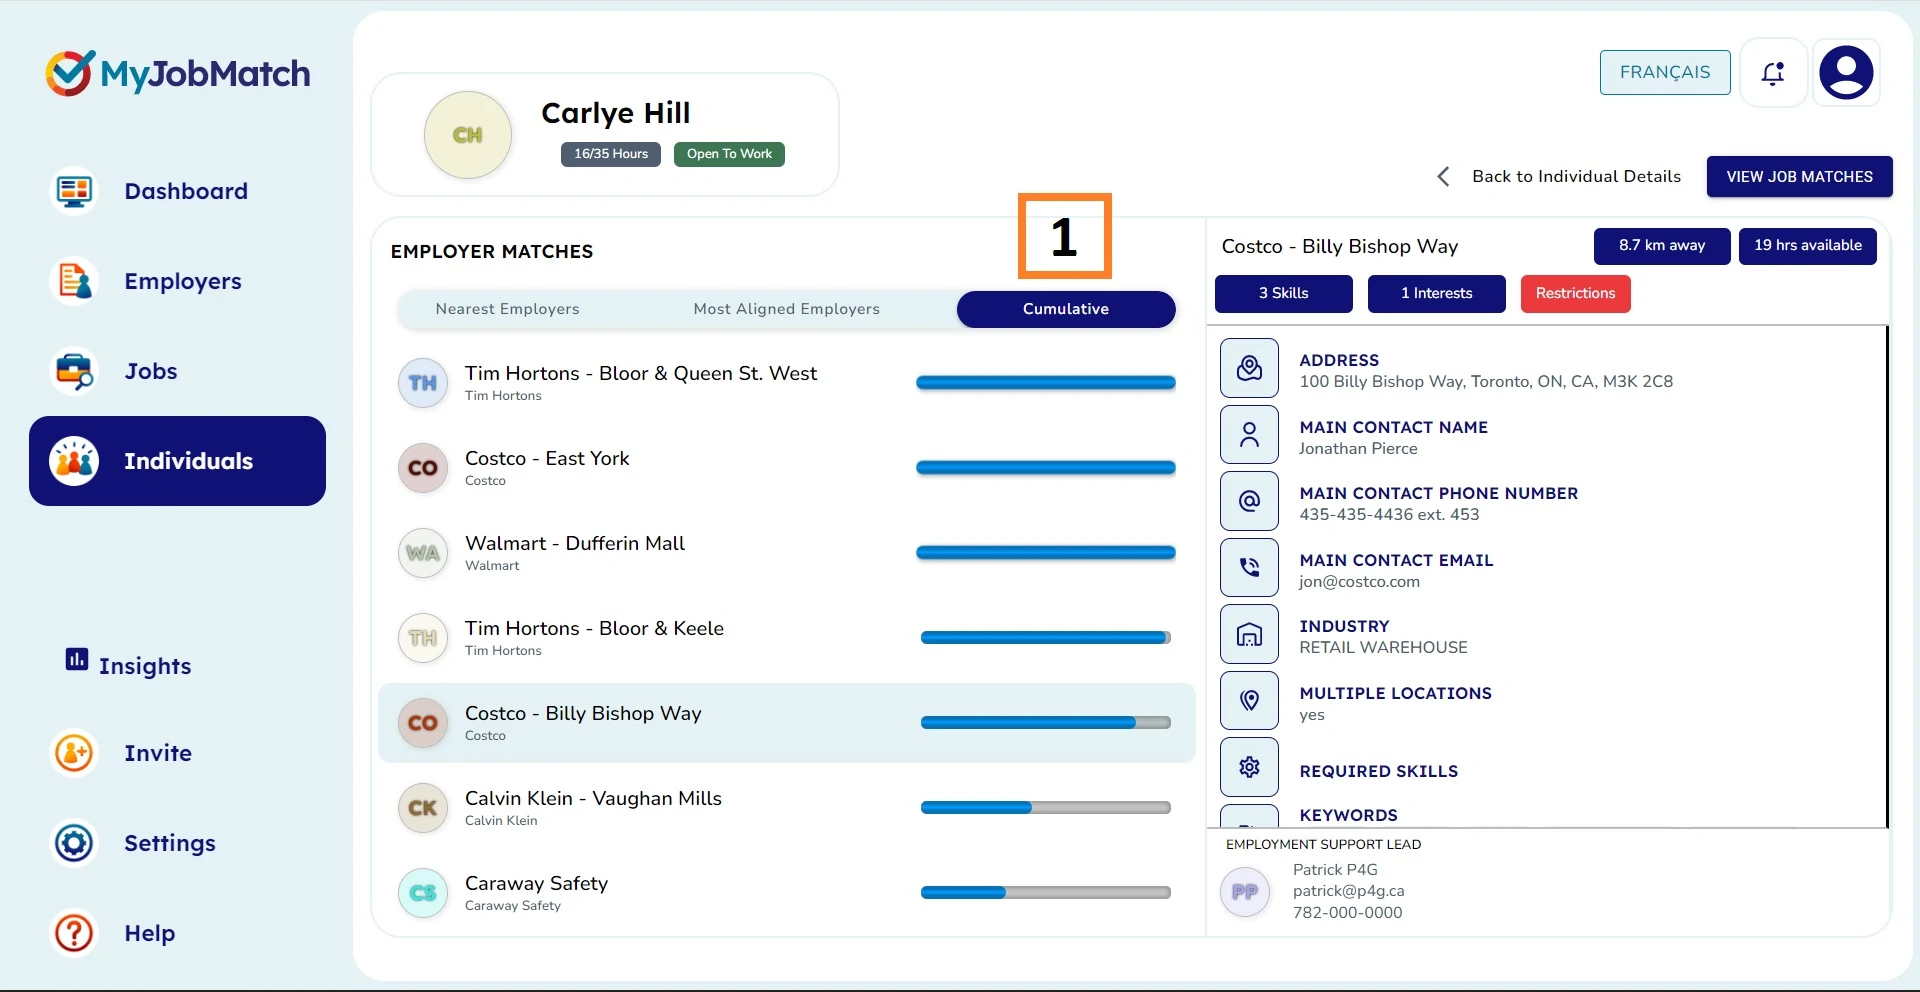
Cumulative Matches (1) factor both Nearest and Most Aligned into consideration to provide you an overall match.
Distance makes up 55% of the total weight while Keywords make up 45% (keywords are scored using the same ranking system from the most aligned section).
Other tips for Matches
Dark blue tags mean there are matched skills or interests that exists between your Individual and the Employer or Job (1). If there are no matches the tag will be white (2).
If there are restrictions, this tag will be highlighted in red. Hover over the red tag to see the restrictions (3).
To identify the Employment Support Lead who leads the relationships with the Employer, Job or Individual see the bottom right corner (4).